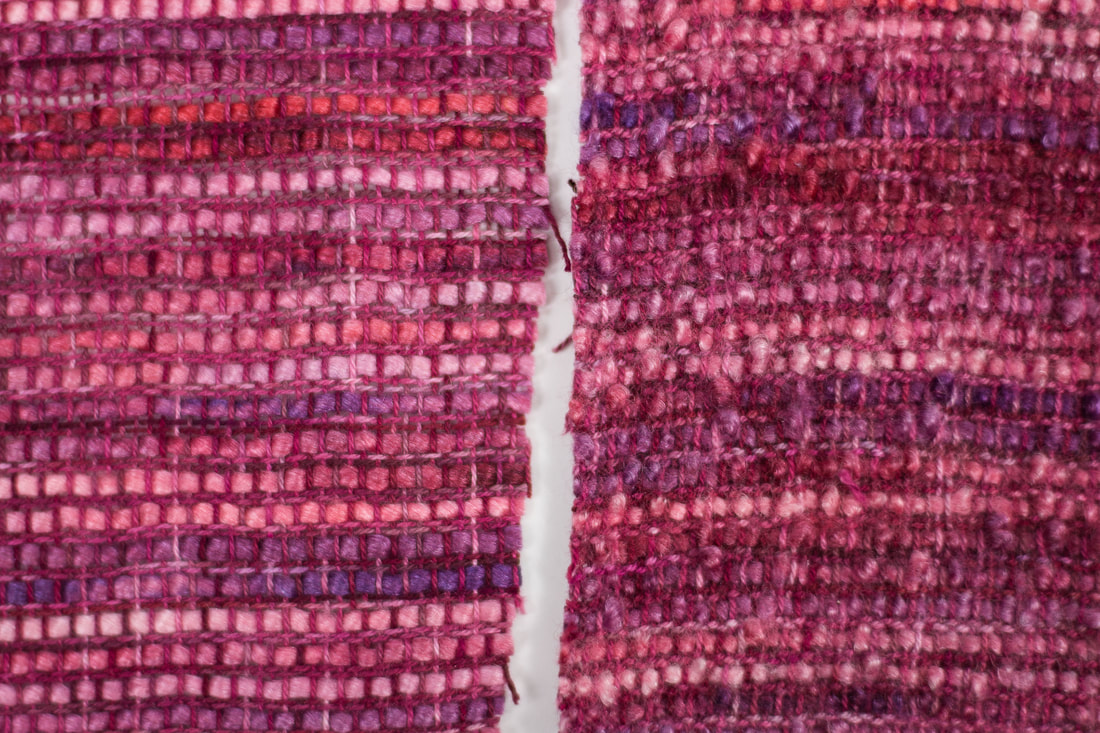
 The cloth on the left is unfinished. The cloth on the right has been wet-finished. Wool, silk, and cotton all shrink at different rates, which is what causes this fabric to have its texture. Have you heard of differential shrinkage? It's a scary-sounding word, and googling it doesn't help - you get a very technical description of building construction principles. Yuck! In weaving, differential shrinkage is actually a very simple idea. It means that some fibers shrink more than others when you wash them. And you can use that idea to create interesting textural effects in your woven fabric. Combining a shrinking fiber like wool with a non-shrinking fiber like silk or cotton in a single piece of fabric can create interesting results. When the fabric is washed, the shrinking fiber will pull the non-shrinking fiber into puffs. The looser and more open the fabric is, the more susceptible it will be to this effect because the fibers have more room to move around. The tighter the fabric is, the less it will be able to shrink because the fibers are already very close to each other. 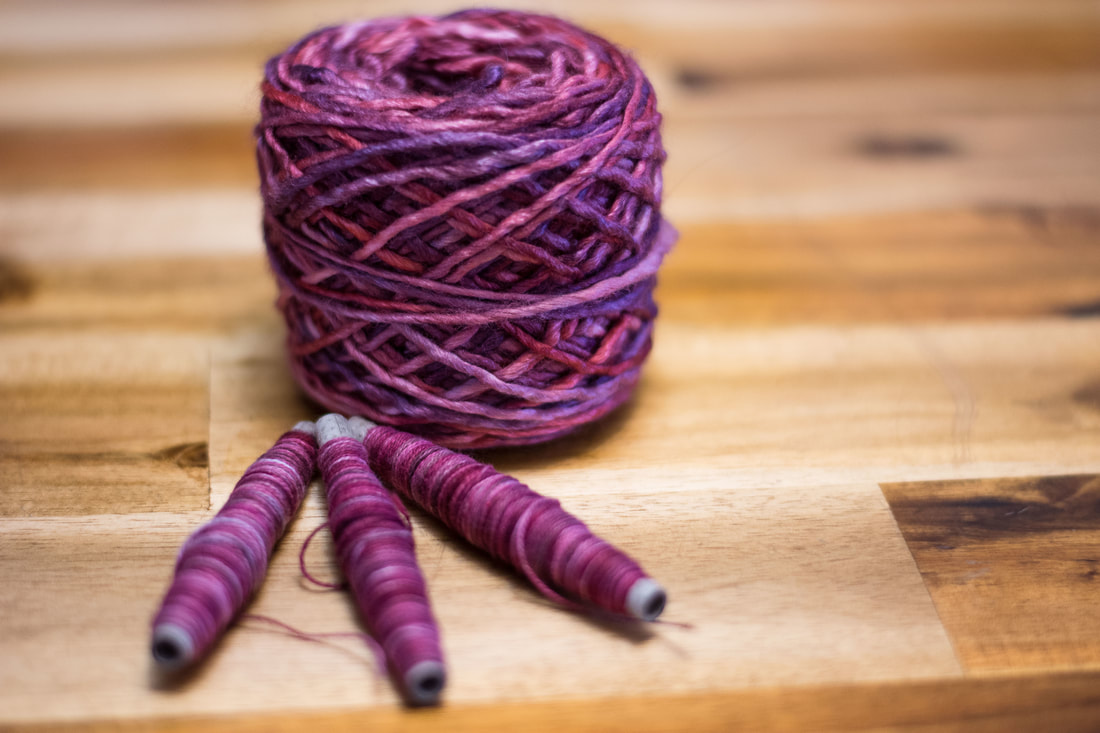 Different fibers shrink differently The first key to working with differential shrinkage is knowing which fibers will shrink and which won't. Wool is the most notable fiber that shrinks because it has scales that act like Velcro. Wool felts or fulls as heat, moisture, and agitation are applied to it. Some wools will shrink more than others - wool from Merino sheep felts easily, while wool from Southdown sheep is more resistant to felting. I've also included Lycra and elastic in the list of fibers that shrink because when they are on the loom, they are stretched out to their longest length, and when they are taken off the loom, they can shrink, creating textured effects. Subjecting them to heat will make them shrink more - think of stretch denim that has gone through the dryer one time too many! Fibers that Shrink:
Plant-based fibers don't shrink as much as wool because they lack the scales that cause wool to felt. Some animal fibers, like silk and mohair, don't shrink either. And many synthetic fibers like rayon, polyester, and tencel don't shrink. Some wools have been through a process called "superwashing," which either removes the scales from wool or smooths them down. These wools won't shrink as much, but I do find that they can shrink up to 10%, especially if they are subjected to very hot water or put in the dryer. Fibers that Don't Shrink (as much):
Sometimes we achieve differential shrinkage on purpose, and sometimes it's an accident. I've woven pieces where I used all wool, but the wool was all different breeds and/or brands of yarn that were spun differently. The differences in the wools and yarns meant that some shrank more than others. What I thought would be a basic striped rug was a wavy, rumply thing that would never lie flat. Other times, I've woven things where I combined different fibers on purpose, knowing I would get a textured effect. The weaving in the top image is one example - the warp was cotton, and the weft was a combination of cotton and a wool/silk yarn. Of these three fibers, wool is the only fiber that will shrink substantially. On the loom, the cloth looked flat. But after a trip through the washing machine on the delicate cycle, I ended up with a boucle-like fabric. That's differential shrinkage in action! There are lots of different textural effects you can achieve with differential shrinkage. You can create a fabric with allover texture, like I've done here, or you can create small areas of texture within a bigger piece of fabric. The possibilities are endless! Textural Effects You Can Achieve with Differential Shrinkage  Plying a yarn that shrinks with one that doesn't is one way spinners can take advantage of differential shrinkage. Not a weaver? You can also use differential shrinkage in crafts besides weaving. If you're a spinner, you can ply a shrinking fiber with a non-shrinking fiber. I love to use plying silk, which is very fine, to create a textured effect in my plied yarn. When you wet finish your yarn, you can full the shrinking fibers to create a textural effect. Maggie Casey of Shuttles, Spindles, and Skeins calls this "Boucle the Easy Way." If you're a knitter, you can use differential shrinkage in felting bags, hats, purses, and other items. If you're a felter, you can add effects with non-shrinking fibers to create dimensionality. You can also use different thicknesses of wool layers to create puckers and bubbles - this video gives a great overview of the how and why. Lately, I've been using differential shrinkage most often in creating boucle-like fabrics like the one pictured at the top of this post and my autumn leaves ruana. It really is a fun effect!  Welcome to August! Are you ready for fall yet? I know I am. We spent (at least) two or three weeks in the hottest days of July with a non-functioning swamp cooler.* Now that it's fixed, I have the air blasting just so I can put on a long-sleeve shirt every now and then and dream of fall. In July, I managed to finish a machine-knit sweater. I tried it on to make sure it fit, but took absolutely zero photos of it. And I made a SAORI-style table runner...and tons of yarn for Tour de Fleece. But the biggest thing is what you see above! I am now selling rug hooking wool and other supplies over on FiberCrafty! Rug Hooking/Needlepunch
Knitting
Weaving
Spinning
There are lots of other odds and ends, but I think that's most of it! What are you working on this month? xx, Pamela *For all y'all who live somewhere humid, a swamp cooler is an air conditioner that intentionally adds humidity to your air. If you live in a dry climate like I do, it actually works pretty well to cool you off. (And if you grew up in a swampy place like I did, it's pretty alien to you to consider a swamp cooler to be a good thing.)
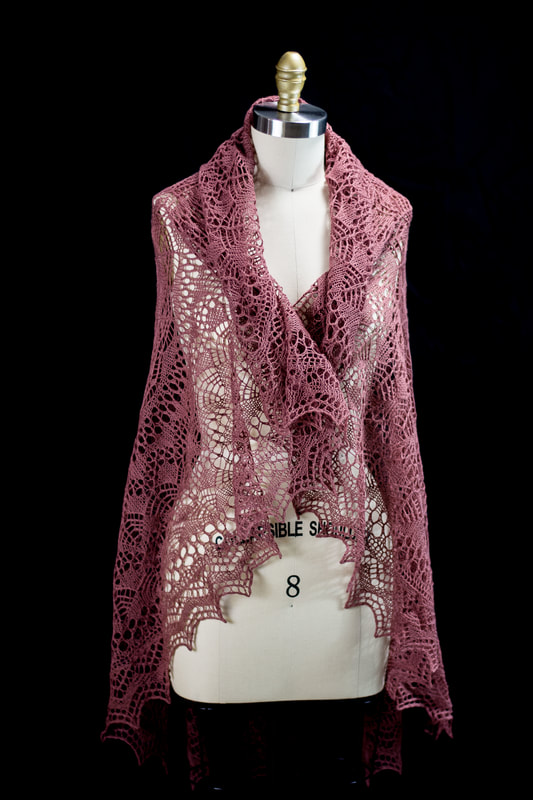
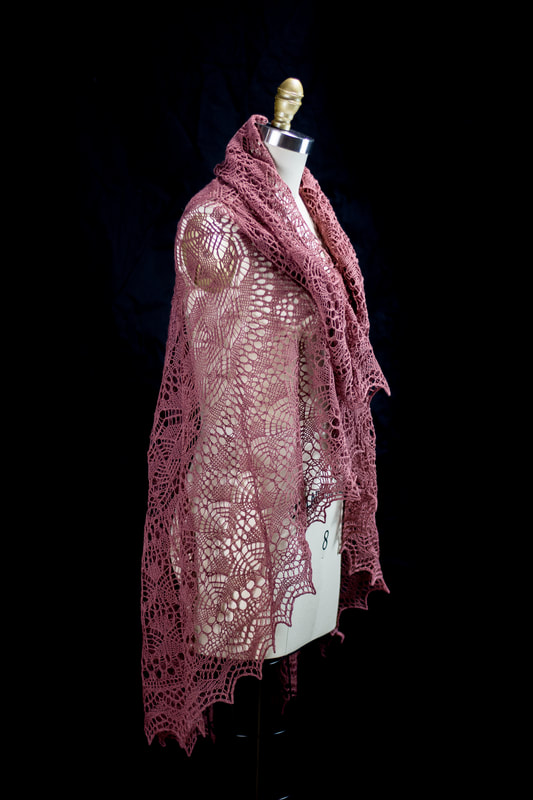
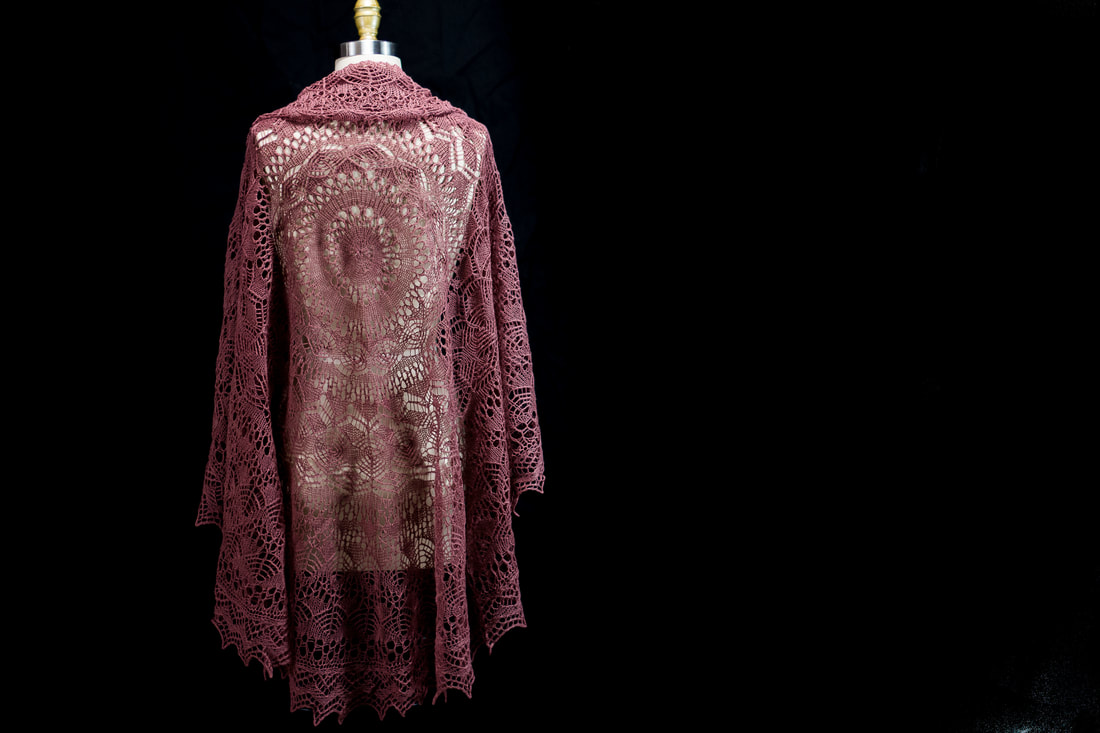 I don't need another lace shawl...but this just *fell* off the needles. It's the Lucca Shawl, designed by Jared Flood, in Brooklyn Tweed's Vale. The color is "Barberry." I bought 4 skeins, intending to make a lightweight wool tank out of it, but after swatching, I realized I wouldn't have enough yarn. Then some unexpected travel came up, and I didn't have any travel knitting. A quick browse through Ravelry told me that I could knit the large version of this shawl with the number of skeins I had, so out came the needles. I was able to get the fiddly bit of the cast on done before hitting the road, and this shawl kept me company through the whole week that I was traveling.
I wanted to get it finished before I went to YarnFest in April, but only managed to get the body of the shawl finished before leaving - there was still the border left to do. That bit dragged on for several weeks - at one point it felt like I must be almost finished, but every time I counted I was only 2/3 of the way through. As these things go. 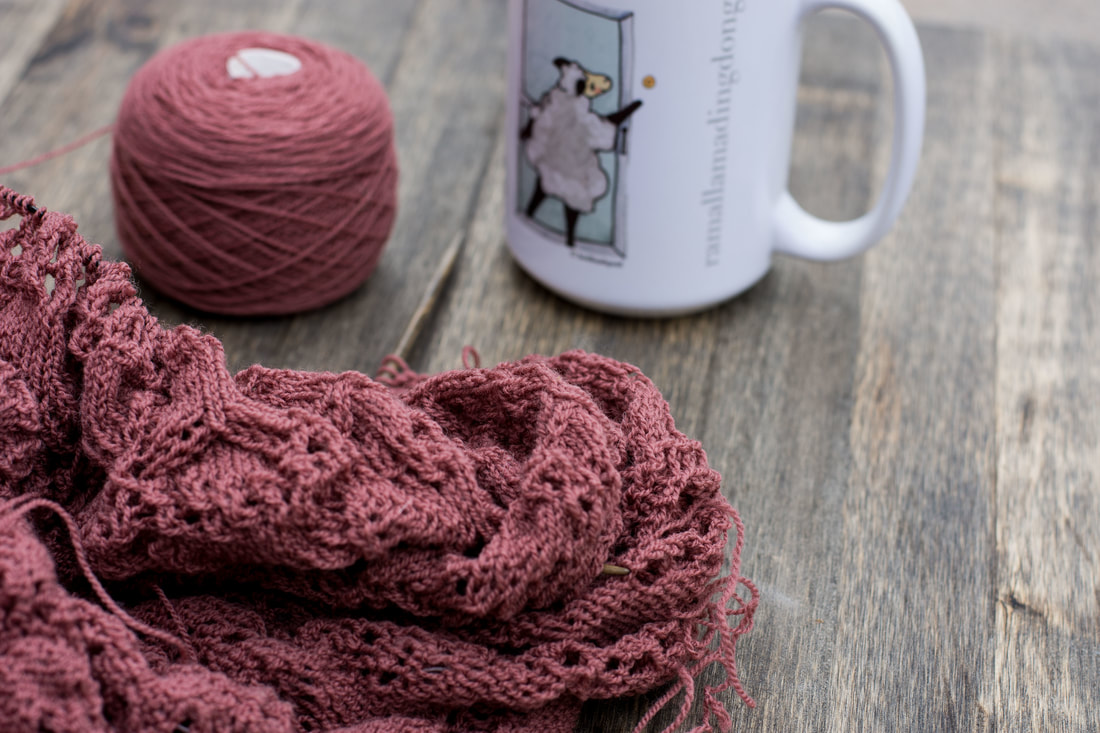 The interesting thing about this pattern is that there is a small size and a large size - and the only difference is the gauge. The small size is knitted on 3 mm (US size 2.5) needles, and the large is knitted on 4.5 mm (US size 7) needles. Looking at the yarn, I felt like the 4.5 mm needles would be ridiculous, and scaled back to a size 4 mm (US size 6). This ended up using just shy of 3 skeins of yarn, and makes me sneakily suspicious that the "large" size was engineered to sell an additional skein of yarn. Regardless, I enjoyed working with the yarn immensely, as I always do with Brooklyn Tweed. I took the extra skein and overdyed it - but that's a different post entirely. Ravelry project page here. xx,
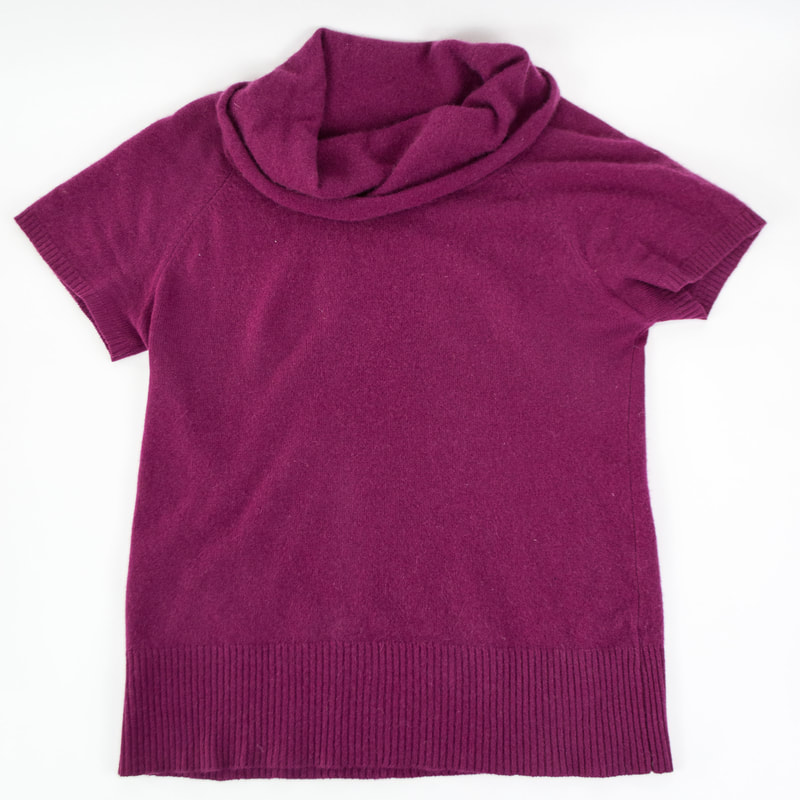
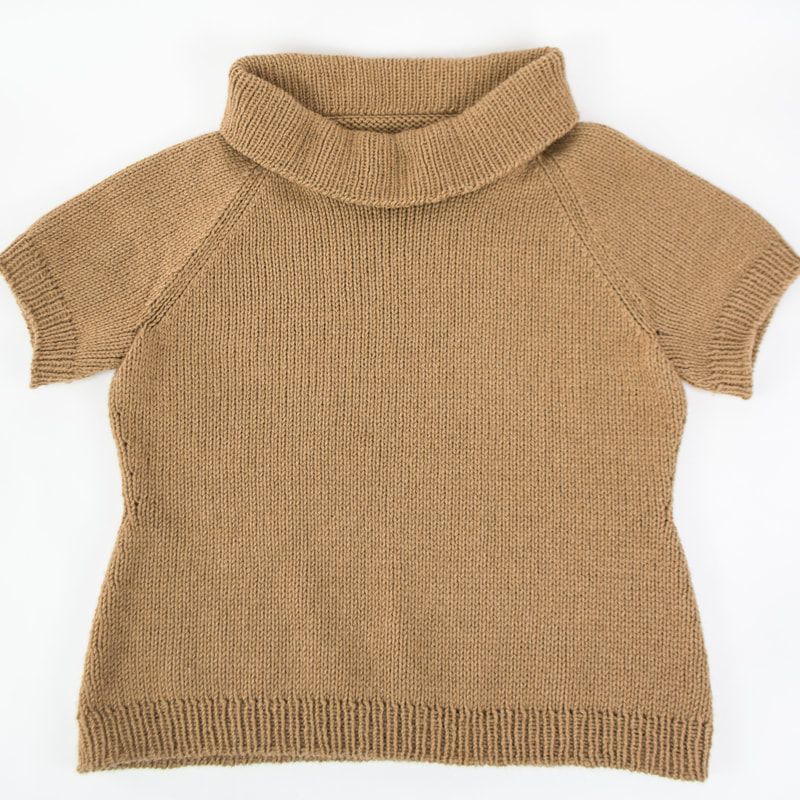
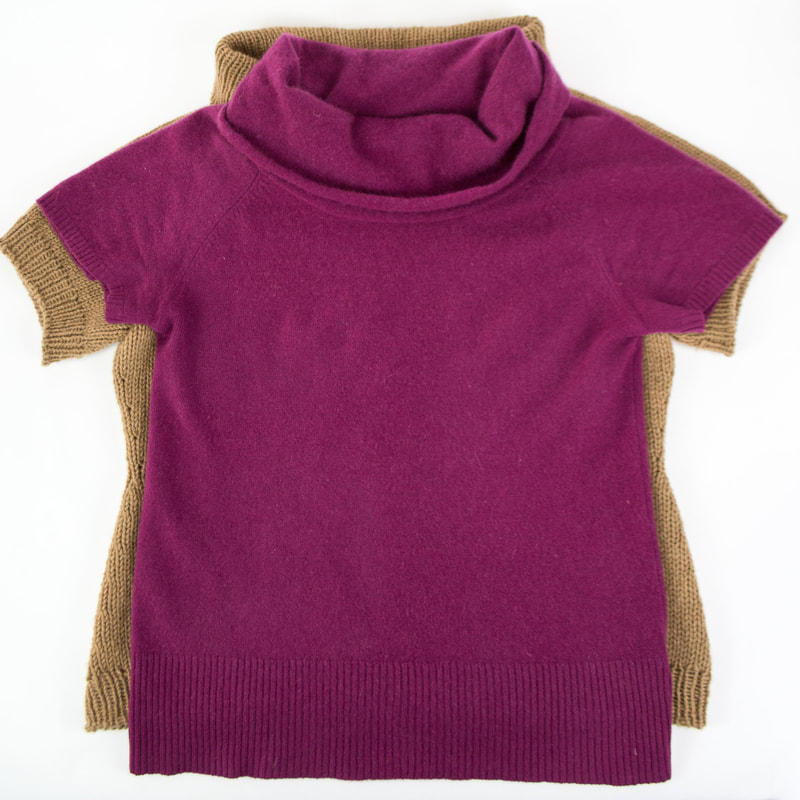
Pamela 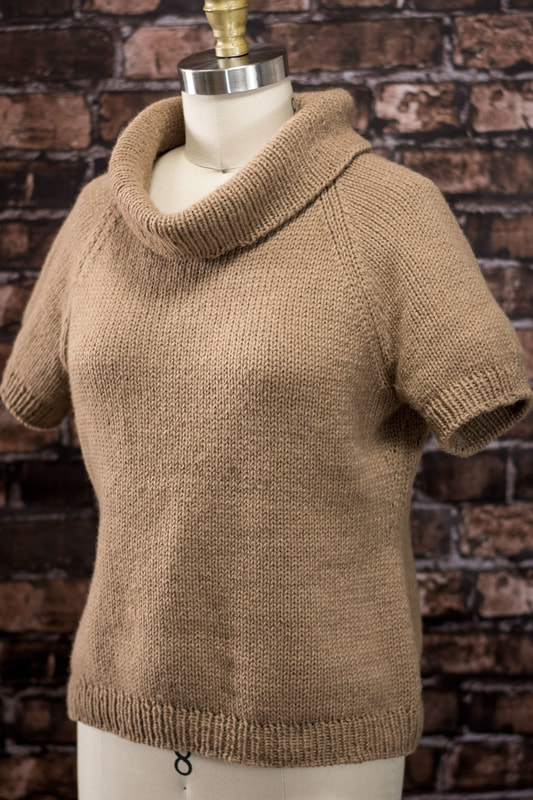 Well, this sweater has been on my "want to knit" list for quite a while, and it wasn't even really on my radar for February projects. And here it is, all finished and wearable and cozy. So much for planning! I was getting ready to meet up with my mom in Denver, and feeling a little out of sorts about my wardrobe options, when I came down with what I lovingly call "Easter Sunday Syndrome." My mom, an incredible sewist, always had to have a new dress to wear for Easter, Christmas, and other big events. And, like any good procrastinator, she often started the project a little late, and would be putting the finishing touches on her new garment as the rest of us were ready to walk out the door. I always thought it a little silly when I was a kid- why not wear a perfectly good outfit you already have instead of stressing out so much? Of course, such a thought is a wicked invitation for karma to turn the tables on me. The Sunday afternoon before my trip, I found myself between projects. Waiting on freshly dyed yarn to dry, without the time to dye more, and not wanting to do anything on my actual to-do list, I pulled out this yarn from my stash. I've had this sweater in my mind for ages, and figured it would be a good practice project for my knitting machine. I started with Melissa Leapman's new book, 6,000+ Pullover Possibilities. I faithfully took my measurements, swatched, and figured out the pattern. Over the next few days, I made each piece of the sweater. A couple of days before my trip, I seamed the sweater. I was in good shape. All I would have to do was knit the edgings, and I'd have a brand new sweater to wear. Then I tried it on. It was huge. As I'd steamed the pattern pieces, I'd thought, am I really that big around? The answer, it turns out, is a resounding no. The sweater had completely left the realm of flattering positive ease, and was positively sacklike. And of course, that natural camel color didn't help. 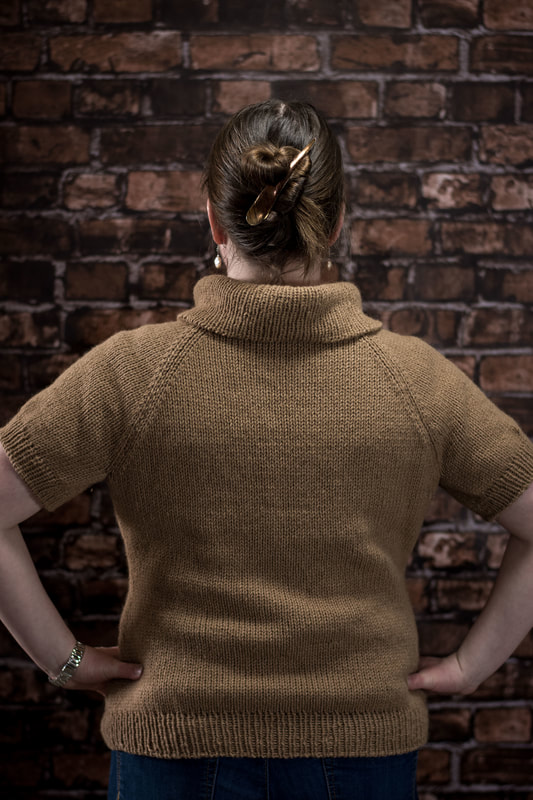 The only thing to do was rip it out. I re-skeined the yarn, and steamed it on the swift. Then it was back to square one. This time, I used my actual body measurements in combination with my gauge swatch, plus the measurements from an existing sweater. And, more than a little frustrated by the first book, I turned to Sally Melville's Knitting Pattern Essentials to fill in a few gaps. The second version ended up taking a whole couple of skeins less than the first, and looked much closer to what I expected when I finally laid them out on the blocking mats. So instead of packing a finished sweater, I was packing freshly-blocked sweater pieces to take with me (after staying up late and waking up early in the race to the finish). At least I had eight hours on the train instead of driving. By the time I got off the train, I was almost done with the ribbing on one sleeve, and picked the sweater up every now and then over the next week. I'd toyed with the idea of doing brioche or some fancy cables at the cowlneck, but as I got started on it, I was away from my library of stitch dictionaries, and ended up with plain old 1x1 ribbing. Which is just as well, since I've always thought of this sweater in my mind as a super-basic piece. Which is what I have now, just a little bit later than I'd originally planned! Above is the original sweater I was trying to imitate - a cashmere sweater I bought on sale in college that was mysteriously sized as "one size fits all." It did, in fact, fit me, and I still wear it, though it's a lot tighter around my middle bits than it used to be. For the camel version, I opted for waist shaping - a little wider at the hips than at the bust, since that's how I'm shaped - and for the back neck to come up a little higher. I'd intended for the camel version to be longer on me than the original, and so I was a bit surprised when I laid one on top of the other. The camel version is actually an inch shorter! The armholes are a bit deeper, and I suspect that I feel like the pink cashmere sweater is too short because it's getting stretched out around my tummy. 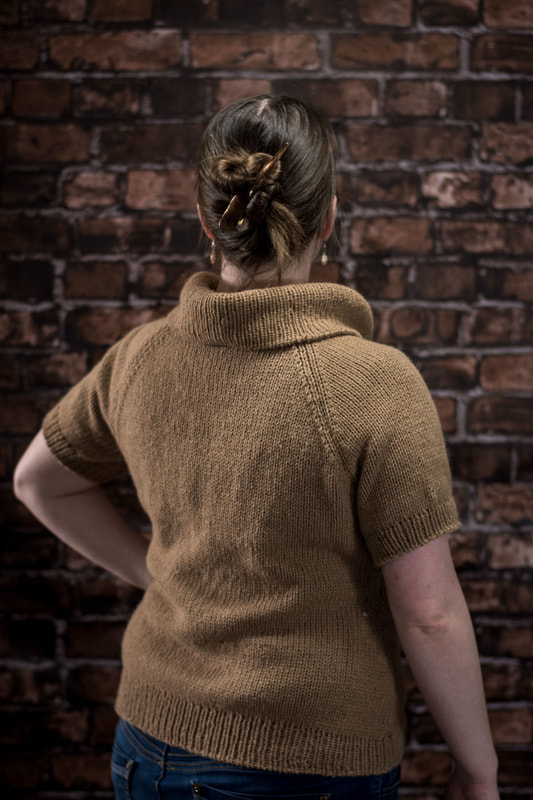 This camel sweater is really all about the yarn, and what yarn it is! I used 6 skeins of "Clever Camel," a 100% baby camel yarn. I originally bought it in April of 2016, spurred on by Karen Templer's Channel Cardigan and the promise of 10% off. I bought 10 skeins, thinking the Channel Cardigan or something like it would be luscious, but I'd just finished spinning the yarn for a Corriedale cardigan, and the colors were just too close. I knew I didn't need (or particularly want) two very similarly colored cardigans, so I came up with the idea for a knockoff of my beloved pink cashmere cowlneck tee. I dutifully made a couple of different swatches, and was amazed by how versatile this yarn is. It looked great at several different gauges, and all were still lusciously soft and pliable. Plus, I carried one of the swatches around with me for several days, subjecting it to all kinds of abrasion, and it wore like a champ. Just the slightest halo and no pills. Part of this magic is because the yarn is composed of 6 plies, which any spinner will tell you helps to reduce pilling. Of course, the journey from swatch to sweater is filled with many twists and turns, and my initial attempts at this sweater were less than exciting. So really the yarn has been sitting in my stash waiting to become something for at least a year and a half now. When the thought occurred to me that it would make great practice for the knitting machine, I felt a little sacrilegious. I spent all that money on this soft and smooshy yarn - shouldn't I spend lots of time knitting with it by hand, feeling that sweet baby camel hair slip through my fingers? In the end, I decided it was worse for the yarn to keep sitting in the stash, and that I'd get plenty of time enjoying the yarn when it was made up into a sweater that I could actually wear. Ironically, the 6 plies that make this yarn fabulous for its anti-pilling properties made it a little bit of a challenge to knit on the knitting machine. There are a couple of snags where stitches split that I need to go back and repair. But overall, I'm thrilled to add this sweater to my wardrobe, and I'm looking forward to more adventures with my knitting machine. xx,
Pamela When I was a new knitter, I would have gasped if you told me to cut apart my knitting. No way, no ma'am. I distinctly remember a red Aran sweater my mother had - full of bobbles, cables, and knit at such a tight gauge it makes my fingers hurt just thinking about it. But she never wore it because it was too big on her. So she cut it apart and incorporated parts of the sweater into a lovely fitted jacket. I was shocked. Won't it unravel? Who would cut into a knitted garment that someone had clearly spent so much time on? The truth is, that while knitting does unravel, there are lots of ways to cut knitted fabric. Steeking is perhaps my favorite and most-used method, and this sweater does indeed have a steek running down the front. Some design and fit issues left me less than thrilled with the finished product. That's the thing about experiments - they don't always work. My problems with this sweater were:
I'd already woven in lots of ends, which makes unraveling difficult. Plus, the yarns (mostly handspun Icelandic thel and Shetland Spindrift) don't unravel so easily. Which makes them great for steeking, but not for correcting my mistakes. So I decided to try something I haven't tried before. I cut the yoke right off, and picked up the live stitches onto my knitting needles, and the sweater is ready for yoke attempt #2. It was easier than I could have imagined. Some tips:
It's also possible to do it the other way - say I had knit the sweater top-down and wanted to replace only the yoke. I'd cut just like I did, but then I'd need to graft the new yoke to the old one. This sometimes leaves a bit of a line, but it's definitely doable. I'd hoped that the end of January would mean that I have a new sweater to wear, but ultimately I want a sweater that is actually wearable, and that I like, so I'm willing to have it take more time. xx,
Pamela |
Archives
January 2024
Categories
All
|
 RSS Feed