|
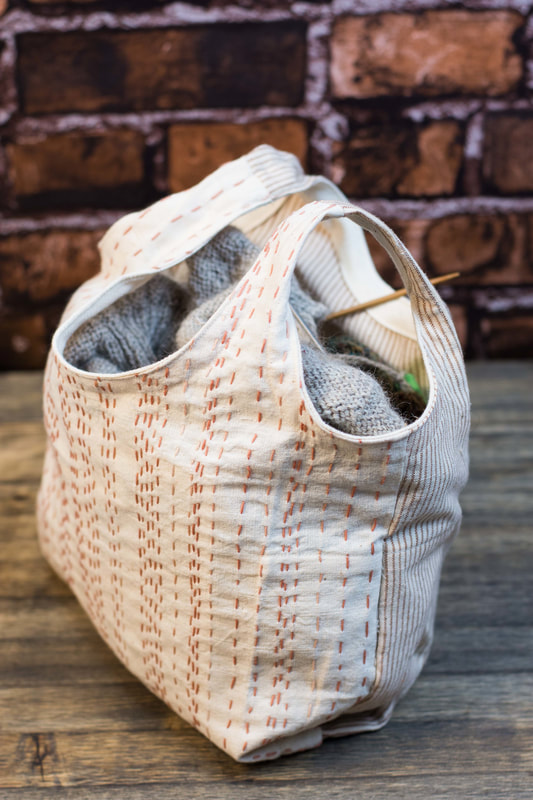
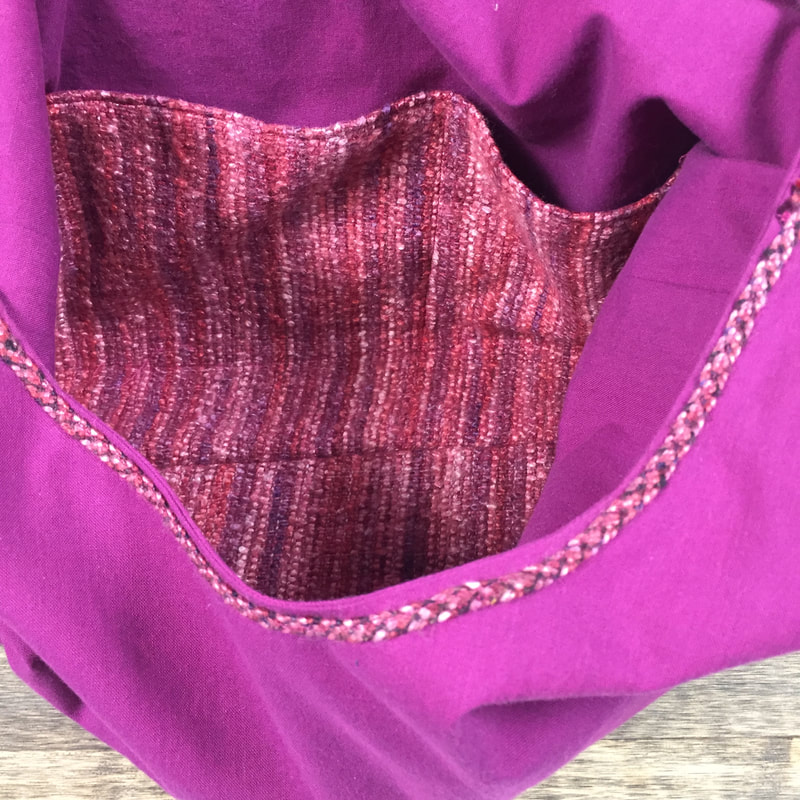
Last week in my email newsletter, I wrote about how I made a surprising impulse purchase of the Sashiko Stowe Bag kit. What was equally surprising was that as soon as the kit arrived in the mail, I sat down and started working on it, and had a finished bag the next day. Usually kits and yarns of all sorts have a habit of lingering for a long time before I actually start on them. Inside the Stowe bag pictured above are two projects - the beginnings of my Miss Rachel's Yoke (purchased as a kit more than two years ago and finally cast on!) and the beginnings of a shawl with this yarn. As soon as the bag was stuffed with these two projects, I realized I needed yet another bag. Originally, I'd planned to make the larger Stowe with some pink handwoven fabric - and then quickly walked back my plans when I tried to lay out the pattern pieces - there was no way I'd have enough fabric. As much as I love big bags, I felt like there could be a size in between the big and little Stowe bags, and set about drafting a medium size based on the amount of handwoven fabric I wanted to use. Then, knowing that pattern drafting isn't exactly a well-honed skill of mine, I decided to test the pattern out on less precious fabric first. I ended up choosing to line the bag, using this tutorial. I did end up using a little bit of this handwoven fabric as the pockets, and lined those too. Instead of doing step 13, I did a more traditional boxed bottom using the basic fold-and-sew method. I used a kumihimo braid that matched the handwoven fabric as a trim on the outside of the bag. If anything, this bag might be a little bit wide for its height, so there might be some more tweaking in store for my modified pattern. Overall, though, I'm very pleased with the bag itself - right now it is hanging on the back of my chair holding the yarn for the Miss Rachel's Yoke.
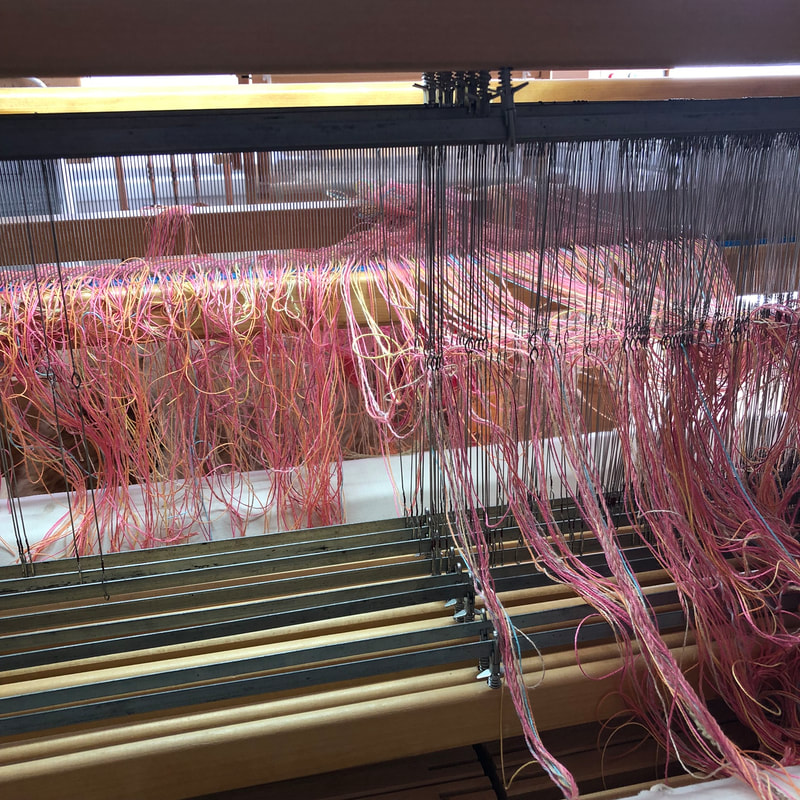
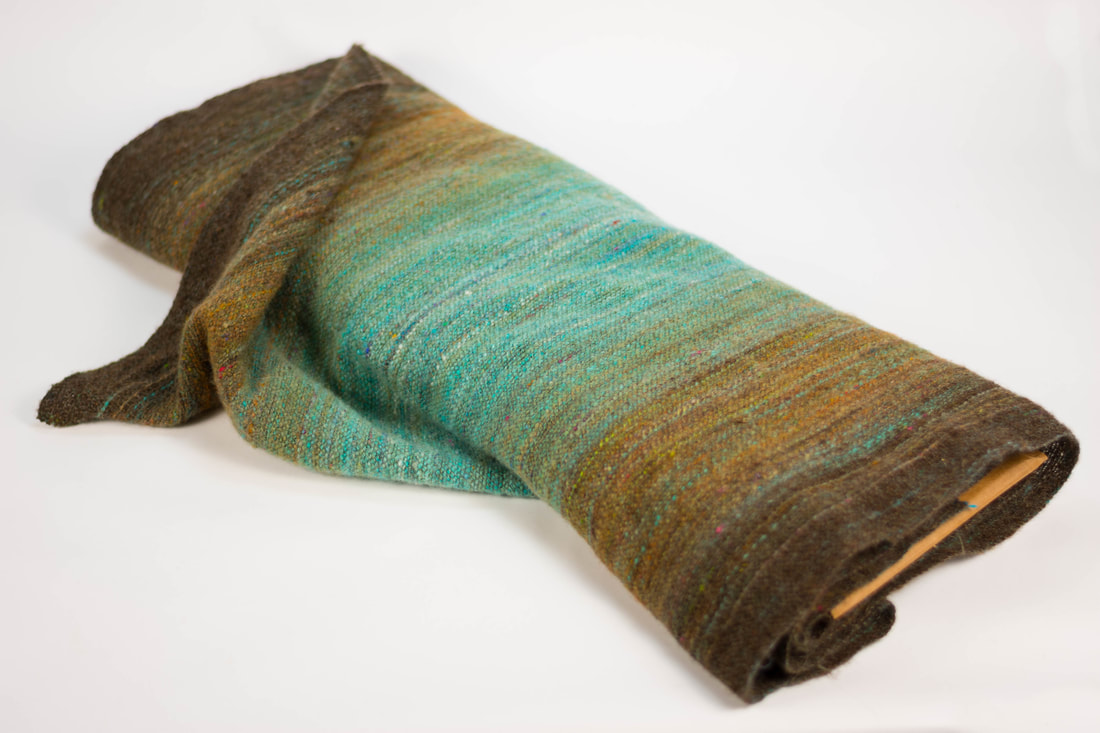
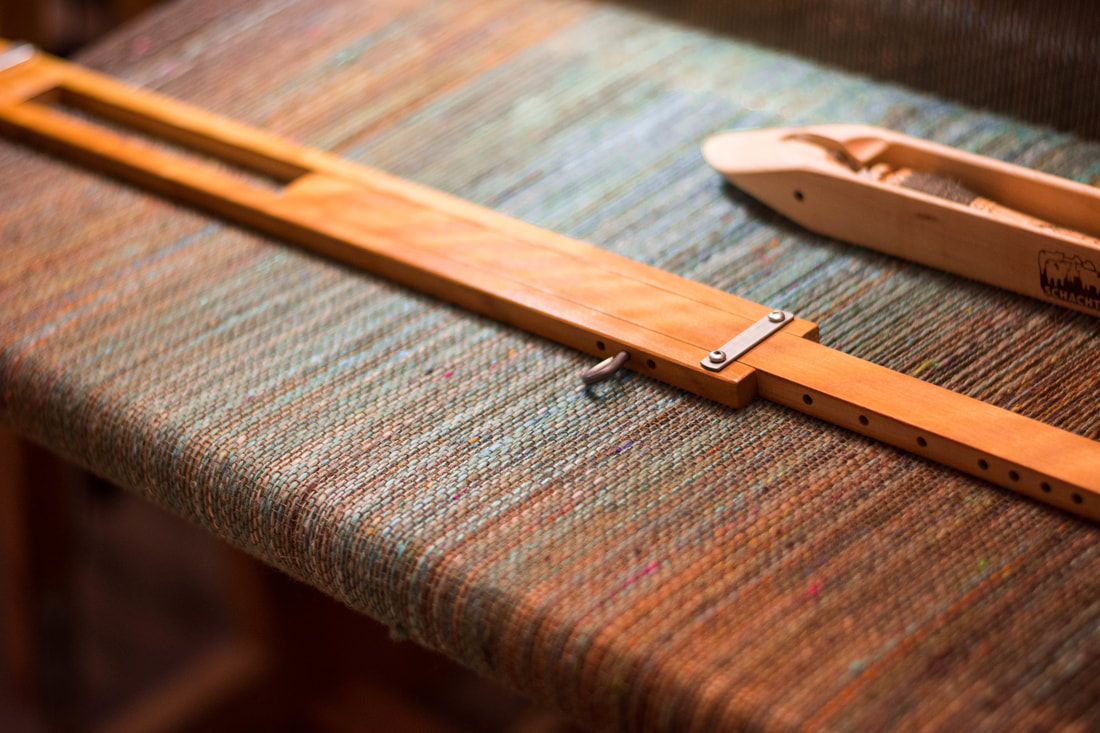
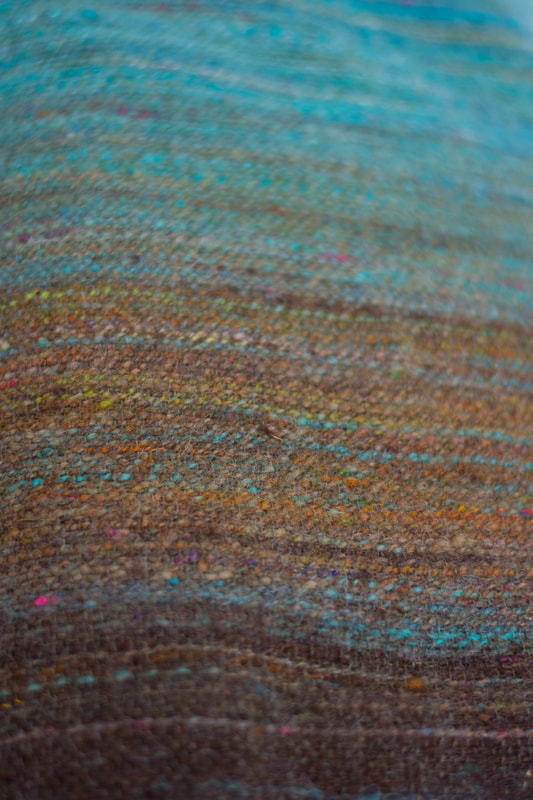
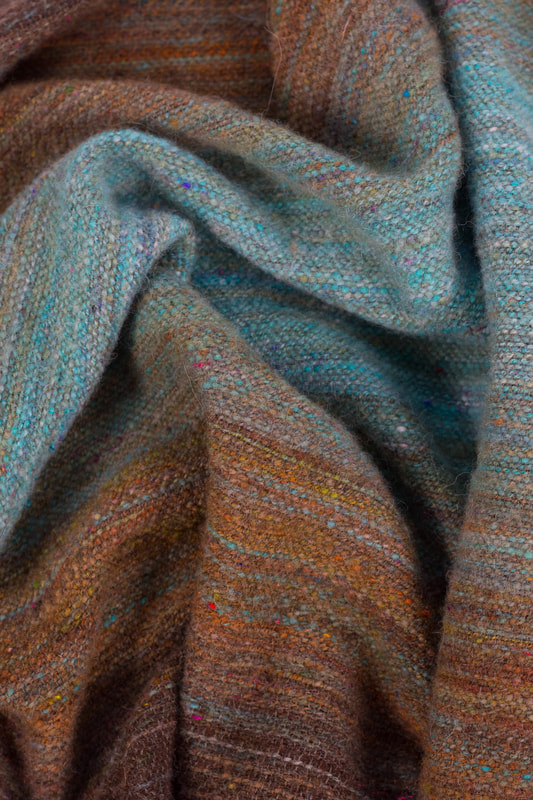
Yep, I'm totally a bag lady, but I'm okay with that! The last time I blogged about this, it was still yarn. Now it's cloth, and I couldn't be happier with the outcome. Unlike some of my other projects, warping this piece was relatively easy - after two days of warping, and a little bit of sampling, it was ready to weave. As I often do, I threaded the loom for a twill pattern, just to keep my eyes from glazing over while I was threading the heddles. A plain weave structure is typically warped on shafts 1-2-3-4, and then that sequence is repeated until the end of time. For twills, there are endless variations of patterns, but the one I chose was 1-2-3-4-3-2-1-4-3-2-1-2-3-4. The upshot is that there are more pattern possibilities with that complexity, including plain weave. I sampled several twill treadlings, but didn't like them on the cloth. I often find that with a gradient warp like this one (and also this), plain weave just shows off the gradient in a wonderful way. Originally, I had wanted to use a handspun weft in a dark brown. But I wanted to get the fabric woven more than I wanted to wait while I spun more yarn. Instead, I ended up using an olive green wool/alpaca blend that I bought as mill ends. It's 24/2 (laceweight for you knitters), and I bought a 4 pound cone of it that seems like it will never end. Even with about 5 yards of weaving on the loom, I barely made a dent in it. I originally set the warp at 12 ends per inch, but it seemed too sticky. I re-sleyed the warp at 10 ends per inch in my 8 dent reed (the 10 dent is rusty), double-sleying every fourth slot. It turned out that the yarn was probably a bit too thick for a 12 dent reed, and I probably could have gotten away with 12 ends per inch if I'd started off in the bigger reed. After re-sleying the warp into a different reed, though, I was not in the mood to re-sley yet again. Once I got weaving, there was no stopping me. It took a few days, weaving in one or two hour chunks, and then the warp was ready to take off the loom. I wet-finished it in the washing machine. I was a little hesitant to do so, since even though I have a top-loading washer, it locks as soon as the cycle begins and it's just about impossible to pause the cycle to check on the progress. I set the washer to cool water on the gentle cycle, and selected the "deep water wash" option so there would be plenty of room in the water for the fabric to move around. It still needed a little more fulling once it came out, so I tossed it in the dryer for about 20 minutes, checking on it every five minutes or so. The results look like this: Because the weft is so much thinner than the warp, but I wove it as a "balanced" weave (10 ends per inch in both the warp and weft), the fabric is fairly thin and lightweight with a really nice drape. I'd been intending to make a loose fitting jacket from this, and started to gather fabric for a muslin when I realized how much of a yardage eater it is. My mom suggested the Fit for Art Tabula Rasa Jacket instead. I'm currently waiting on the pattern (and most of the extensions) to arrive in the mail. Then I'll make a muslin and hopefully be ready to dive in to actually do something with this fabric! ~Pamela
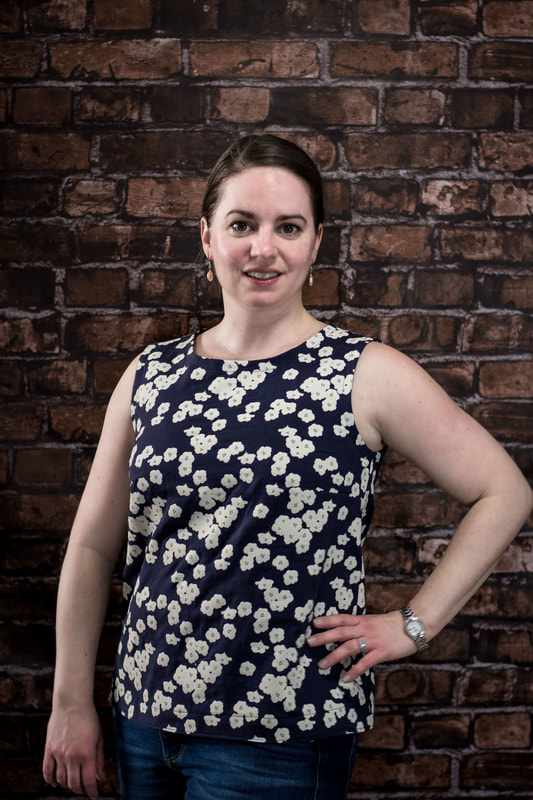
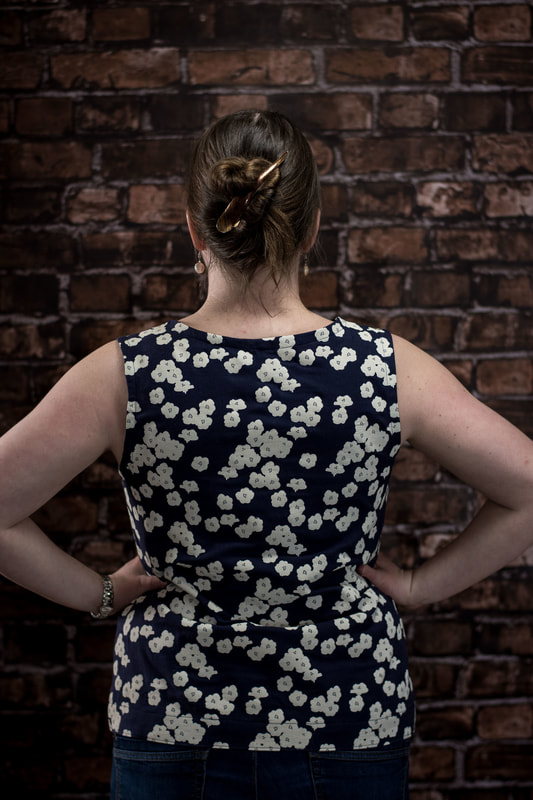
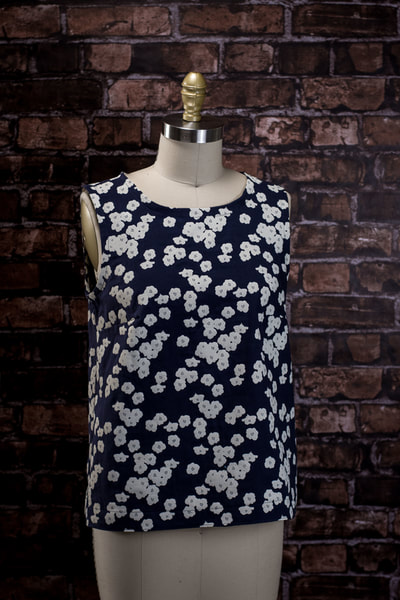
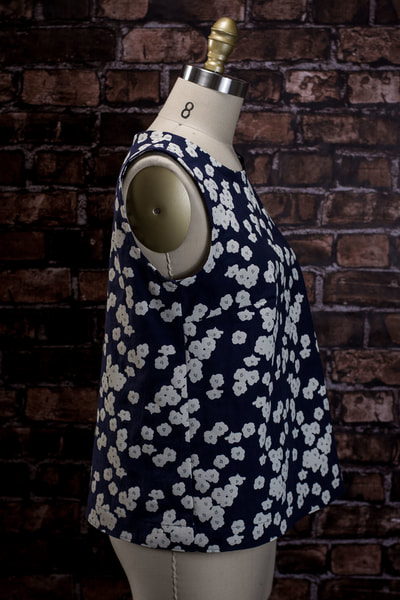
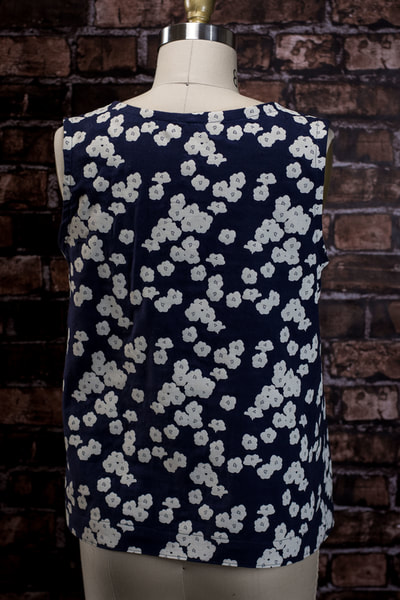
I've always had a complicated relationship with shopping for clothes. There's the whole body image thing, for one, and then there's the fact that I rarely fall in love with clothes designed by other people. The print is perfect but the cut is awful. Or vice versa. Or my favorite colors aren't "in fashion" for the season. Then there's the whole issue of quality - my mother, the sewist, taught me to look at the construction of a garment before even trying it on. In the last twenty years, clothes have gotten a lot more affordable - at the expense of quality. And then there's the fact that I feel a real sense of distress when I see so many clothes lining the racks of a store. Who made them? What conditions were they subjected to? Taking a step back from that, how did the fabric get produced? What is the environmental and human impact of this shirt I'm about to buy? Most people would just shrug it off - working and environmental conditions are worrying, but we all need clothes, right? Sure, they don't make 'em like they used to, but this is reality, sister. Get over it. Only, instead of "getting over it," I've been getting more and more concerned about it. In 2015, I was totally on the bandwagon with Slow Fashion October. Since then, I haven't shared quite as much as I did that first year - instead, I've been taking a hard look at my wardrobe. As a knitter and spinner, my knits are in a pretty happy place - I have a pretty solid collection of sweaters to get me through the winter. As a less intrepid sewer, though, my shirts/tops collection has been looking a little sad. I don't have much in my closet after several moves helped me winnow my wardrobe down to (mostly) only things that I actually wear or really really love. It's amazing how long clothes can actually last - there are a couple of garments in my closet that are starting to show their age. And since making the transition to self-employment, I'm not needing to dress up every day to look like the boss lady. A special privilege, I know, but more than anything, it's meant a delay in me actually figuring out how to solve this problem. I buy most of my ultra-basics (tank tops, leggings, and a couple of tees, as old things wear out) from Pact Organic Clothing. Beyond that, I've bought a grand total of three shirts, one pair of jeans, and one pair of walking shoes in the last year. Enter the Willow Tank. I purchased the pattern on a recent trip to Fancy Tiger Crafts. I'd seen the pattern online before, but balked at the price. I didn't want to wait for it to be mailed to me, and no way was I going to print out a pattern to have to tape it all together. No way, no ma'am. I've tried other tank patterns in the past from Simplicity and others, and been terribly unsatisfied with them, but everyone online seems to love Grainline patterns, so I wanted to give it a shot. The fabric, by the way, isn't from Fancy Tiger, but an old old purchase from Organic Cotton Plus. It's a double gauze in a dark navy. I made the size 10, even though according to the pattern I probably should give the 12 a go. The 10 fits, but with zero ease at the bust. It's not uncomfortable, and it doesn't have those telltale puckers across the bust that say it's too small, but for my next iteration I might just give the 12 a try after all. I do like how there's not a ton of positive ease in the 10 at the hips, so in the future I might do the 10 at the hips and the 12 at the bust. I loved Grainline's tutorial on how to do the bias facings - it's something I've done before, but with varying levels of success. I still have room for improvement, and after doing it on this top I feel a lot more confident. The only thing that puzzles me is the dart placement. It seems a little low, but I like the overall fit and shape of the shirt. Does this mean I should keep the dart as it is, or move it about? On this top, I fudged the length of the hem a bit, and am very pleased that I did. I didn't do any shortening/lengthening in the pattern, but when I got to the hem, I realized that doing it according to the pattern would make the top about an inch shorter than I'd like. Next time, I'll lengthen the pattern by an inch and do the hem the way the pattern calls for, with one exception - I did an extra row of topstitching at the very bottom of the hem. I like the way this looks, and will most likely do it again. Now the only quandary is this: how do I keep myself from ordering too much fabric and making a dozen of these? xx,
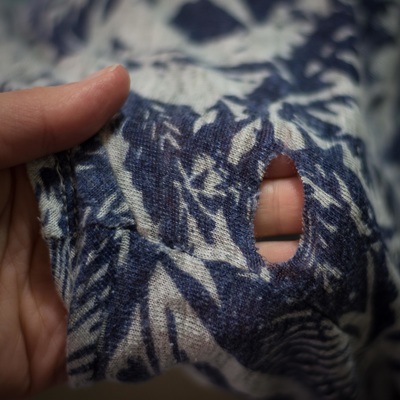
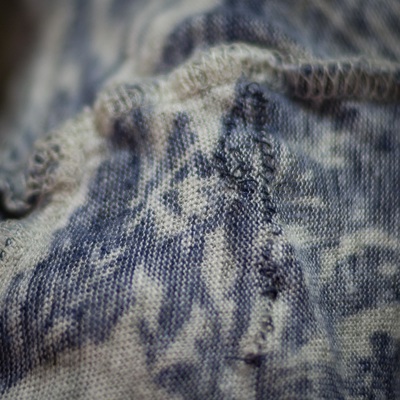
Pamela Though I’ve always had a basic understanding of sewing, mending has never been something I did much of. I remember that my mother had a mending basket, but the joke in our house was that the mending basket was where clothes went to die of neglect. It wasn’t that mending wasn’t a priority so much as there were so many other priorities that were more important. And I suspect that Mom didn’t want to spend her precious sewing time on what felt like drudgery. She’d rather sew something new and fun for herself. I don’t particularly like shopping for clothes, so the Slow Fashion concept of “long worn” feels particularly relevant to me. I typically buy items that feel like “classics,’ and then proceed to wear the heck out of them. But when a shirt gets a hole or cloth wears too thin, I’ve had a tendency to give up on the garment. I’ve written before about giving my clothes new life as rag rugs, but I feel like I’ve had less success with mending. The thing with clothes, though, is there's always another chance to improve your skills. If your mending job goes terribly awry and results in an unwearable garment, just wait a while and you'll eventually wind up with another worn out garment to practice on. That's what happened to me, anyway. Ironically, on the same day I intentionally cut a hole in my sweater to make a pocket, I ripped a 2-inch hole in a shirt. It's not an absolute favorite, but one that I wear frequently since it's so comfortable. I put the shirt in my queue of things to do, and let it sit there for a week, not exactly sure how I would mend it. My last couple of mending projects had gone wrong in all sorts of different ways, I and wasn't feeling too confident about my skills. Eventually, I turned to YouTube and found a few videos that were helpful, but not exactly enlightening. But they made me feel like the repair was something I could do, at least. One of the hurdles I think we need to jump in mending our clothes is an idea of perfection, the idea that our clothes should always be fresh and new and perfect. When we mend our clothes, there are new stitches where before there were none. A shirt gains a ridge, a pucker, or texture that wasn't there before. No matter how we try to hide it, there's a scar. I'm not advocating that we all become slobs or wear tattered clothing. My point is merely that mending clothes will never be brand new again, and they may no longer qualify as "Sunday best." But most of us have a place in our lives where mended clothes can - and should - serve a purpose. I've long adored sashiko, boro, and other visible mending techniques, and yet I struggle to incorporate them into my life. So I knew that my mending job needed to be as invisible as possible. I sewed up the hole, being careful to pick up all the loops left open by the tear. The fabric was too fine to do a real Kitchener stitch, but that was what I attempted in order to make the repair less visible and to give the mend more structural integrity. When I finished mending the hole, I ironed a piece of lightweight fusible interfacing over the repair, which will hopefully strengthen the area where the hole was. Though the tear was two inches long, it was near the armpit and not very visible. In fact, I had a hard time finding it when I went to do the repair. And of course, using thread that matched the print makes the repair itself less visible. Hopefully as I continue to wear the shirt, the repair will hold up. But what I've really learned is the importance of practicing a new skill, and trying again and again until I get it right. And that the changing character of a worn and mended garment isn't a bad thing - just something different. xx,
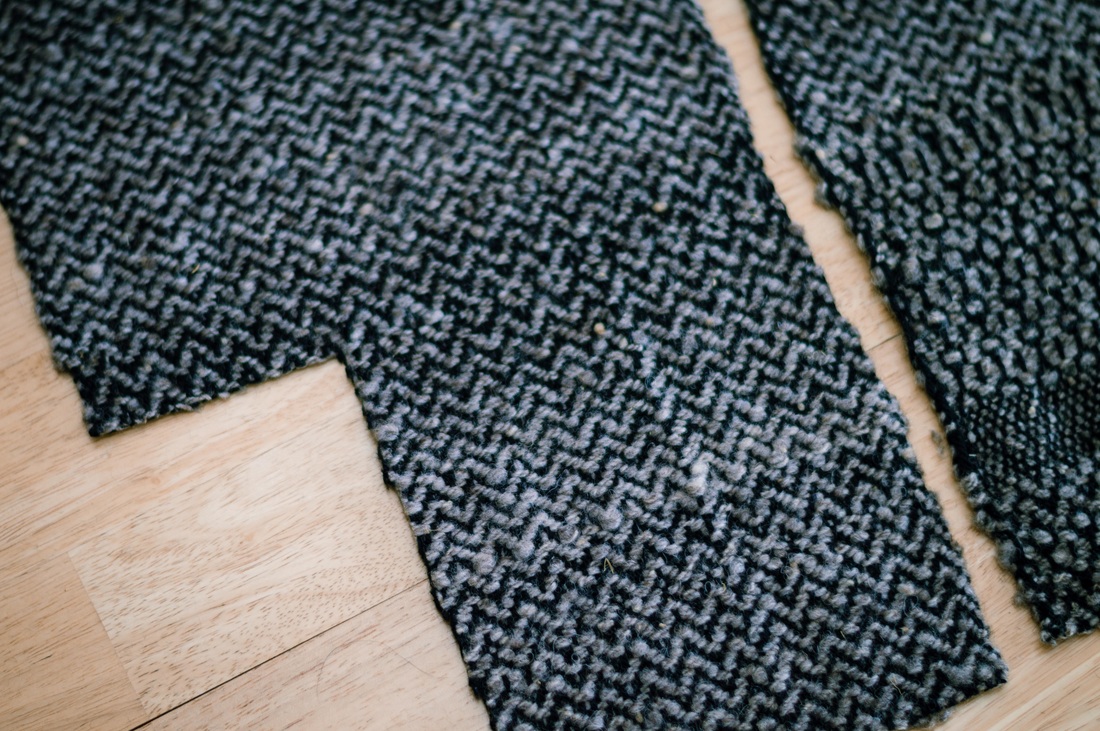
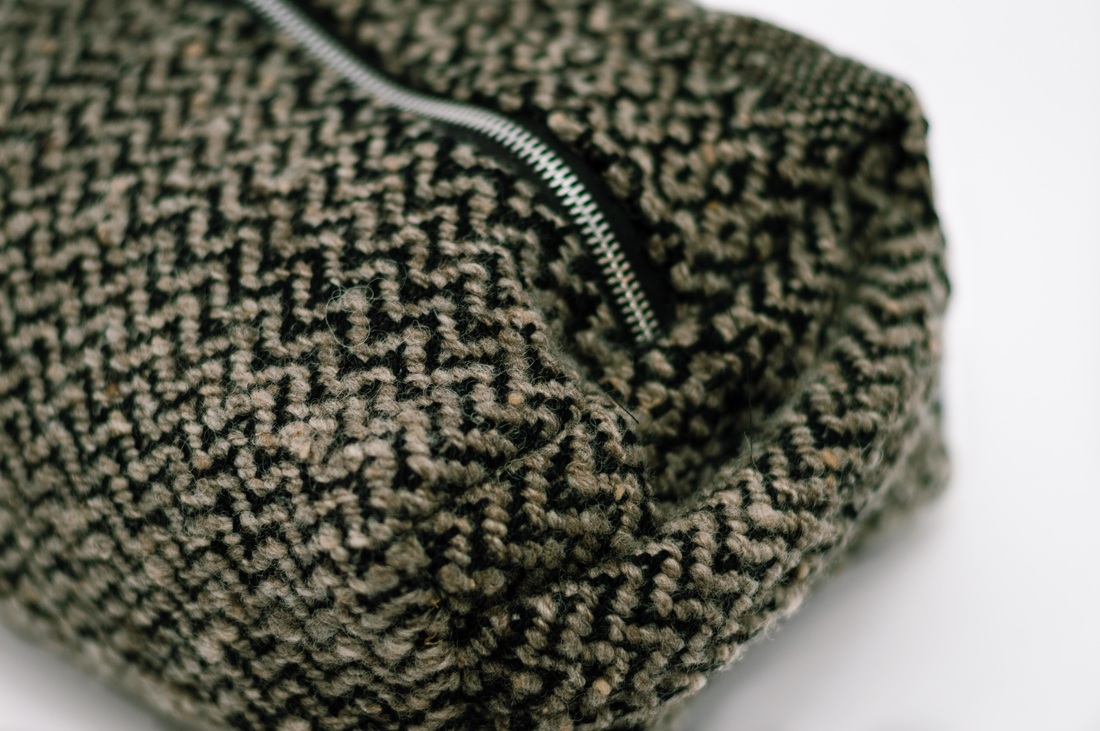
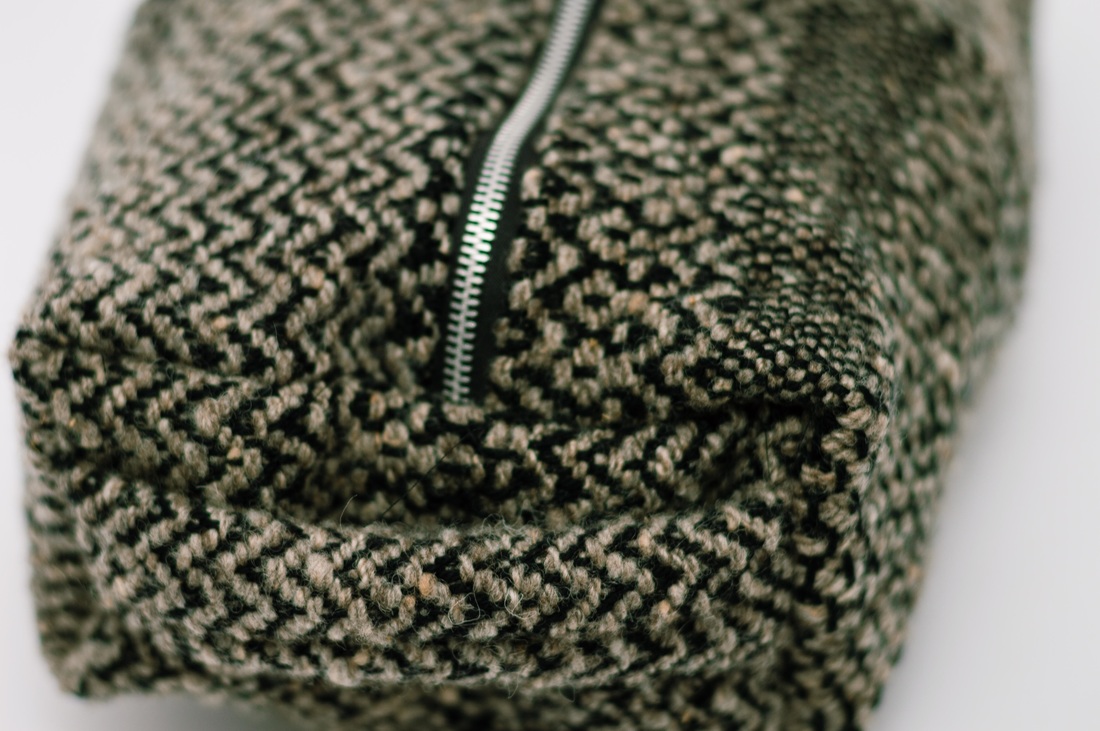
Pamela When I got my big loom all the way back in November, I was excited beyond measure. And then I had to set it up. It was mostly set up when I bought it, but we had to take it apart a little bit to get it into Mike's truck, an then we had to take it apart even more to get it into my craft room. It seems that some of the door frames in our house are abnormally small. So instead of weaving on it right away like I'd hoped, I spent a weekend putting it together. The frustrations associated with that ordeal were enough to dampen my enthusiasm. Still, I was determined to weave on it, if only to prove to my husband that it was well worth the (considerable) price we paid for it. I decided I would weave a rug for my office because why not. I had lots of carpet warp, so it seemed like a good idea. And just to get good practice, I warped 10 yards and enough to fit the loom's entire 45 inch width. As I was warping the loom, a warp thread broke. Not great, but what's one thread? As I started weaving, I struggled to keep my shuttle from falling out of the warp. And then more warp threads started breaking. It turned out that one of the harnesses was in upside down. It was miserable. It took me almost three months to admit it wasn't working. In that time I managed to weave only five inches. A more experienced weaver would have known how to fix it, but all I could do was cut all 10 yards off the loom. It was wasteful, but it was still a good decision. Because I got this on the loom. A three yard warp, only about 12 inches wide. The goal was really just to get something on and off the loom. Mission accomplished. The warp is a basic worsted weight wool knitting yarn that was in my stash. The weft is handspun wool that was in the stash that came with the loom. I played with a bunch of different patterns just for the heck of it, which seems to be my m.o. One day I'll have to pick a pattern and stick with it, but this was not that day. Once I got it off the loom, I wasn't really sure what to do with it. Not exactly the right dimensions for a scarf, and the gray handspun is way to scratch for next-to-skin wear. I've been hankering for a bigger bag to keep toiletries in. I have one at home that I love, but my locker at work is an embarrassing mishmash of stuff that falls out at the most inopportune times. So I made this boxy bag from the instructions over at Purl Soho. My fabric was exactly half the width needed for the pattern, so I seamed two edges together. I love the idea of making something useful out of my weaving samples. This bag is far from perfect, but it will do exactly the job I want it to do. And what could beat that?
|
Archives
January 2024
Categories
All
This website uses marketing and tracking technologies. Opting out of this will opt you out of all cookies, except for those needed to run the website. Note that some products may not work as well without tracking cookies. Opt Out of Cookies |

 RSS Feed