|
Ever since Charles Dickens wrote about Madame Defarge embedding secret codes into her knitting, the world has known that knitting can send a powerful message. Of course, knitters have known that for much longer. Knitting for someone else is a powerful message of love and support and comfort, whether it’s a gift for a loved one or a stranger in need. Up until the Women’s March on Washington (and all the sister marches around the world), knitting* didn’t get much attention in the political sphere. Then, all of a sudden, there was a sea of handknit hats, people declaring that we will not submit to hate and fear and control. A crocheted pussyhat landed on the cover of Time Magazine, and a knitted one on the cover of the New Yorker. Of course, the resistance doesn’t stop with pink hats. If the last two weeks are any indication of what is to come, it’s going to be a busy and exhausting four years. There are, of course, the practical things we all can – and should, and must – do, like calling and writing our legislators. Not just the ones in Washington, D.C., but the local ones too. We can’t forget that local policies make way for national ones. There are the marches, which I hope will continue to show the world that America is not full of hate and fear, though our President is. There is the legal action to challenge our President’s illegal and unconstitutional actions. And we can give financial support to all those organizations that care for marginalized people, for our environment, for the arts. And of course, we can keep on knitting. I’ve started thinking of this kind of knitting as politknits. It can encompass any topic, really, so long as it’s current. Unlike charity knitting**, the primary purpose of politiknits is to send a message, loud and clear. Politiknits tell the world what the maker is thinking. Politiknits tell the world that this is not okay. Politiknits tell the world this is what I’m doing to change the world. 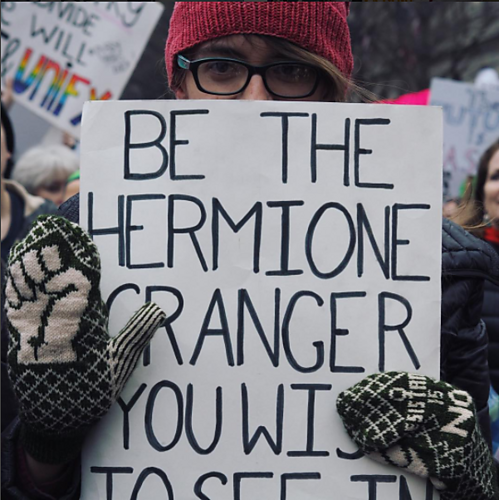 Image (c) Ysolda Teague One of my favorite politiknits debuted at the Women’s March on Washington. Designed and worn by the inimitable Bristol Ivy, the Peace de Resistance mittens pattern features a clenched fist and the message, “Resistanace is NOT Futile.” All proceeds from pattern sales are donated to a rotating list of charities. In the first 24 hours the pattern was on Ravelry, it shot up to #1 on the “Hot Right Now” list, and generated over $4,000 for organizations that work to make life better for all people, not just those in power. There are 85 projects already on Ravelry - and more added every day. 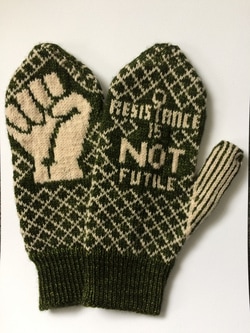 (c) Bristol Ivy (c) Bristol Ivy There's so much that I love about these mittens. Mittens, something soft and warm and made by hand. Mittens, that bear a traditional colorwork pattern, with anything but a traditional message mixed in to that pattern. There's a growing need for resistance to hate and fear on all fronts. Politiknits are just one, but I love them because they're an encouraging and exiting way to express ourselves as creators. As Bristol said: Let’s make some good trouble, y’all! xx, Pamela *and crochet, and sewing, and so-called women’s crafts in general **Charity knitting is generally meant to fill the needs of warmth and love for the intended recipient. A good and wonderful and necessary thing, just different.  My handspun sweater is at that stage of doneness where it is wearable as a garment, but still needs a few finishing touches – sewing up those faux seams, adding some handwoven ribbon to keep the steeked edges covered, and there might still be a couple of ends that need weaving in. But we managed to get out to the park for a walk in the sunshine, and it was the perfect layer for a spring-like day (in January!). Last week I filmed myself cutting the steek down the center front. Traditionally, steeks are cut in colorwork – a way to speed up the knitting, since colorwork is easier done in the round than worked flat. Really though, you can use a steek just about anywhere – as long as you’re using a yarn that’s not too slippery. Knitting the sweater in the round and then steeking it let me accomplish a couple of things. First, I was using handspun, which has more variety in thickness and color from skein to skein than commercial yarn. Knitting the sweater in the round meant that it would be visually even – no need to try to juggle matching left front to right front. Second, it meant I could knit a stockinette sweater with very little purling. Actually I did purl – the center front has one purl stitch, and each side has a purl stitch where the seam will be. The purl in the center front made for an easy visual for where to steek, and the side purls are there for a faux seam and to add a little bit of structure. But that’s it! Steeking intimidates a lot of people because it seems so dangerous! Won’t the knitting unravel? Interestingly, knit stitches don’t really want to unravel in the direction a steek is normally cut, which helps soothe most people’s fears. When you cut a steek, there are a couple of different ways to reinforce it to keep all your hard work from unraveling. The two main techniques I’ve seen are using a sewing machine and crocheted reinforcement. Using a Sewing Machine to Reinforce a Steek The idea is simple: sew a couple of rows of stitches just outside the cut. The machine-sewn stitches are strong and disappear into the fabric. You do have to be careful not to stretch the knitting as it goes through the sewing machine, or else risk a “ruffly” edge, but this technique is great for yarns that might not traditionally be steeked, like cotton or acrylic. You can find a bunch of great tips about machine sewn steeks here. Reinforcing a Steek With Crochet Stitches This technique uses two columns of crocheted stitches just outside the column of stitches to be cut. The crocheted stitches pull away from each other, leaving you a clear cutting path. Once cut, they roll under whatever edging you add, giving you a nice edge. This is my go-to tutorial for the crocheted method. This second technique is the one I used for my sweater, partially because I like it, and partially because I didn’t want to haul out the sewing machine. Then it was just snip, snip, snip, and I had a cardigan instead of a pullover. I’ve heard a lot over on Instagram about how daunting steeks can seem, but they’re really useful in a lot of situations. Maybe I’m a little obsessed, but I think every knitter should try steeking at least once! Do you have any experience with steeking? I’d love to hear about it – or any questions you might have about the process. I’m all ears! xx,
Pamela 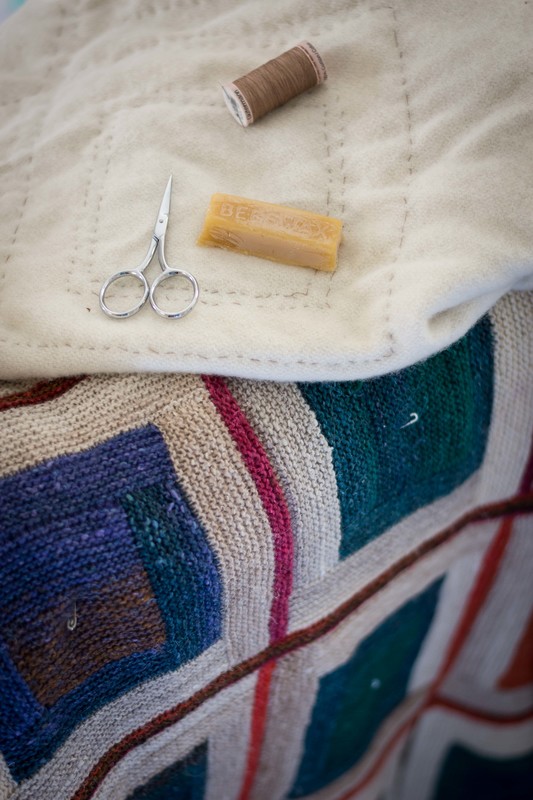 Lately, I've been enjoying Vickie Howell's Craft-ish podcast while I weave. It's a fascinating look into the lives and careers of makers of all types. One of the themes Vickie touches on frequently is the difference between art and craft. It's a touchy subject for many, as things that are perceived as "craft" are often valued less - particularly crafts like knitting that are seen as women's work. Vickie often asks her guests to define the difference between art and craft, and one of my favorite definitions is that a work of art is never really done, while a craft has a set point at which it's finished. That definition acknowledges that there is often a fine line between art and craft - a technique that is considered "crafty" doesn't have to be limited to crafts and can be used for fine art. And I think that something Vickie is hinting at is that so many more of us are artists than we allow ourselves to think. Lately, I've been working on my Noro Log Cabin Blanket, which has been in the works for more than three years now. All the knitting is done, and I've decided it needs to be like a "real" quilt - with a backing and binding and everything. Partially this is so the knitting won't stretch out, but it's also because I keep thinking of ways to make the piece better, like a work of art. Naturally, the blanket is too big and heavy to quilt on my sewing machine, which means I'm doing it by hand. The backing is a wool blanket I picked up at the Pendleton Woolen Mill on my travels last summer, and I'm enjoying the weight of it on my lap while I quilt away on it. Once the quilting is done, I'll bind it with some of my handwoven tape. But that's a long way off still. What about you? Do you have projects that toe the line between art and craft? Do you have your own definition of the difference? xx,
Pamela 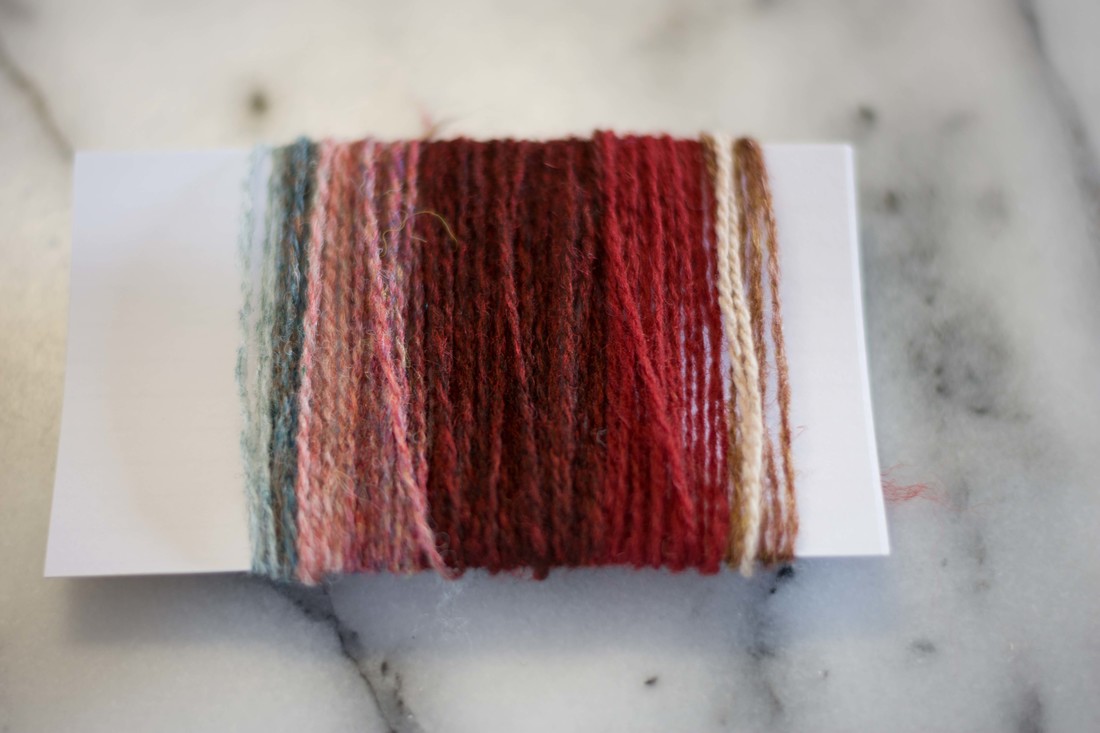 Have you heard of making shade cards as a way to plan out colorwork projects? It's a technique I learned from weaving, but it's useful for knitting too. It's simple, easier, and faster than swatching, plus it doesn't mess up the yarn by getting it all crinkly. A win-win-win, if you ask me. All you have to do is wrap yarn around an index card, like I've done in the photo above. Use more yarn for colors you plan to use more of, and less for accent colors. You can do this as blocks of color, or you could sprinkle the accent color across a background of your main color - whatever works for you. There are two things I like about using this method instead of just piling balls of yarn together.* First it lets me play with relative quantities of each color. Second, I can try out many different color combinations and compare them to each other - something that's hard to do with yarn in the skein unless you have lots and lots of it. And another thing: unlike swatching, which leaves your yarn all curly and could mess up your gauge if you re-use it without steam blocking, wrapping your yarn around an index card keeps it as nice as it was in the skein. This is also great for more delicate yarns that start to look fuzzy if they're ripped and re-knit. 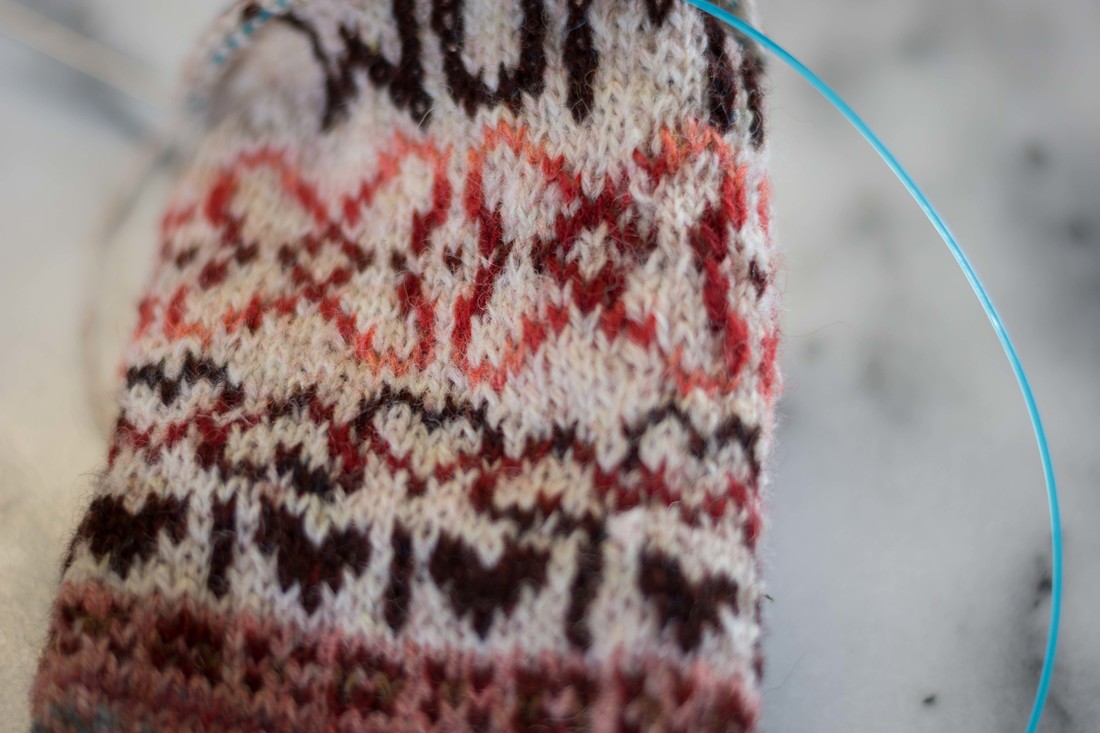 Of course, swatching might still need to be a next step (especially if gauge is important). In the swatch above, I quickly scrapped my original color palette to add more depth on each end of the reds range. I found that there wasn't as much contrast between the pink and the red as I thought, and played around with different colors. But that's the beauty of it - I at least had a starting point that gave me a solid idea of what I was working with. So there you have it! A super easy way to play with color combinations. How do you plan out the colors for your colorwork projects? xx, Pamela *Which I still love, and do as a first step. The color cards are the second.
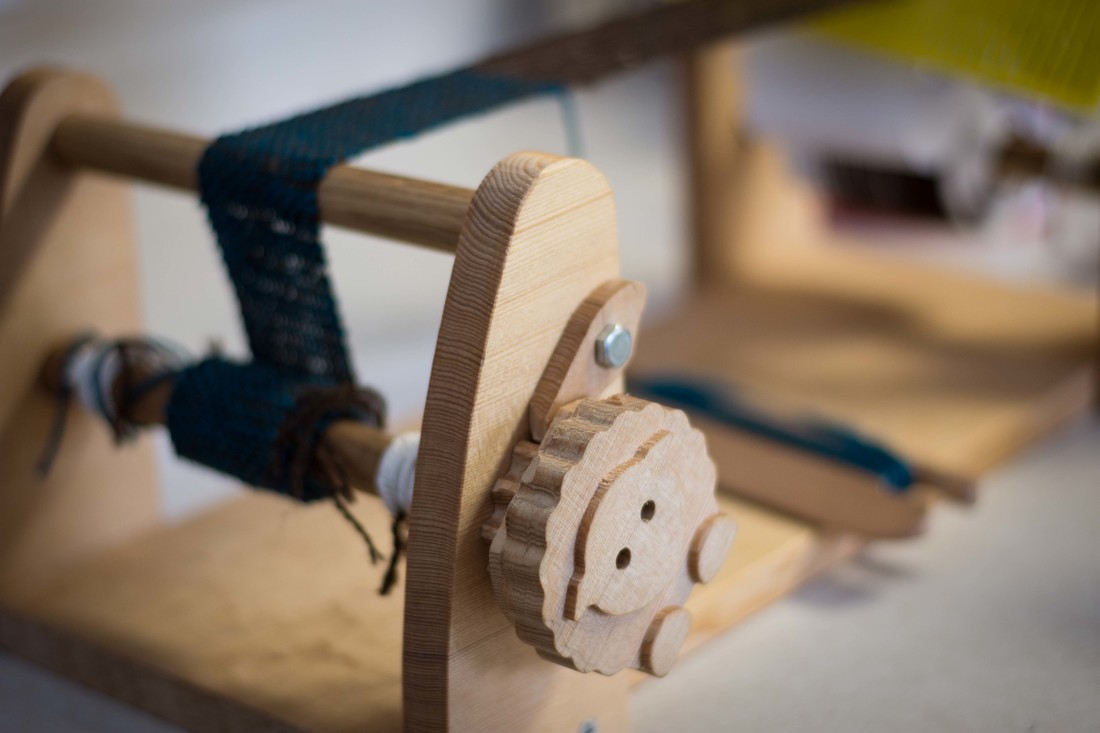 When we went on our 2-month adventure last summer, I packed our RV full of yarn. But all my looms were way too big to fit in our RV, so all I had to keep me busy was my knitting and spinning. The whole time, I wished I could weave, and longed for a little loom that could come on our trips with us. And, since I've started weaving bands, I realized that I don't need a ton of width to weave on. So we came up with this little loom, and of course it had to have sheep! 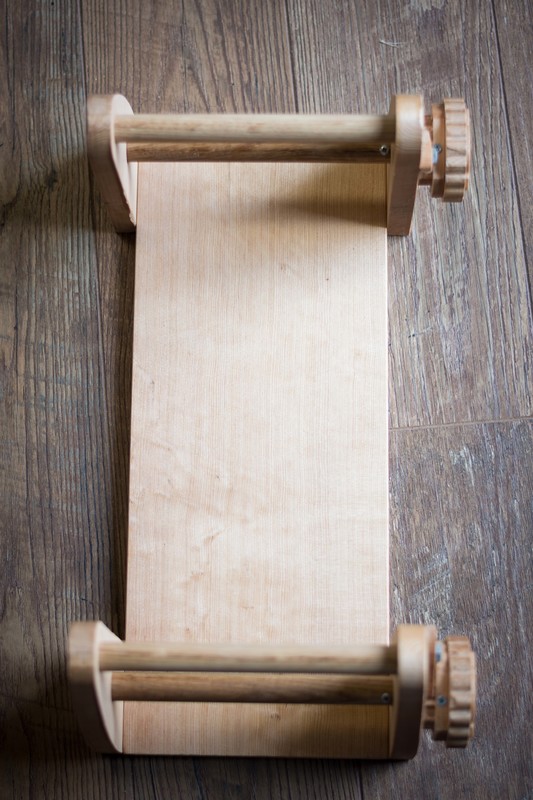 Now available in the shop, this little loom can be used to rigid heddle or card weaving, and at 18" x 10" x 8", it can go pretty much anywhere. I love how the beams let me warp more than my inkle loom, too. The warp you see in the top picture is about five yards long - much more than I could have gotten on my inkle loom, and in less space, too! xx,
Pamela |
Archives
January 2024
Categories
All
|
 RSS Feed