|
Knitting stranded colorwork is one of my favorite things. It uses both hands so it's interesting enough that it keeps my attention. But it also has a rhythm that keeps it from being too hard. In the last few years, all the colorwork sweaters I've done have been from charts I developed myself, and often using my own handspun yarn. How did I get to that point? Or, more importantly, how could you get to the point where you're designing your own colorwork patterns? Start with Someone Else's Patterns to Get the Hang of ItWe all have to start somewhere, and working from other people's stranded colorwork patterns is the perfect place to start. If yoked sweaters are your jam, notice how the increases & decreases are placed in the colorwork pattern. Often, this will be done in the "background" color to minimize distortion of the pattern. Keep that idea in your back pocket as you go forward in your design journey! The KnitOvation Stitch Dictionary (reviewed in my last post) has some great resources if you want to plug different stitch patterns into an existing design. Combine Multiple Patterns to Create Unique CombinationsUsing one or more stitch dictionaries, combine multiple patterns. Think diamonds that shift in scale, or different kinds of flowers...essentially, pick a theme for your sweater, find a bunch of patterns that fit the theme, then arrange them in a way that makes you happy. Experiment with charting all of them together so you'll get a sense of how they look next to each other. This might lead to: Learn How to Resize, Center, and Move MotifsYou may need to modify the sizes of some patterns, or to move the starting point of a chart. Sometimes this means centering a motif on the front, back, or sides of the body, or it means avoiding awkward placement of motifs. Reverse Engineer Other Stranded Colorwork DesignsFind a colorwork pattern you like, but don't have a chart for. See if you can chart it out! Remember, at this point, you're still learning, so you shouldn't be trying to pass the design off as your own. Find Inspiration for Your Own PatternsInspiration is all around, and once you've gotten the hang of stranded colorwork, you'll wonder how you can turn your favorite images, symbols, and shapes into colorwork patterns! If you're struggling with this phase, I highly recommend Felicity Ford's Stranded Colorwork Sourcebook and Janine Bajus' The Joy of Color. Chart Your Own Patterns with Dots on Graph PaperKnit stitches aren't square - they're rectangular. The ratios of the rectangles depend on your gauge. If this bothers you at the charting stage, you can buy knitter's graph paper. Usually, though, I just use regular graph paper and a simple trick - dots. A dot in the middle of each square for my pattern color is quick, and it approximates the visual effect of a knit stitch. This did take some getting used to, since I started my knitting journey thinking that a dot always represented a purl stitch in a knitting chart! I demonstrate this around the 4:22 mark in the video. Remember to Consider Your Float Length!Ah, floats. There's a lot to say about floats. How long should they be? How long is too long? I'll admit, I let some of my floats get pretty long when the pattern absolutely demands it. And I don't trap floats, since this usually shows on the front side. But as a rule of thumb, a float shouldn't be longer than an inch, or an inch and a half if you're feeling really daring. Remember to consider this when you're creating your designs - usually this translates to no more than 5 to 7 stitches one color in a row. Consider Value Contrast When Selecting YarnsA strong value contrast (dark and light) will help your patterns read well. Take a picture with your phone, then converting it to black and white - if the two yarns look like they're the same shade of gray, you don't have much value contrast. Low contrast can create subtle effects, but it will be harder to see while you're knitting, and the pattern will be less clear when you're done. High contrast patterns are easier to see. Don't Forget to Swatch!Swatching can help you refine your design. Often, I find that I'm overflowing with ideas, and I've designed two or even three sweaters worth of stitch patterns. Swatching helps me simplify & problem solve so that there's less ripping out once I'm actually working on my project!
Do you have a tried-and-true stitch pattern design formula? I'd love to hear about it! 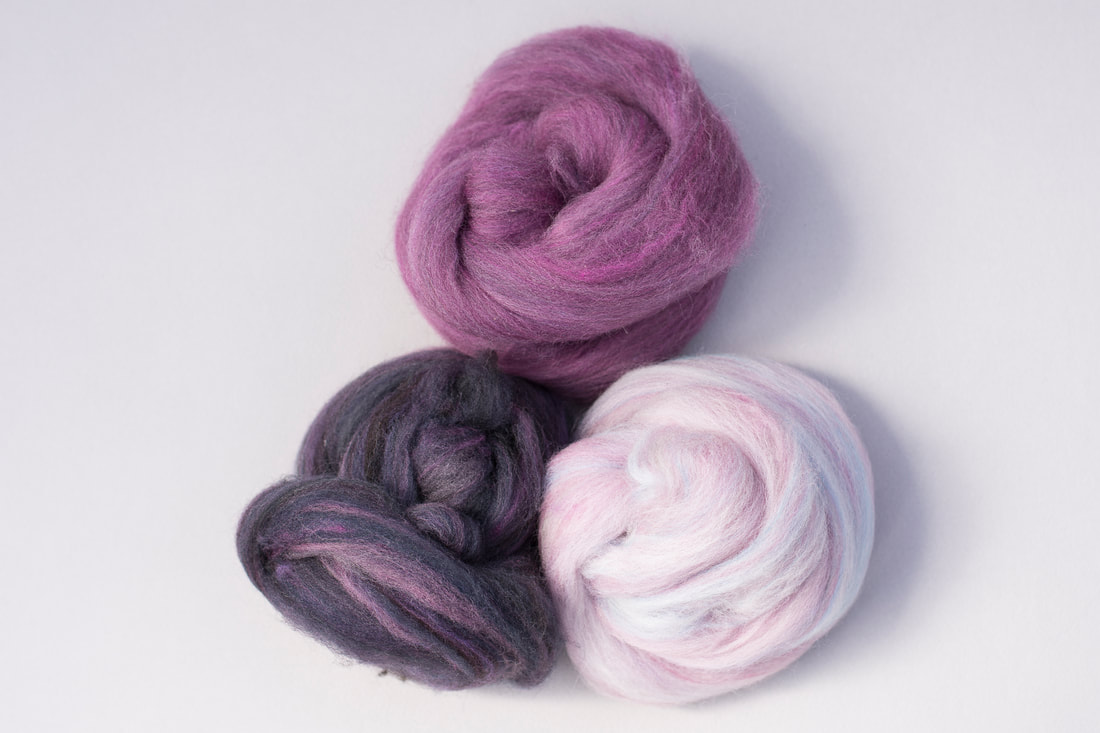 Lately, I've been working on a project that makes use of a gradient. This is to be a sweater quantity with most of the yarn in the darkest color. I started with several piles of color - most of it the mauve/magenta color shown at the top of the first photo. Then I blended it into a gradient, adding darker and and darker values on one end, until I got to the almost-black-purple, and lighter and lighter values on the other end, until I got to the pale lilac-pink. 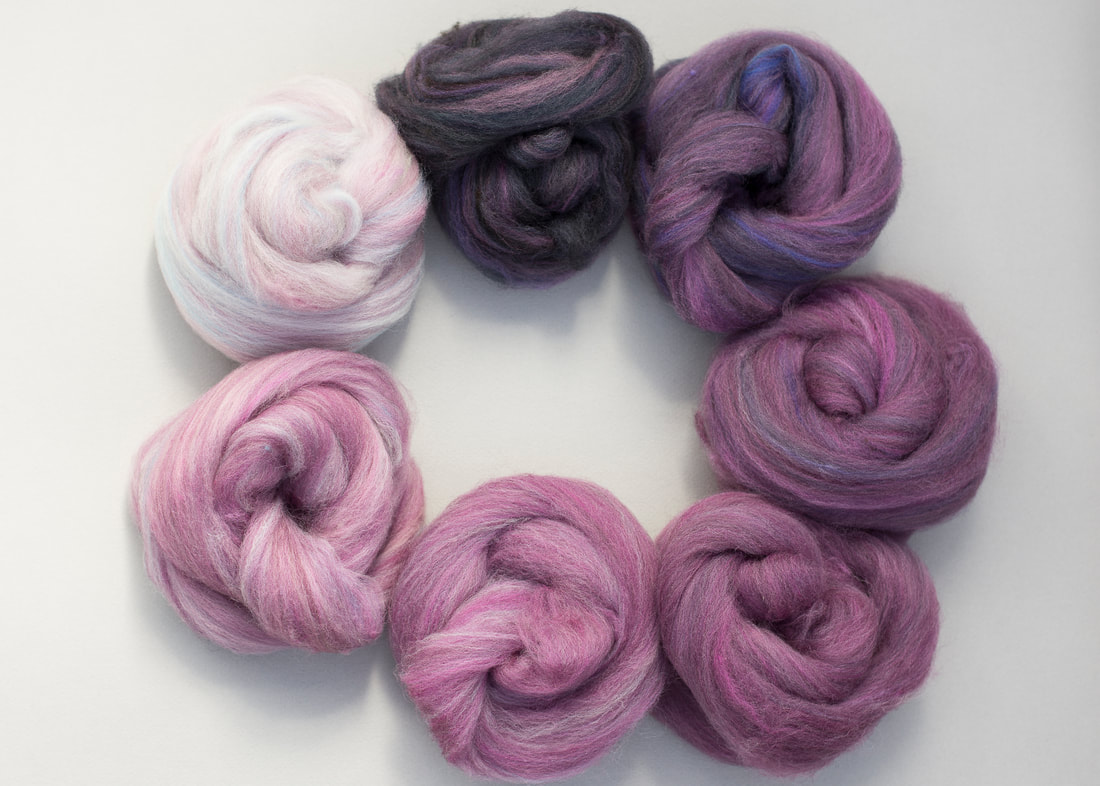 When I took the photo above, I realized there were a couple of places where I wanted to to smooth out the gradient, specifically at the lightest and darkest ends of the spectrum. So there are a couple more values in the gradient now! The fiber is mostly organic Polwarth, with a little bit of Merino and CVM in there too. I used the diz in the Spinner's Ultimate Multitool to pull the roving off the drum carder. Now I'm using the WPI gauge to make sure I spin to about 28 wraps per inch. I'm doing this as a short forward draw, which is a little bit outside my comfort zone, so I make sure to check pretty frequently! 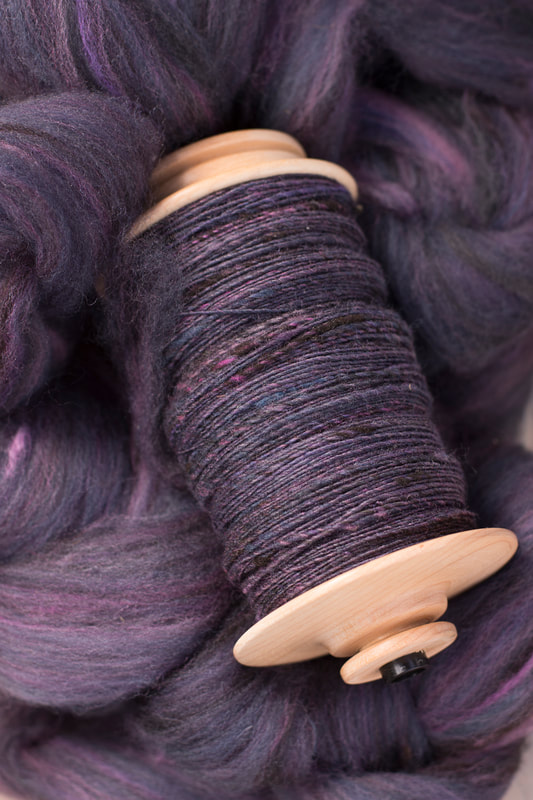 I'm starting with the darkest color. There's about 20 ounces of this, and then between 2-4 ounces of each of the other colors, so there should be plenty for the sweater I have in mind!
Here is the fourth episode of the Fiber Sprite Podcast! On this show, I'll talk about projects I've been working on and my visit to the Taos Wool Festival.
Knitting:
Designing:
Spinning:
Weaving:
Books: 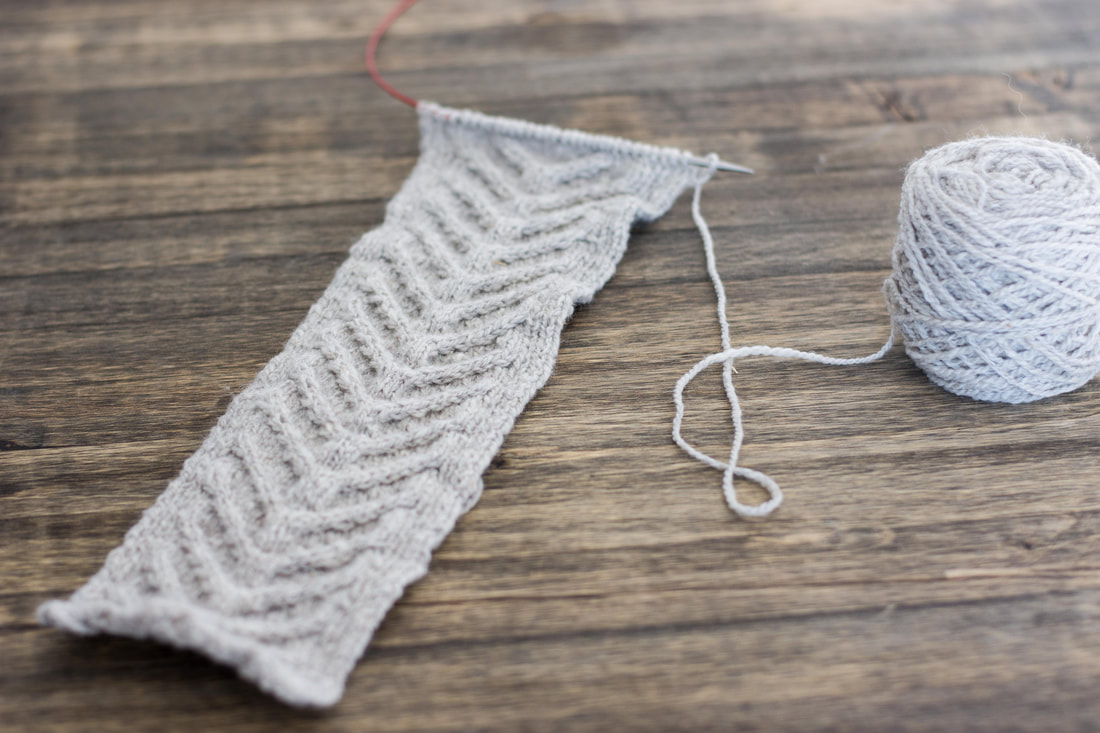 Last week on the podcast I shared that I was starting a sweater with some of the yarn I purchased at the Sneffels and Taos fiber festivals. First, I'm working a border for the sweater, and then will knit the body of the sweater and seam the border on. I started the project when I was traveling, and didn't have all my stitch dictionaries handy. Plus, stitch dictionaries are really a jumping off point - there are infinite numbers of possible stitch combinations, and stitch dictionaries can only give you a fraction of what's possible. I knew that I wanted an antler cable, so first I looked on Ravelry for other patterns that had antler cables. Since I didn't find any sweaters that were exactly what I had in mind, I decided to design my own. (More on that later!) I found a basic antler cable pattern chart from the free Antler Toque pattern by Tin Can Knits. It is a sixteen-stitch wide cable with six rows: 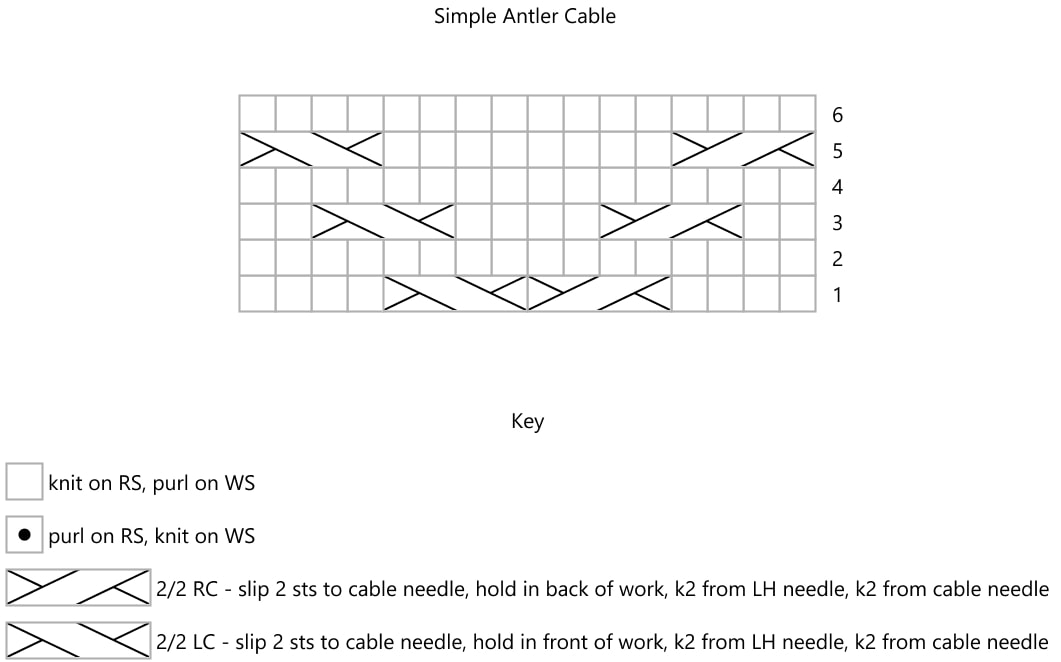 This is a pretty standard antler cable - like you might find in many stitch dictionaries. However, based on my gauge swatch, I felt like this cable would be too narrow for me. Rather than hunt for more cable patterns, I decided to modify it. First, I added two stitches to either side of the pattern, making a 20-stitch wide cable pattern. In order to continue the pattern, I also needed to add two rows. Then, I added in the cable crosses in the pattern that had already been established.  I felt like this still wasn't wide enough, so I added another two stitches on either side of the pattern, making the cable 24 stitches wide. Instead of continuing to add height, I added these cables at the bottom of the chart, so that the beginning and end of the stitch pattern nest together: 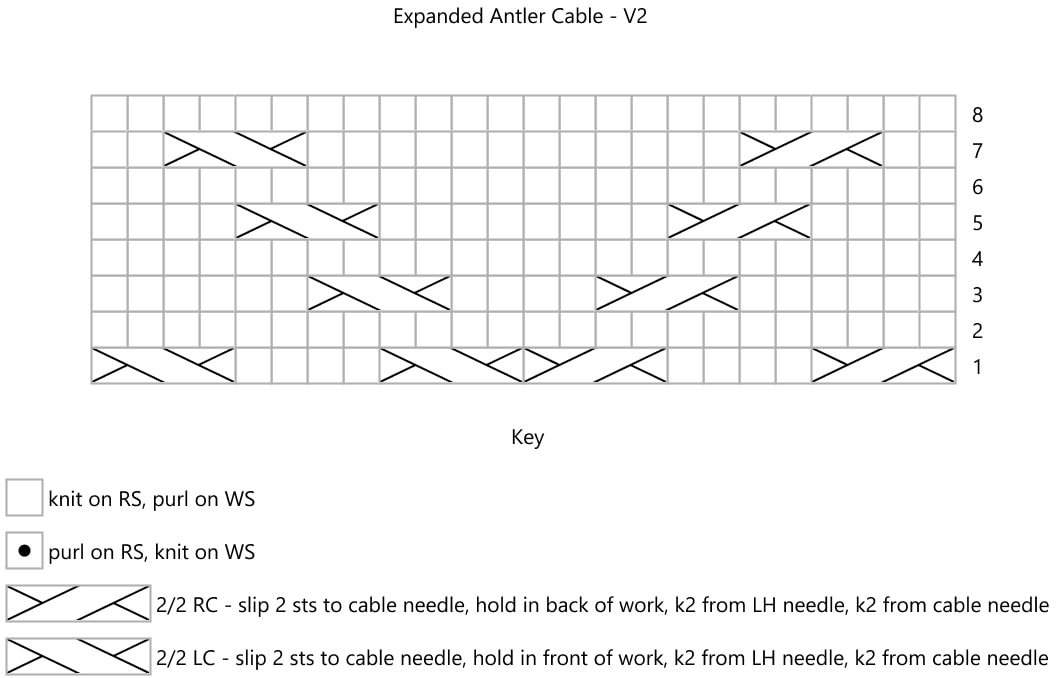 Lastly, I added a ribbed border of 5 stitches on each side, for a grand total of 34 stitches. The ribbed border sets the cable off in a subtle way, keeps the cable from curling, and will give me room to seam the band to another piece of knitting. 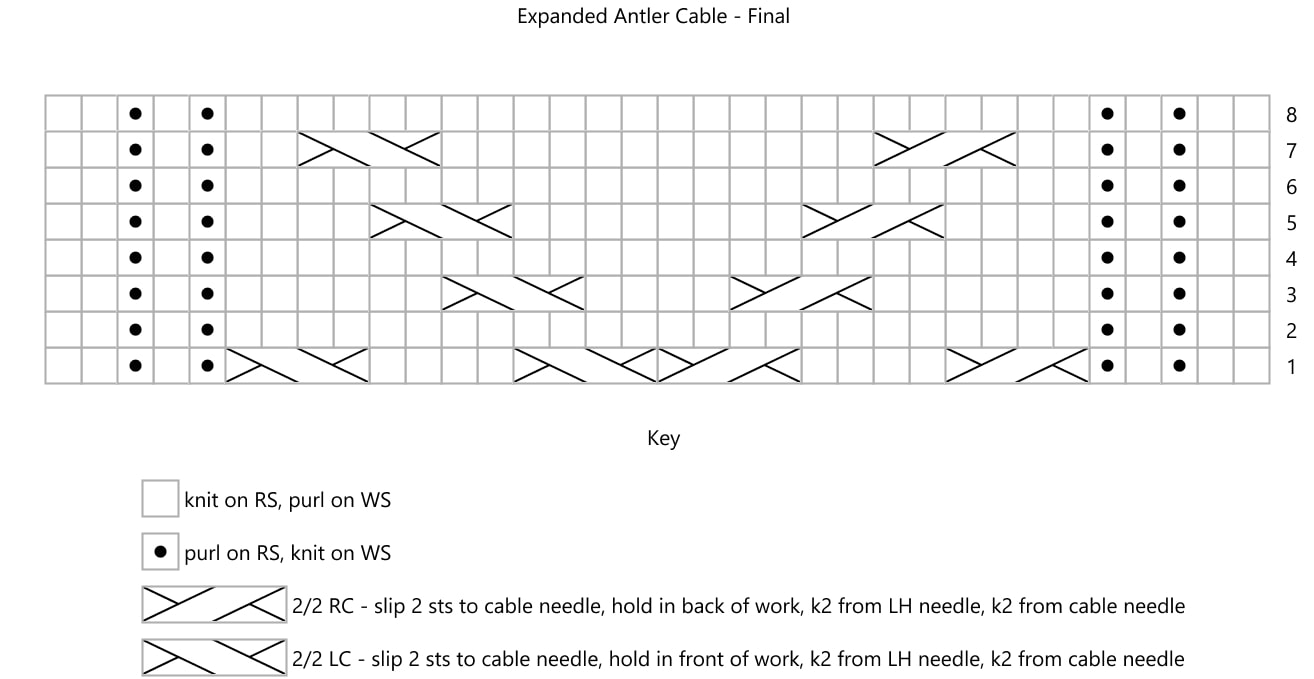 Modifying stitch patterns can be daunting at first, but it's really just a process of tweaking an existing pattern until you have something that works for you. For more information about modifying cable patterns, Norah Gaughan's Knitted Cable Sourcebook is an unbeatable resource.
Happy cabling! 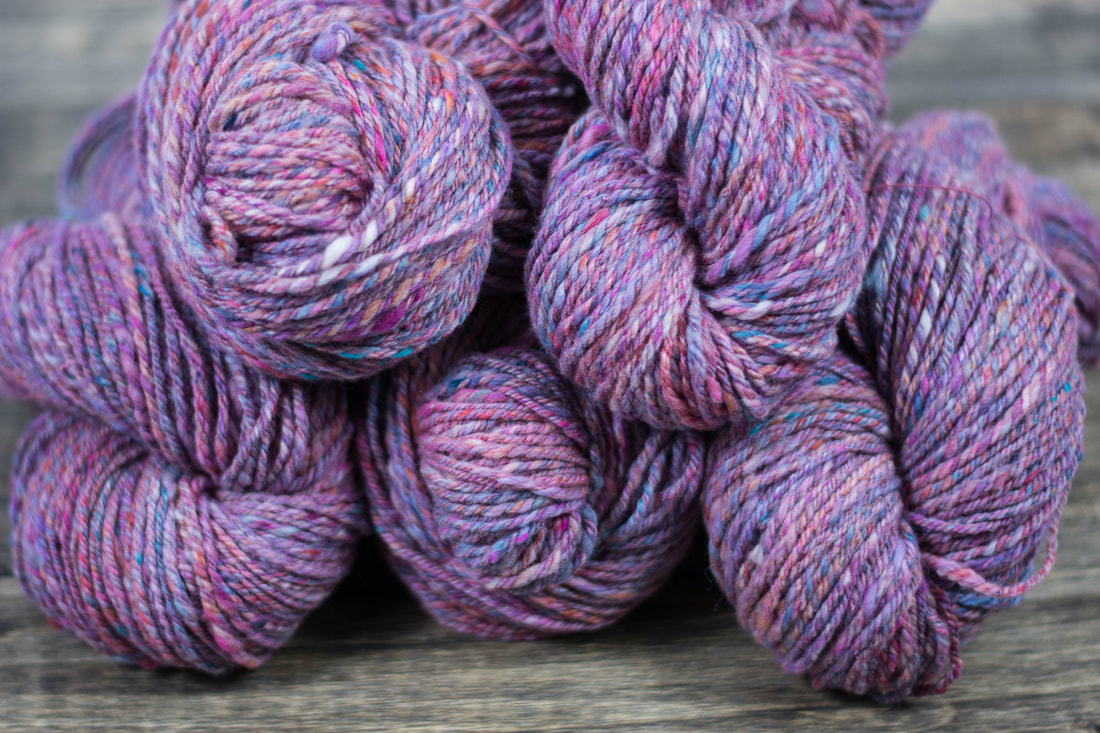 It's the question that every artist dreads. It's also the one that's asked the most often. Sometimes people ask it out of genuine curiosity. Sometimes they mean it as a compliment - they think the work is exquisite, and therefore must have taken a very long time. Sometimes they're trying to decide how much they're willing to pay for it. This last question is the worst, and one of the reasons that artists don't like to share how long it took them to make something. Another reason artists don't like to share how long a piece took them is that artists don't always track their time, and art is often a non-linear process. A project might be started, stopped, picked back up, "finished," then have additional edits made. Other projects frequently are started and stopped between each part of the process, making tracking time even more difficult. One way some artists answer the "how long did that take you" question with how long they've been practicing their medium, or practicing art in general. In that view, each project adds to their experience and gives them the knowledge of how to make a new project better and with less time spent on mistakes. This answer is a firm way to say, "thanks for your interest, but I don't share that information." It insists that the artist's experience is what gives value to the work, not how long the piece took. It protects the artist's privacy, and keeps the questioner from having an opportunity to devalue the artist's work based on how much time it took them. While I certainly admire artists who can command a living wage for their work, I also feel that fiber art is constantly undervalued by the perception that it's "just a hobby." I cringe when someone tells me they get a dollar an hour for something they made. I get angry when I see people selling product at craft fairs and farmer's markets for low prices, sometimes prices so low that the garment costs less than the yarn/fabric must have cost the seller. In part, we have industrialization and fast fashion to blame. As early as 1840, it became more economical to buy cloth rather than spend time making it. Commercial cloth (and ready-to-wear clothing) has become cheaper and cheaper ever since. As we became divorced from the processes of making yarn and cloth, we stopped appreciating its value. We also traditionally see textile work as "women's work." While the history is a little more complex than it just being work done by one gender, seeing textile work as something done by women, at home, in the time between other household chores makes it very difficult to quantify, and therefore value. Last winter, one of my handspun, handknit sweaters went into the washing machine. The yarn was not superwash. It was an accident, no one was hurt, and I did manage to unshrink it just a little bit. After the initial shock, I joked to my husband that it was an excuse for me to get to go shopping for a sweater quantity's worth of yarn. And then I started explaining how much the yarn would cost for a sweater quantity - up to $200 for wool similar to that sweater. Since it was handspun, the fiber had cost me a little less, but there were hours and hours poured into the making of the yarn, and then knitting it up into a sweater. I just didn't know how many.  In my own work, I don't typically keep track of how long something takes me to knit, weave, or spin. It is a hobby, and I know that making things for myself is what gives me the most enjoyment. I do sell some of the things I make, but when I do, I'm always careful to price them so that my time is accounted for and I'm getting paid at least minimum wage. There are a number of other costs to consider when pricing items, like cost of materials, equipment, overhead, and profit if you're trying to run a business. But there's still that elusive question: "How long did that take you?" For my most recent sweater, I decided I would keep track. I didn't time myself with a stopwatch, so all of the time is in averages. Because I wanted to get a big-picture view, I decided that I would spin the yarn myself - which also included blending the fiber on the drum carder. Some of the fiber was dyed by me, some of it was dyed by others, and I did not count the time cost of scouring and dyeing. (But if you're interested in that stage, Bren Boone has an excellent post where she breaks down the time cost for her of scouring, carding, and spinning a skein of laceweight yarn.) Carding the fiber took me about 15 hours, spread out over a weekend. Spinning the singles took me about 35 hours, spread out over several weeks. Plying took me about 10 hours, spread out over a week. Finishing the yarn (skeining and washing) took me about 3 hours. I knit all the ribbing on the sweater by hand. Each of the bottom hems took me about 3 hours, as did the short rows and ribbing on the neck. The ribbing on the cuffs took me an hour each. That's a total of 14 hours of knitting the ribbing. I knit the rest of the sweater on the knitting machine. While it is faster, there is a real time and energy commitment to using a knitting machine. You can't just put your knitting on the machine and walk away (at least not on my machine!) and the techniques are a little bit different than hand knitting. In total, I spent 10 hours on the knitting machine with this sweater. Lastly, there's the final step of blocking, seaming, and weaving in ends. It always seems like there are twice as many ends to weave in when using the knitting machine! This step took a total of 3 hours. So - the grand total for preparing and spinning the fiber into yarn was 63 hours. The grand total for knitting and finishing the garment was 27 hours. The total amount of time spent making this sweater was 90 hours. So, naturally, the next question is how much is it worth? Where I live, the minimum wage is $11.10/hour. So that's $999 worth of my time. If we were to bump the wages up to what's currently considered a "living wage," $15/hour, the time cost rises to $1,350. I tend to think of my time as a lot more valuable than that - after all, spinning and knitting are skilled forms of labor that not everyone has. But for the sake of this post, we'll stick with $15/hour. Time isn't the only cost - I used about 30 ounces of fiber, most of it merino, which generally sells for about $5-6 an ounce. There is some silk, yak, and other luxury fiber thrown into the mix, so I estimate my materials cost at the higher end of the range, for a total materials cost of $180. I used a pattern to knit the sweater, which cost me $8. At this point, the cost of the sweater in time and materials is $1,538. If I were in the business of spinning and knitting sweaters for sale, I would also need to account for equipment costs for my drum carder, spinning wheels (I used two in this project), and knitting machine. Based on equipment depreciation calculators and an assumption that the various pieces of equipment are in use 40 hours a week (because we're in business here), equipment cost is about 40 cents an hour. That doesn't sound like a a lot, but when you multiply that by the amount of time the sweater took to make, the cost of equipment is $36, raising the total price of the sweater to $1,574. And then there are other types of overhead - how much does it cost me to rent space, keep the lights on, have running water, and have access to the internet to buy a knitting pattern, fiber, etc.? This is tough to calculate, as many of us say, "oh, the fiber would be in my house anyways," but there is a real cost associated with the space our fiber-things take up. But, assuming that this business takes up 10% of the space in a house where the combined cost of the mortgage/rent and utilities is $1,500/month, the monthly cost of the business space would be $150. Again, assuming this is a job that happens 40 hours a week, the cost per hour (assuming a 4-week month) is 94 cents. For a 90 hour project, the cost of overhead is $84. Now the total price of the sweater is $1658. There are also real costs associated with selling a product - if it's sold online, there are website hosting fees and credit card fees to contend with. If it's sold like a website through Etsy, there's a fee to list it, and there's also a commission that's paid to the website once it's sold. If it's sold at a craft or art fair, there's a booth fee, plus the cost to travel there. If it's sold on commission through a gallery or store, the commission will range from 20-40% of the price. These costs need to be built into the price of the item. Assuming the fees are 20% of the product price, that's $332 for this sweater, which now has a price of $1,990. Last but not least, every business needs to be profitable. Every business has different profit goals, but up to now, we've only been calculating the break-even cost for me to make this single sweater. Profit margins need to be built in to the price of a product so the business can continue to grow. Profit margins also keep the business from suffering a loss if the price of supplies suddenly go up, or the project takes longer than expected to make, or if the overhead increases unexpectedly. Profit margins vary wildly across industries, but 40% or 50% is a pretty common goal. Assuming the lower end of the range, that's about $810 for this sweater, which now has a sticker price of $2,800. So, the next time you go to a craft fair and you think an artist is charging too much, remember that they're real people, with real skills, with real time, money and energy poured into their craft. And if you're tempted to ask the eternal question of "How long did that take you?" please remember that time isn't the only indicator of value. 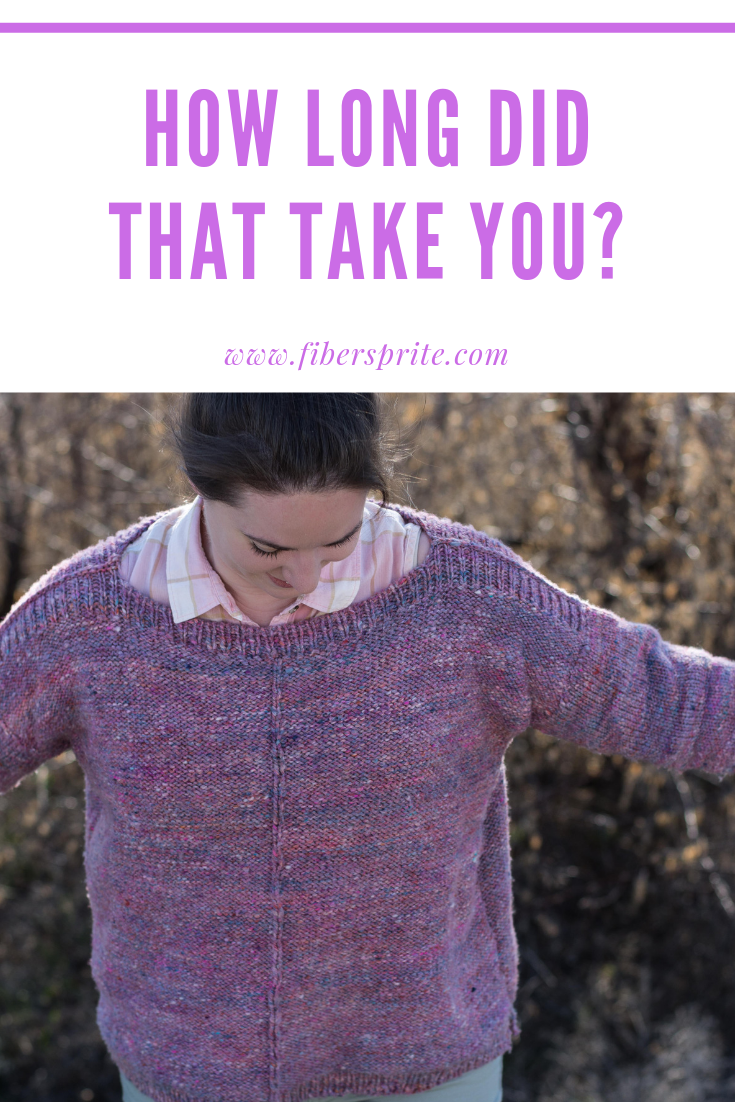 |
Archives
January 2024
Categories
All
|
 RSS Feed