|
Knitting stranded colorwork is one of my favorite things. It uses both hands so it's interesting enough that it keeps my attention. But it also has a rhythm that keeps it from being too hard. In the last few years, all the colorwork sweaters I've done have been from charts I developed myself, and often using my own handspun yarn. How did I get to that point? Or, more importantly, how could you get to the point where you're designing your own colorwork patterns? Start with Someone Else's Patterns to Get the Hang of ItWe all have to start somewhere, and working from other people's stranded colorwork patterns is the perfect place to start. If yoked sweaters are your jam, notice how the increases & decreases are placed in the colorwork pattern. Often, this will be done in the "background" color to minimize distortion of the pattern. Keep that idea in your back pocket as you go forward in your design journey! The KnitOvation Stitch Dictionary (reviewed in my last post) has some great resources if you want to plug different stitch patterns into an existing design. Combine Multiple Patterns to Create Unique CombinationsUsing one or more stitch dictionaries, combine multiple patterns. Think diamonds that shift in scale, or different kinds of flowers...essentially, pick a theme for your sweater, find a bunch of patterns that fit the theme, then arrange them in a way that makes you happy. Experiment with charting all of them together so you'll get a sense of how they look next to each other. This might lead to: Learn How to Resize, Center, and Move MotifsYou may need to modify the sizes of some patterns, or to move the starting point of a chart. Sometimes this means centering a motif on the front, back, or sides of the body, or it means avoiding awkward placement of motifs. Reverse Engineer Other Stranded Colorwork DesignsFind a colorwork pattern you like, but don't have a chart for. See if you can chart it out! Remember, at this point, you're still learning, so you shouldn't be trying to pass the design off as your own. Find Inspiration for Your Own PatternsInspiration is all around, and once you've gotten the hang of stranded colorwork, you'll wonder how you can turn your favorite images, symbols, and shapes into colorwork patterns! If you're struggling with this phase, I highly recommend Felicity Ford's Stranded Colorwork Sourcebook and Janine Bajus' The Joy of Color. Chart Your Own Patterns with Dots on Graph PaperKnit stitches aren't square - they're rectangular. The ratios of the rectangles depend on your gauge. If this bothers you at the charting stage, you can buy knitter's graph paper. Usually, though, I just use regular graph paper and a simple trick - dots. A dot in the middle of each square for my pattern color is quick, and it approximates the visual effect of a knit stitch. This did take some getting used to, since I started my knitting journey thinking that a dot always represented a purl stitch in a knitting chart! I demonstrate this around the 4:22 mark in the video. Remember to Consider Your Float Length!Ah, floats. There's a lot to say about floats. How long should they be? How long is too long? I'll admit, I let some of my floats get pretty long when the pattern absolutely demands it. And I don't trap floats, since this usually shows on the front side. But as a rule of thumb, a float shouldn't be longer than an inch, or an inch and a half if you're feeling really daring. Remember to consider this when you're creating your designs - usually this translates to no more than 5 to 7 stitches one color in a row. Consider Value Contrast When Selecting YarnsA strong value contrast (dark and light) will help your patterns read well. Take a picture with your phone, then converting it to black and white - if the two yarns look like they're the same shade of gray, you don't have much value contrast. Low contrast can create subtle effects, but it will be harder to see while you're knitting, and the pattern will be less clear when you're done. High contrast patterns are easier to see. Don't Forget to Swatch!Swatching can help you refine your design. Often, I find that I'm overflowing with ideas, and I've designed two or even three sweaters worth of stitch patterns. Swatching helps me simplify & problem solve so that there's less ripping out once I'm actually working on my project!
Do you have a tried-and-true stitch pattern design formula? I'd love to hear about it! Last month, I started designing myself a new stranded colorwork sweater. (More on that soon!) This usually means a flip through my stitch dictionaries. And since Andrea Rangel just published the KnitOvation Stitch Dictionary, I thought this was a great chance to review it.
KnitOvation picks up where Rangel's first book, AlterKnit, left off. Both books are a very high quality, and I see them as excellent companions to each other. While KnitOvation has only 150 stitch patterns to AlterKnit's 200, but it makes up for this with a brighter, more cheerful color palette, plus an excellent section that walks the knitter through how their yarn might affect the stitch definition of a stranded colorwork pattern. To my delight, there's no right or wrong answer here. Want to do stranded colorwork with 2-ply? 3-ply? Mohair? Speckles? Tonal yarn? A specific sheep breed? Chances are, there's a swatch already in KnitOvation. Of course, your mileage may vary, but this is a great way to shortcut the swatching process. The designs, too, are fun and funky. They range from "modern geometric" to graphics like crabs and dinosaurs. If stranded colorwork is interesting to you, I'd highly recommend both books. My test warp is off my Cricket Quartet, my studio finally has great lighting, so now it's time to get weaving! Most weaving videos on the internet focus on the actual weaving process, and there are plenty of those coming up. Today's videos focus more on the design process. This is the process I learned when I first started weaving, and it's let me mostly design all my own projects without having to rely on printed patterns. I do use a few books for "design recipes," though! Here are a few of my favorites for 4-shaft looms:
In this first video, I walk through the math I use to make sure I have enough yarn. For this project, I'm using a 3-ply linen from Weaver House, sett at 20 ends per inch. My pattern has 268 ends, which lets me use the whole width of the Cricket Quartet. As promised in the video, here are the free downloads:
In this second video, I walk through my process designing the warp in WeaveIt. This isn't a full tutorial of WeaveIt, but if you need one of those, Sally has created plenty of helpful tutorials on her channel. If you're interested in using or modifying this pattern for your own use, there are free downloads below - one is to the WIF file, and the other is a printable PDF. 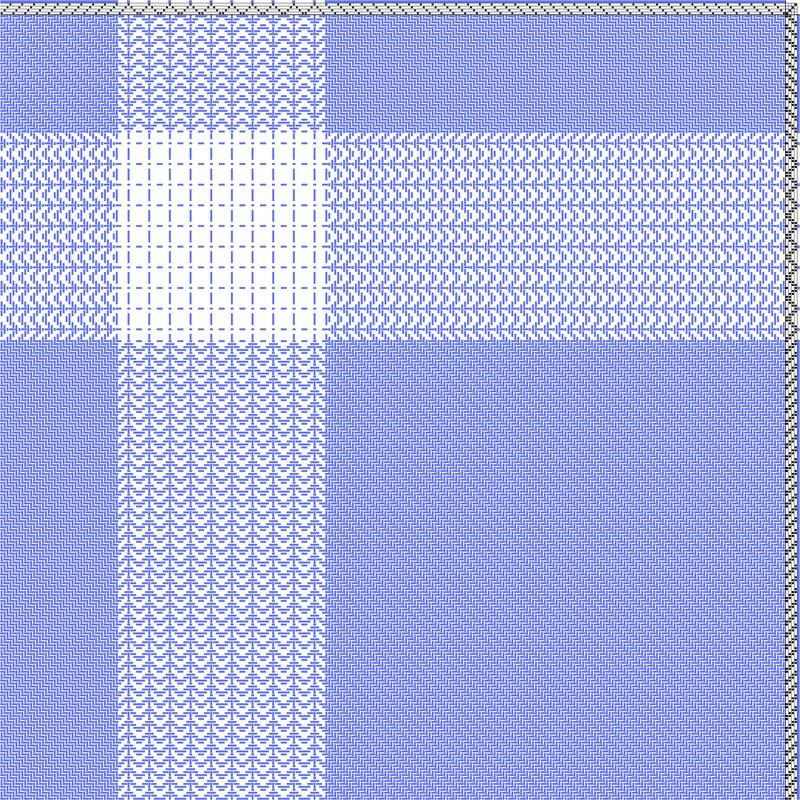
Now it's time to get warping! I'll be back with tips on how to use a warping board, check out what happened when I asked an AI chatbot how to do it.
Last year my husband and I packed up our home and business and moved across the country. This was a huge shakeup, and one of the biggest changes was my studio space. Lighting has been a huge challenge in this space. My previous studio spaces had lots of windows for great natural light, plus great overhead lighting. This one doesn't. Since we've had a lot of other big expenses with this move, I've decided to hold off on hiring an electrician to install hardwired lighting. This also gives me time to figure out exactly how I want the lighting in the studio set up. This approach has had its fair share of challenges! One of the first things that I figured out is that lighting a fiber arts studio is way different than lighting other spaces in a home. TL;DR - Use an online calculator to determine how much light you need. Use bright, cool light. Look for plug-in wall sconces and pendant lamps to get lots of light on the cheap. Your eyes (and your wallet) will thank you! Design Challenge #1: All the Light is in One CornerThis room was originally meant to be either a formal living room or a large dining room. And somehow, all the light ended up in one corner of the room. There are large windows that let in a lot of natural light in the summer and fall. There's also a ceiling fan with three small lights. I started out with using two floor lamps in the darker parts of the room, but even with a high-powered task lamp for extra lighting, I found I wasn't getting enough light. This led to.... Design Problem #2: I Don't Want to Hire an Electrician Just Yetand... Design Problem #3: Floor Space is at a PremiumAs far as I'm concerned, these two problems are related. In an ideal world, I'd have dimmable, moveable track lighting, so that everything in the room is well lit. But there are several reasons why that's not on the table right now. First, it's not in the budget. Second, I want to "live in" to the space and really make a solid decision before making big changes. Once I'd made that decision, I found that most of the lighting options were for floor lamps - like I already had. Adding more floor lamps didn't seem like it would solve the problem. Plus, they'd take up valuable space, add to tripping hazards, and potentially increase glare. I wanted a bright room, but one without too much glare. Everyone I consulted kept saying "wall sconces," but I kept thinking of the dim mood lighting in hotels. Plus, all the wall sconces I'd ever seen had been hardwired in - work that would require hiring an electrician. This conundrum kept me stuck for longer than I care to admit. Finally, I found out that there are plug-in wall sconces available. I bought two sets (four total), and it only set me back $60. They do require that you drill a few holes in the wall, but they are simple to install and connect to your existing outlet. No electrician needed, and no floor space sacrificed. Design Problem #4: Light Temperature Even after doubling the amount of light I had in my studio, I found it still wasn't bright enough. So I swapped out all my bulbs for brighter ones. And it STILL wasn't enough! At that point in time, all the light bulbs in our house were "soft white," or about 2700k. This is a warm light, and it seems to be popular among designers as the "best light" for homes. But we use our homes a lot differently than we did even a few years ago. A studio space is more like an office than a living room. While warm light is great for relaxing, cool light tends to be better for working. So out went the soft white bulbs, and in came (ever brighter) "Daylight" bulbs. These have a color temperature of 5000k, and helped make the studio feel better lit. Design Problem #5: How Much Light Do You Really Need?Switching to brighter, cooler lights was better - for a while. But I found I was still experiencing eye strain, especially when threading the heddles on my floor loom. I was limited to the times that the room was filled with natural light on a sunny day. Even then, I needed to have all the lights on and use a task lamp to be comfortable. This was limiting me to working from about 9 am to 11 am in the winter months, and those hours didn't always line up with the other things I needed to get done. I used an online lighting calculator to determine how much light I needed in my space. The answer: somewhere between 10,000 and 20,000 lumens. At that point, I had about 3,000 lumens from my overhead lighting and wall sconces, plus about 1,000 from my task light. At less than half the minimum, no wonder I still felt like it was too dark! I knew I needed lots more light, and I especially needed to add light to the middle of the room. This time, it was plug-in pendant lights to the rescue. A set of two cost only $39, and they were easy to install. Lastly, I made sure all the bulbs were as bright as they could be. There are currently 7 electric light sources in my studio - three overhead lights, three wall sconces, and one task lamp that I move around as needed. I have one more wall sconce to install (I'm waiting until I've finalized the room layout). Once that last sconce is installed, my ambient lighting will be around 10,600 lumens. Even without that last sconce, it finally feels bright enough. I no longer find myself wandering away from a task, only to later realize that it was because I couldn't see well enough. Each light is controlled by its own switch, which has definite pros and cons. On the negative side, it takes more effort to turn all the lights on. In reality, it's less than 30 seconds! On the positive side, it's easy to customize exactly how much light I need at any given moment, making it much easier to just get on with the actual work of fiber art!
Products Mentioned
I also have read several books that have impacted how I think about designing my studio spaces: This summer, Schacht Spindle released the Cricket Quartet, an attachment that converts their Cricket rigid heddle loom into a 4-shaft table loom. The claim is that the Quartet allows you to switch back and forth at will between a rigid heddle loom and a 4-shaft loom. At $450, this is pretty expensive, considering you also need to have the Cricket, which is currently running around $240. So all in, this would cost $700, which is a lot for a table loom. (For comparison, a used 4-shaft table loom in working condition should be around $400).
However, I already had a 15" Cricket rigid heddle loom that I used to use for teaching and demonstrations. I enjoy using it, but I knew I would use a 4-shaft table loom more. We recently moved, and my weaving space is much smaller than it used to be, so space is at a premium. Gone are my days of acquiring looms just for fun! After looking at used table looms on Craigslist, Facebook Marketplace, and Ravelry, I realized that I had already had some experience with a lot of the looms out there, and found them to be too big, too loud, or too flimsy. So I decided to give the Cricket Quartet a try. As always, Schacht does a really nice job of packaging with minimal waste, while still protecting everything inside. Soon I will be putting the loom together and using it - I'll be sure to report back! |
Archives
January 2024
Categories
All
|
||||||||||||||
 RSS Feed