|
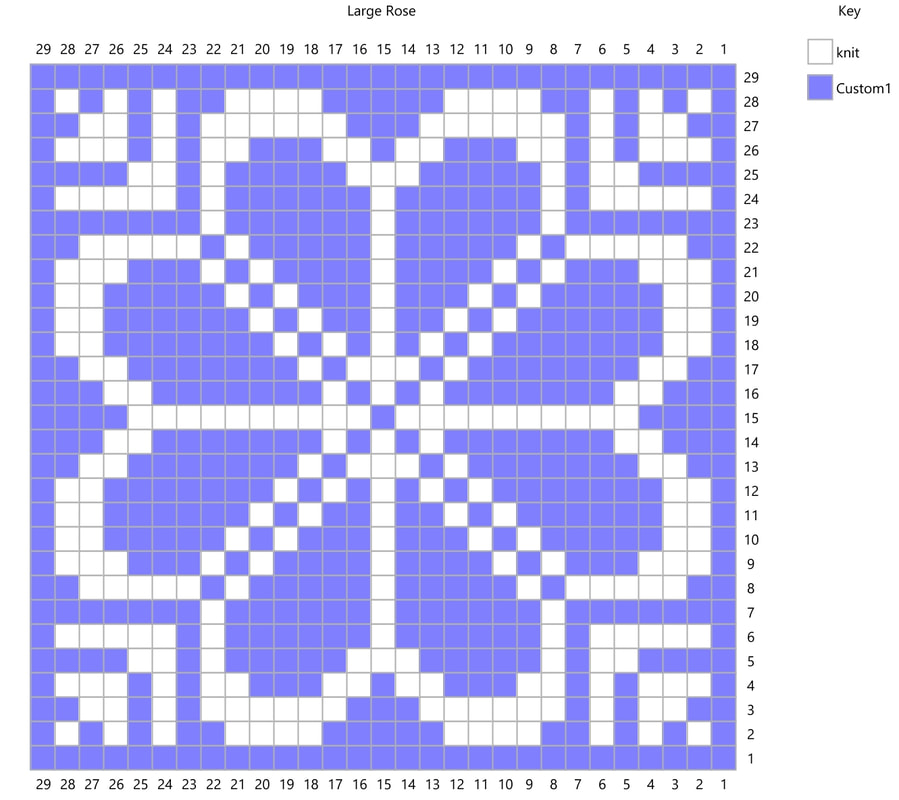
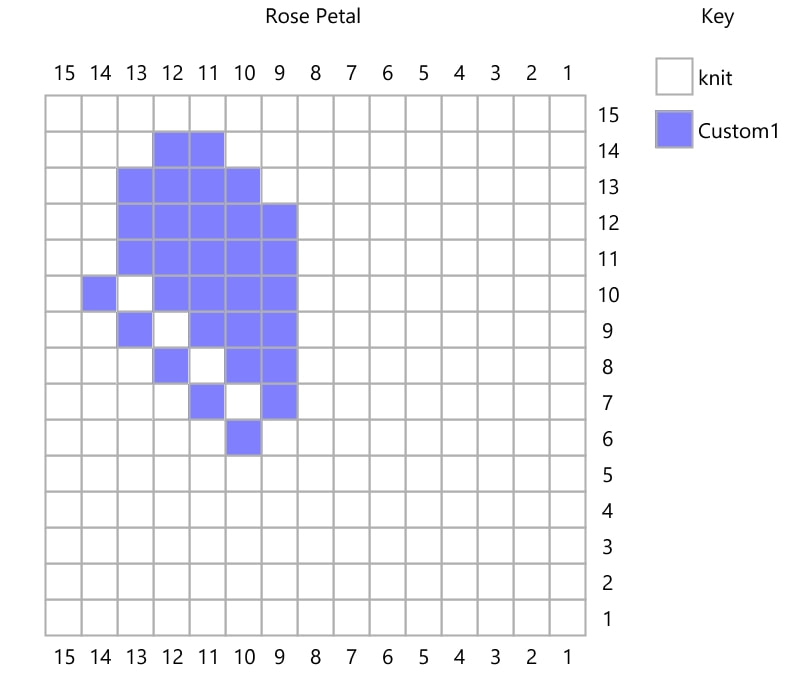
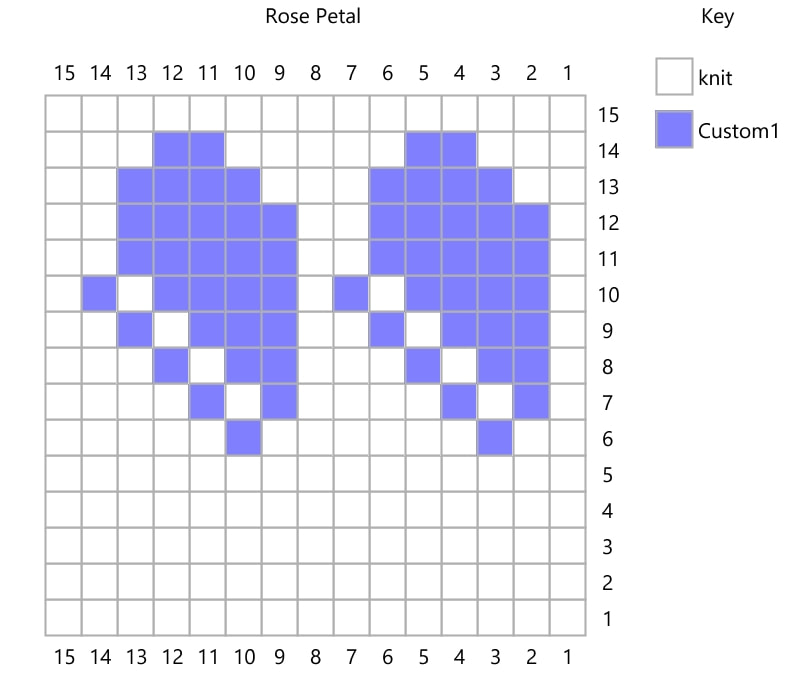
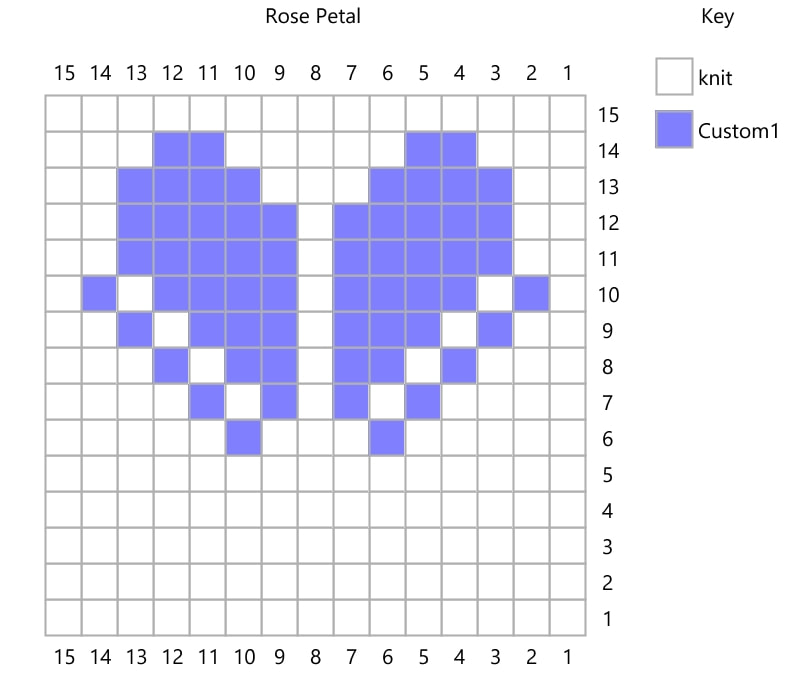
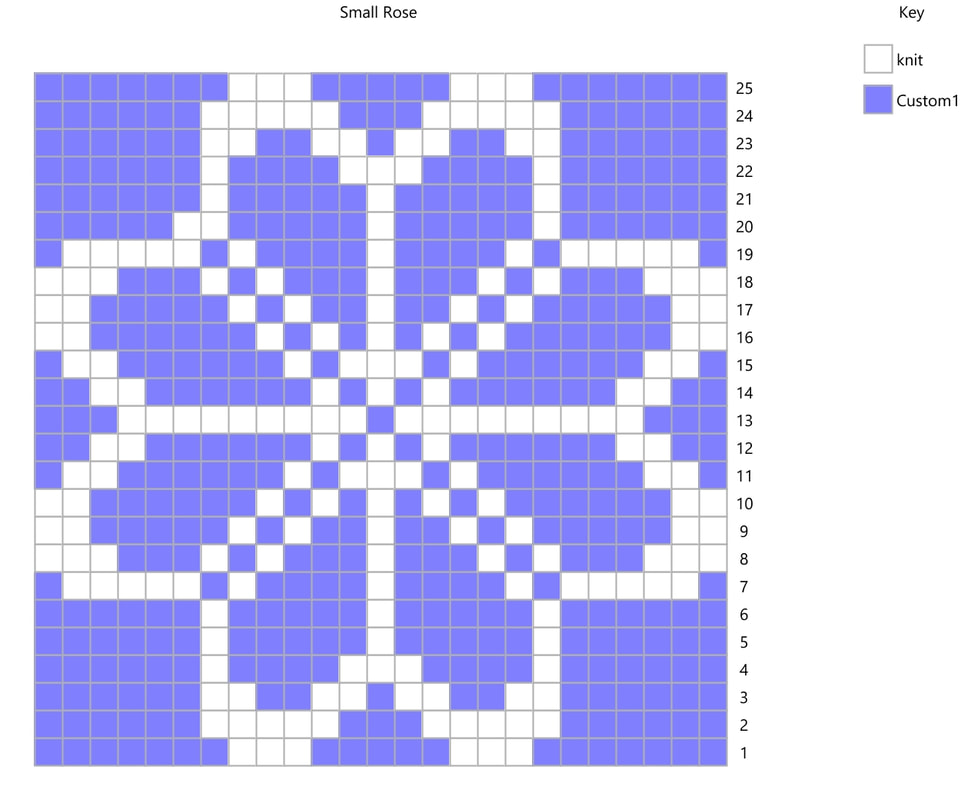
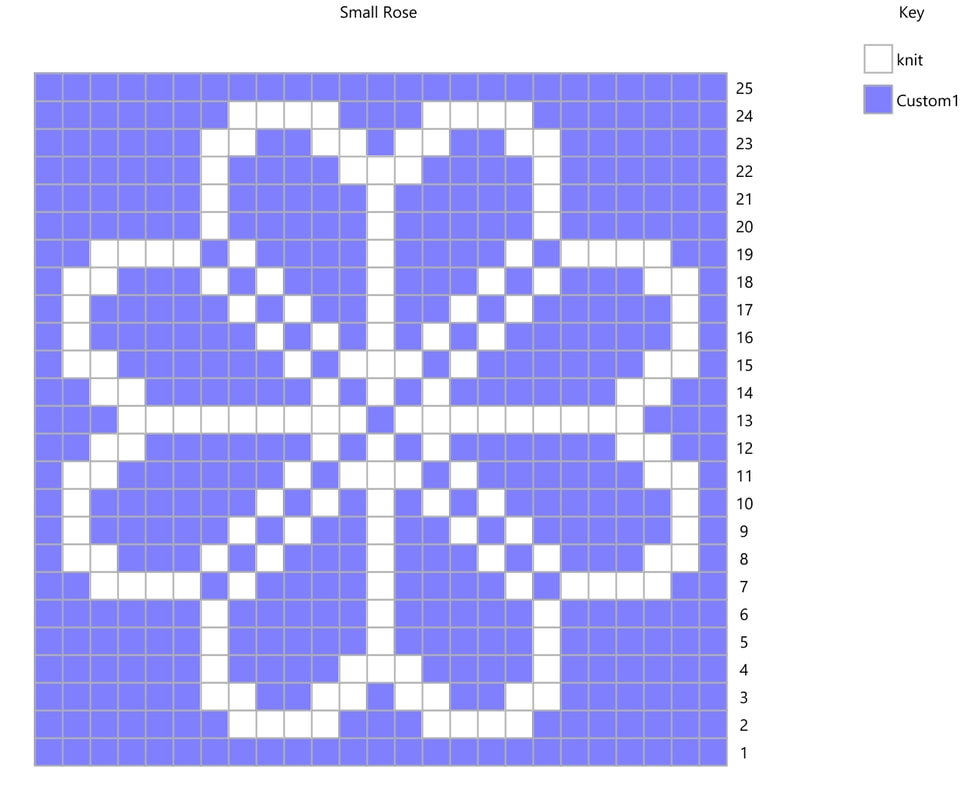
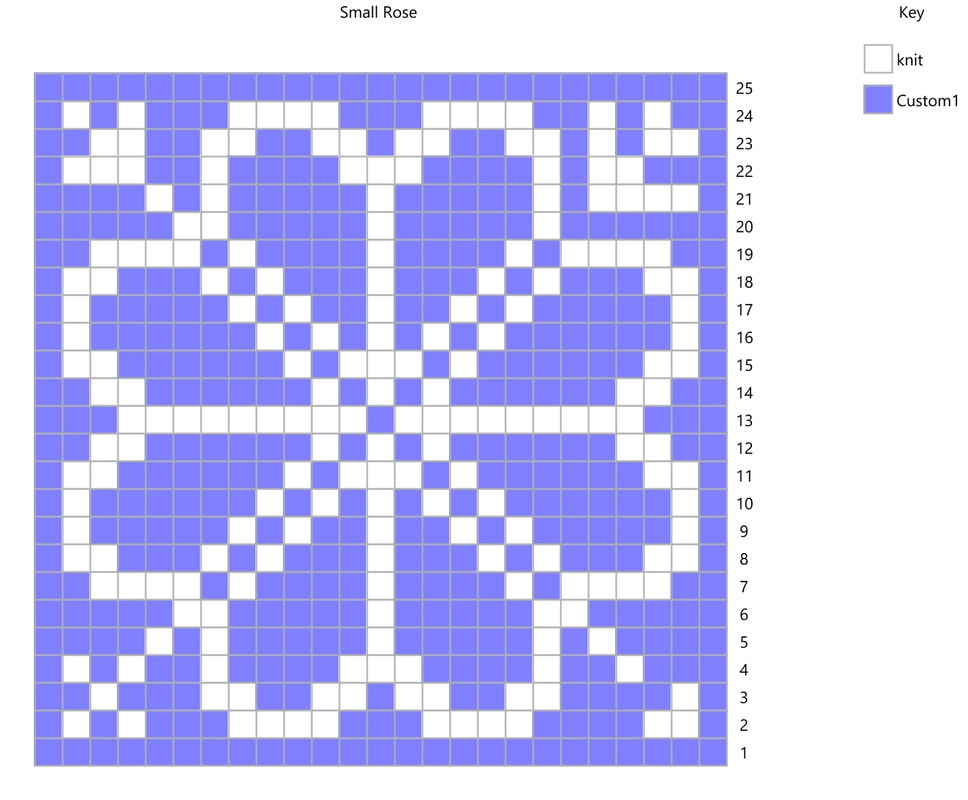
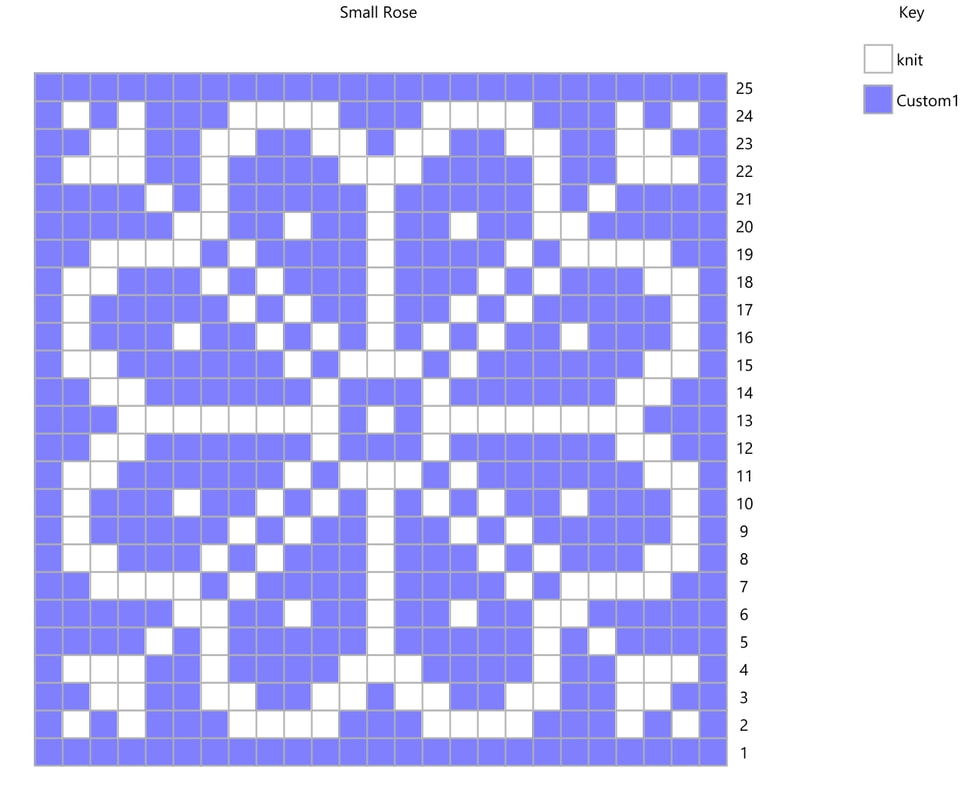
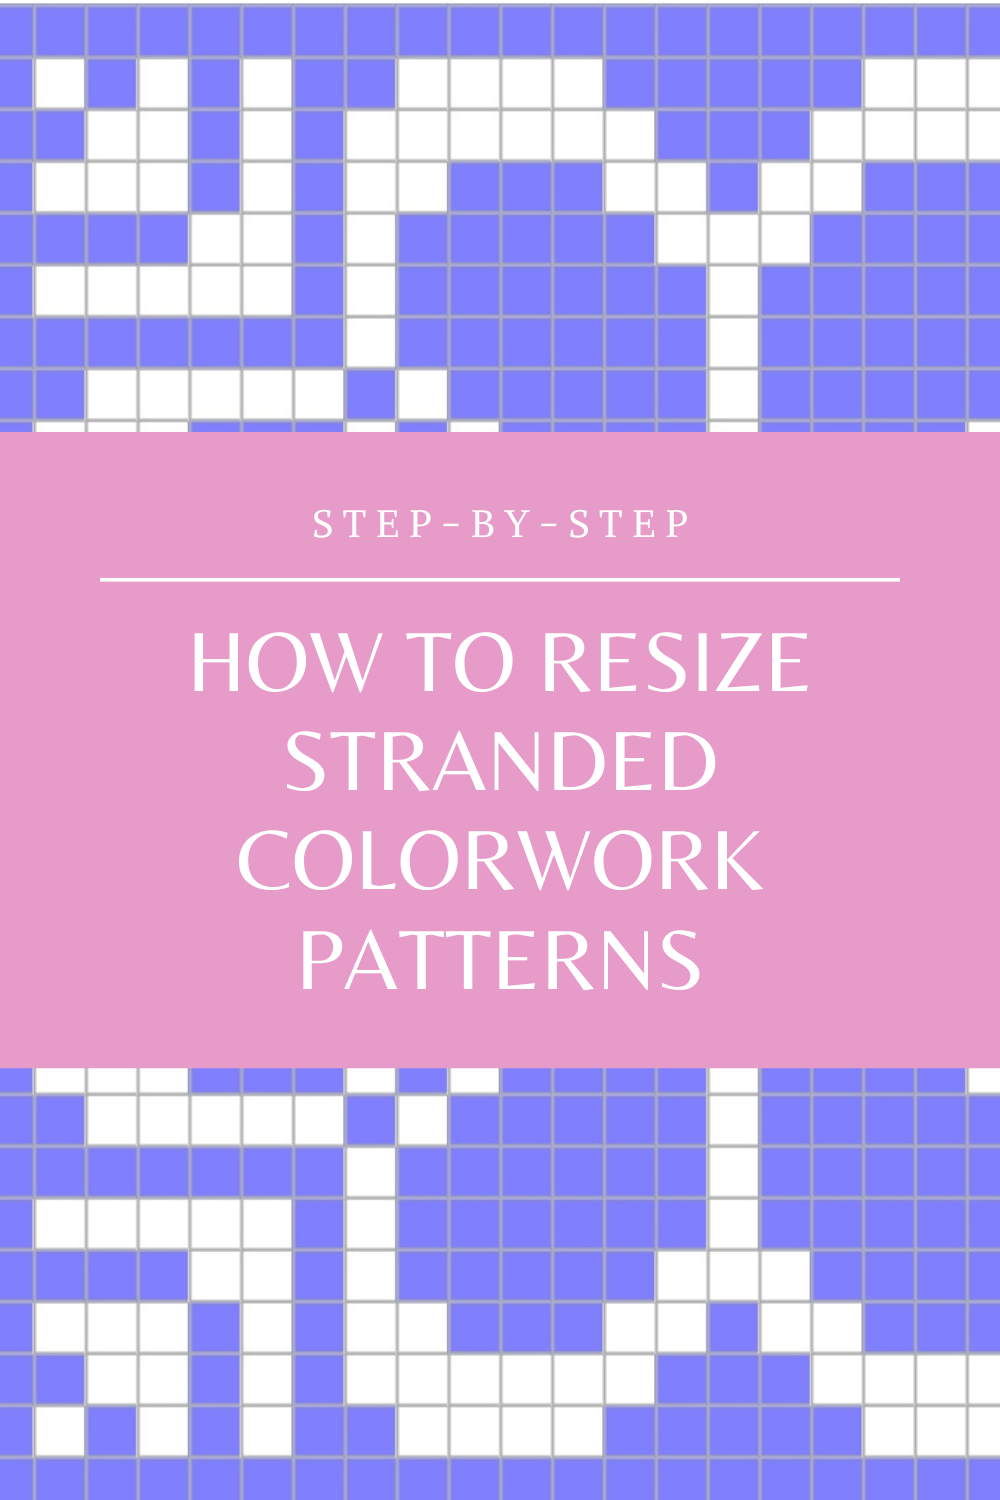
Have you ever fallen in love with a stitch pattern, but it's not quite the right size? In this post, I shared how to resize a cable pattern. Today, I'll share one approach to modifying the size and design of a stranded colorwork pattern. This is a great technique to use if you're using handspun yarn that doesn't exactly match the gauge of a pattern, or if you need to substitute yarn. In this example, I'm sizing down, but it would be just as easy to make the stitch pattern larger with these same ideas. In this example, I started with a 29-stitch-square repeat of a traditional Norwegian 8-petal rose. I liked this pattern, but needed a stitch pattern that would fit into a 25-stitch square. The easiest, and most obvious choice in my situation was to remove the border of solid color stitches, which took me down to 27 stitches. I still needed to reduce 2 stitches on each side, and chose to start with the petals. By drawing a petal that has one less row and one less column, I've reduced the size of the pattern. Expanded over the entire repeat, this will get me to the right number of rows and stitches. At this point, it would be totally fine to draw out the rest of the pattern by hand. However, a little bit of copy/paste/rotate action saves a lot of work. This also helps to make sure that any inconsistencies get repeated (which is how patterns are made). The next step is to fill in the outer petals. You'll notice that in the image on the left, the petals touch the outer edges. This isn't a problem if they touch a border that is the same color as the background. However, to make sure the pattern is clear, you can make the outer petals thinner, as in the image on the right. Now it's time to fill in the corner patterns. Because there are fewer stitches to work with than in the original, this pattern must also be adjusted. There are lots of options - I've placed a different pattern in each corner to show the possibilities. Normally you will choose one pattern and repeat it in each corner. At this point, the pattern is fully resized and you're free to use it in your pattern, or you can continue to play around with modifications. Here I've updated all the corner patterns with my favorite design, modified the center of the rose to be a little less busy, and added dots at the center of each petal.
It's easy to play all day with modifying stitch patterns on graph paper or on the computer, but nothing beats a swatch! Because a knit stitch isn't exactly square, it's important to check your pattern in a swatch to make sure it will turn out the way you want it to. After that, the next step is to place your new design into the pattern you want to use, which will be the topic of the next post. Comments are closed.
|
Archives
January 2024
Categories
All
This website uses marketing and tracking technologies. Opting out of this will opt you out of all cookies, except for those needed to run the website. Note that some products may not work as well without tracking cookies. Opt Out of Cookies |
 RSS Feed