 I guess this isn't your average knitting post. It's more about organizational techniques and conquering the overwhelm that comes with wanting to do all the yarny things. One of my goals over the last few weeks has been to reduce the number of projects I'm working on so that I can focus better and feel less stressed. I'm sure that will always be a work in progress, but here's how I'm doing it so far. Last month, I decided I ought to do something to get my pile of works-in-progress under control. It turned out to be a good tool for managing my stress levels. After I wrote the list of to-dos, I created a modified Scrum/Kanban board on the whiteboard in my craft room. That wasn't my plan, it just sort of happened. As these things do. Scrum and Kanban boards are part of "agile" workflows, often used in the software development world. I first heard about them in Jeff Sutherland's book, Scrum: The Art of Doing Twice the Work in Half the Time. To oversimplify, the boards break down tasks into small chunks, and are designed for teams to optimize their productivity and efficiency. The point isn't to turn people into robots, but to remove the blocks that slow us down. In short, it's a visual organizational tool. When I first read the book, I was still working in the corporate world and looking for a way to do it "all." (Whatever that is.) I tried applying the idea to my life and projects, and used it for a couple of weeks before chucking it to the curb, probably to test out ideas from the next efficiency book I laid my hands on. The reality is that I'm very picky about my planning tools, and I wasn't exactly sure how to modify the idea to suit me. This time, though, I think I have something that makes me happy. My board looks something like this: 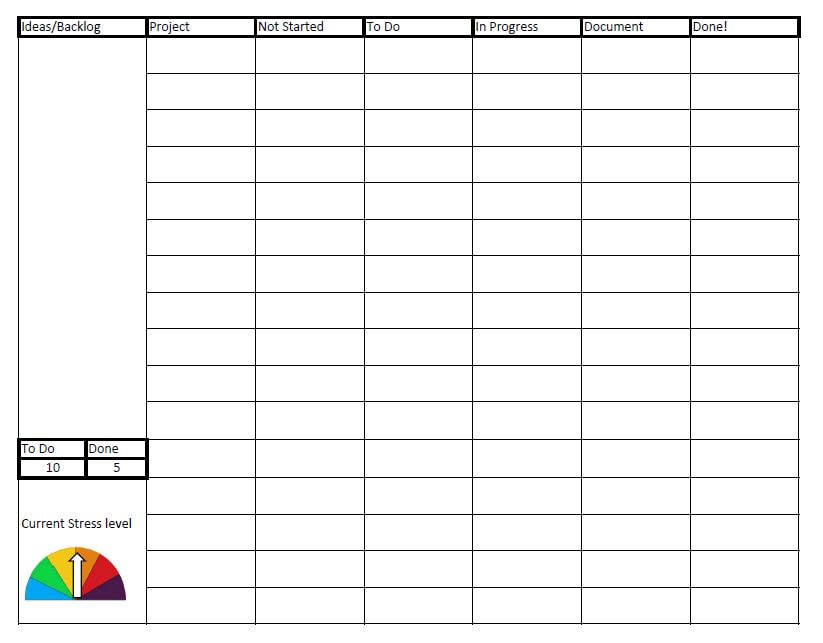 The original scrum method has you moving post-it notes across the board. Each element of a project has its own post-it note, but that felt too messy to me in the original iteration. So instead I put it all on a whiteboard and can erase things as needed. And the original scrum method suggests a separate board for every project (and maybe only doing one project at a time), but my personal projects aren't as complex as programming computer software, I'm not working on a team, and I tend to have several (many) projects going at once. So each row of the board is functioning as a miniature board on its own. Often, I don't put descriptions in every box, but simply move a big "X" from column to column as I work on the project. Anything that I'm working on that takes a significant chunk of my time or mental energy gets its own "project." The normal life of a project on this board would something like this:
The "Done" column on the far right isn't just for when the whole project is finished, but also for when elements of a project are completed. For a spinning project, that might mean that when I finish spinning the singles, the word "Singles" goes into the Done column, and I add "Plying" to the to-do column. The Done column is a place for victories, and every win counts. Since I'm not working with a team, it's not critical that I update the board every single time I pick up or put down a project. It's more of a big-picture way to see what I have going on, and to consider whether or not I really need to add another project for myself. When one project is stalled for too long, it usually means there's a hidden project-within-a-project, and that I need to figure out what that hidden project is before I move forward. For example, "make yarn labels" sounded like a simple project. But really it looked like this:
Sometimes I think a project should be simple and just take one afternoon. It might, if it's something I've done before and already have a workflow or template for. Often, though, something brand-new involves lots of unexpected steps, learning opportunities, and opportunities for refinement along the way. Sometimes it's overwhelming. The project board is just a visual reminder that helps me figure out a way to complete the project instead of wasting my energy on starting projects but never finishing them. Two keys to my modification are in the very first column. They're really marginalia, but make a big difference to me in the usability of the board. The To-Do/Done tally is yet another way to remind myself how much I have to do, and a reminder to pare down the number of unnecessary projects. The number of "Done" projects reminds me that I am capable of getting things done. (Unlike the "Done" column on the board, this tally is only for projects that are completely finished.) The stress level meter is modeled after the fire danger signs you see in national forests. It was something I always wanted for my cubicle when I was in the corporate world, but didn't want clients or the higher-ups to see. If I had no stress at all, that must have meant I wasn't working hard enough. But if I was too stressed out, that would have meant I was inadequate. Now the meter is just for me, and I'm glad to have it. My meter usually hovers somewhere between yellow and orange (that's just who I am), but if it were to creep over to red or purple, that would be another reminder to assess how much I've got going on. I'm currently thinking that I'll re-do the board each month in conjunction with writing my WIPs posts. Hopefully as time goes by, that will help me recognize what's realistic to get done in a month. How do you manage your works-in-progress? xx,
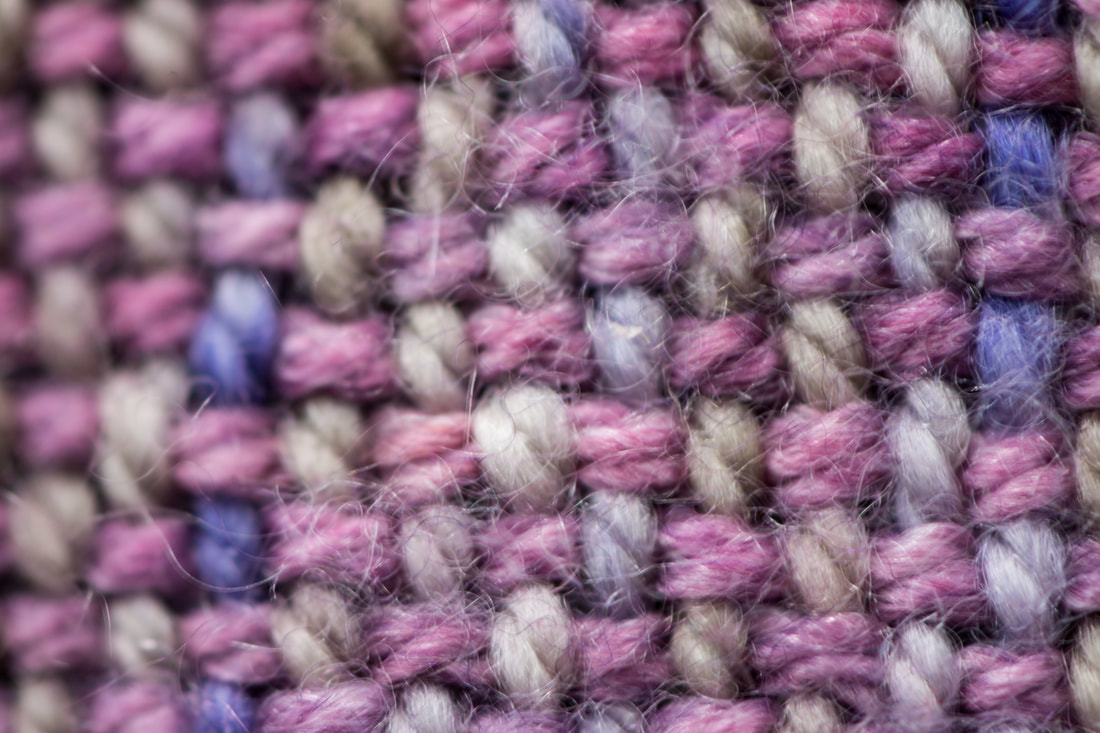
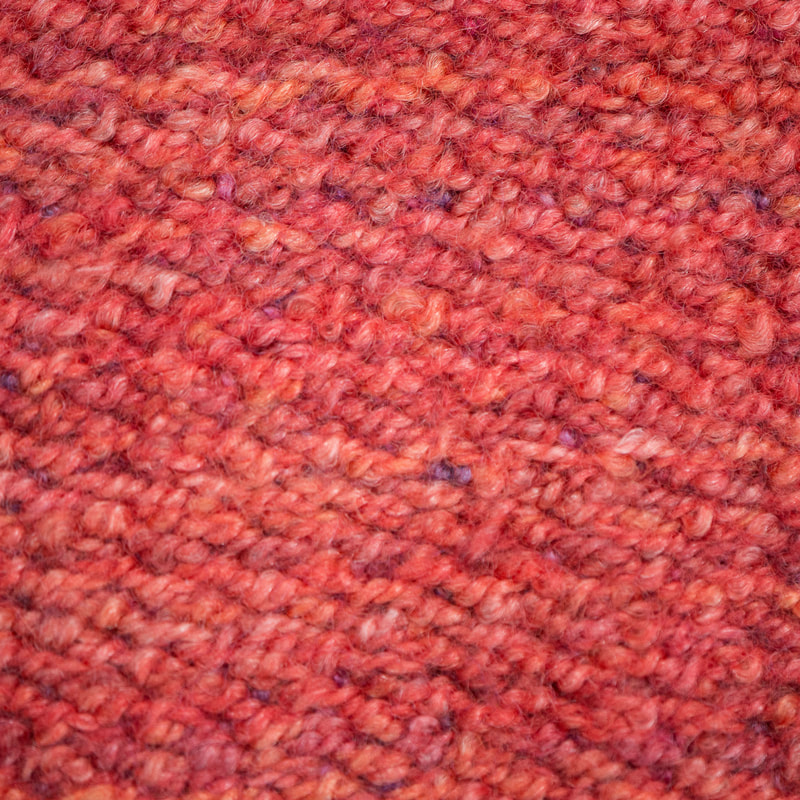
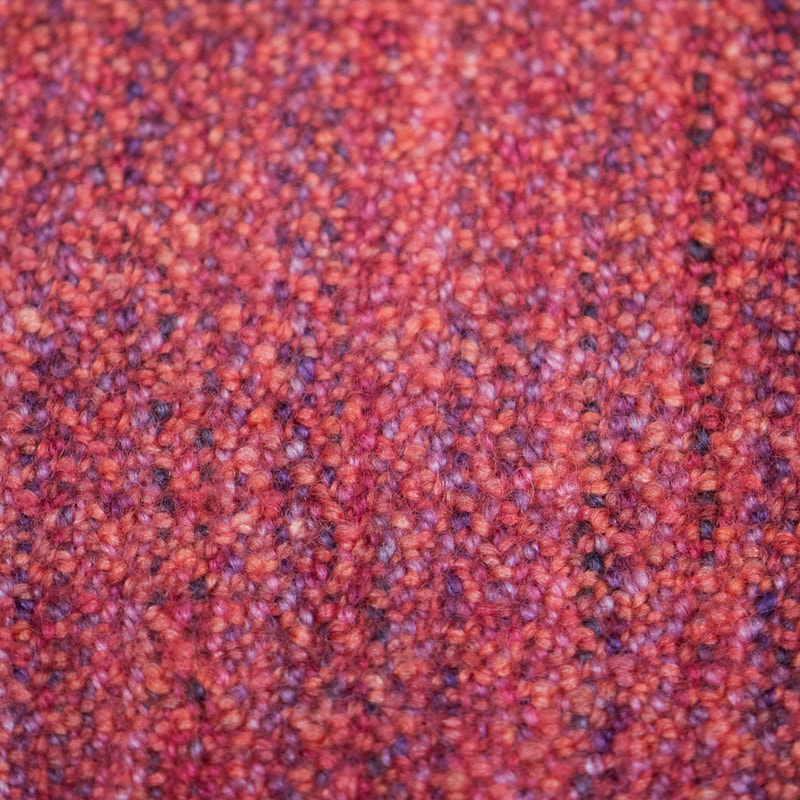
Pamela 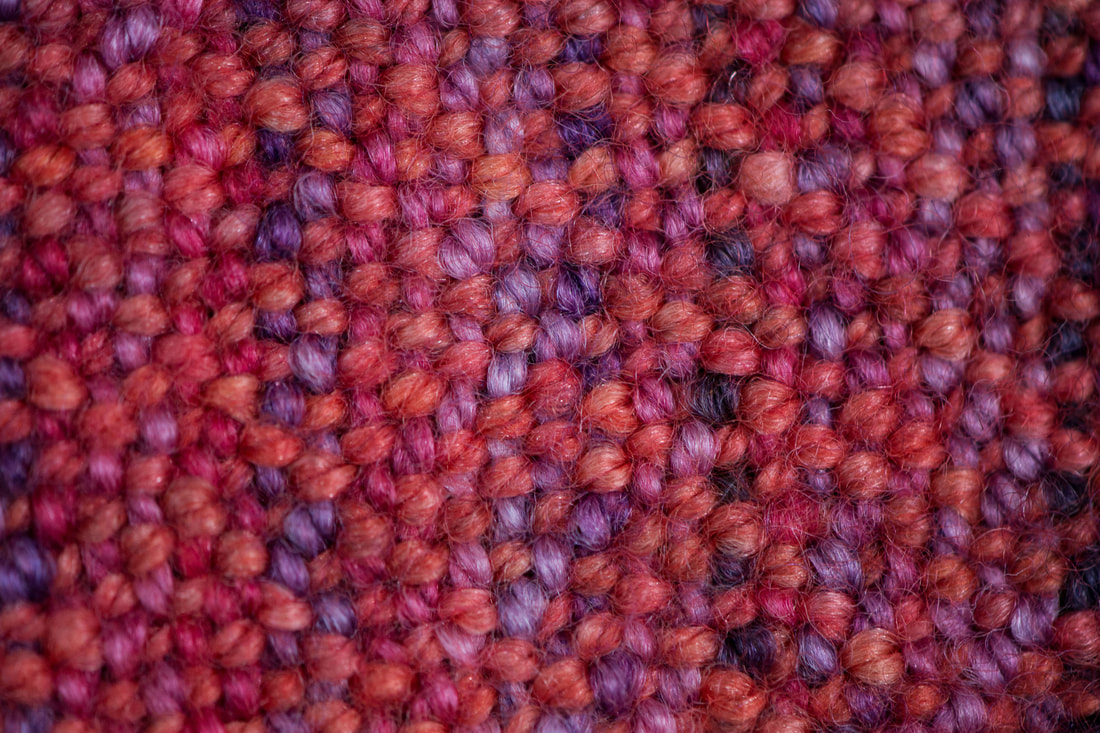 For Christmas, I wanted to make something special for someone who loves orange. Orange is one of those colors that creates a visceral reaction - most people either love it or hate it. Having done time in a blaze orange velour mini-cubicle, I tend towards the hate it camp. So what to do? I put on a warp of one of my favorite hand-dyed colorways, "Bursting Berries,"* in a merino/silk blend. It's a most decidedly pink/purple color, with a few hints of orangey red. But still not orange. I threaded my loom in a simple point twill (1-2-3-4-3-2-1), set at 15 ends per inch, and got ready to experiment. I had dyed some orange yarn in the same merino/silk blend, and wove it in three different ways. First, I did a 2/2 twill, which came out looking like this:  As I'd predicted, it came out mostly orange with just a few hints of warm purples and reds. A 2/2 twill looks pretty much the same on both sides. Next, I wove lots of plain weave, and got what you see in the top picture. I liked this even better, since the orange was toned down some more. For the last bit of orange, I wove a 1/3 twill. This type of twill is different on each side of the fabric. While I was weaving it, it looked very, very orange (left image below), but I fell in love with the "back" side of the fabric (right image below).
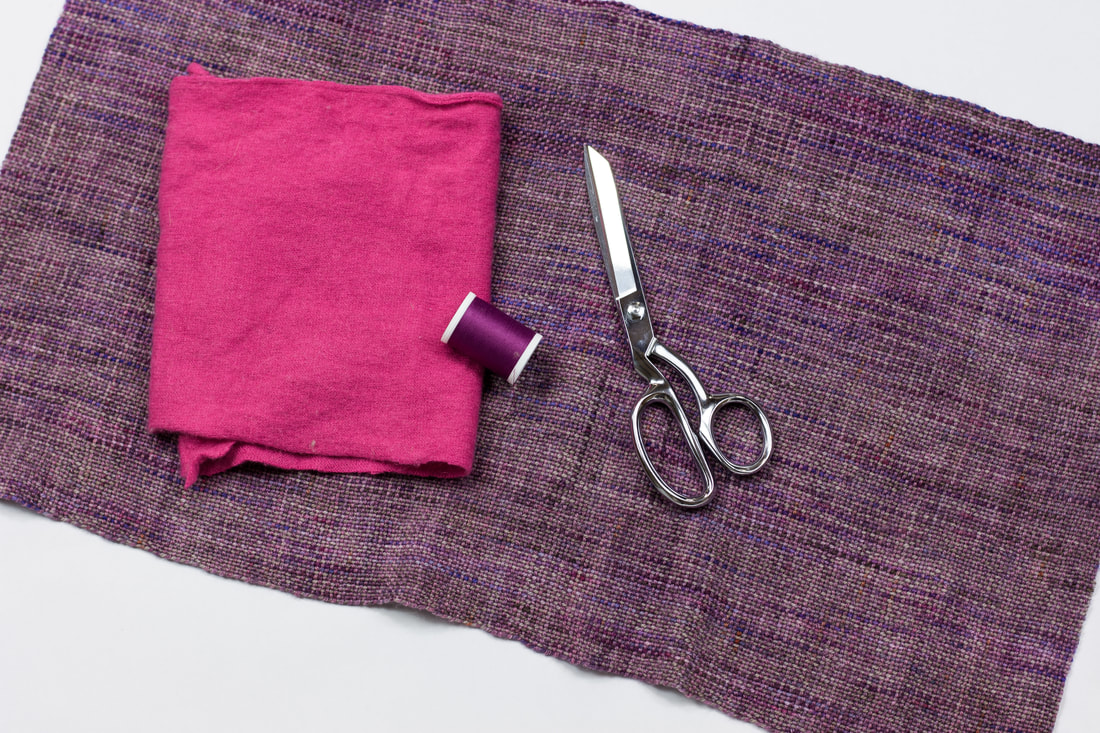
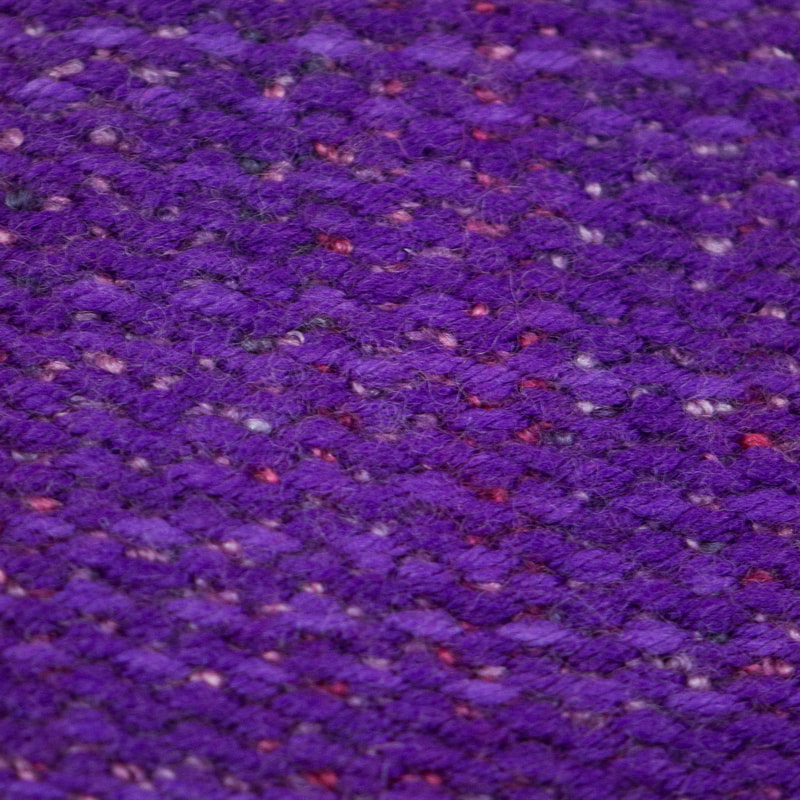
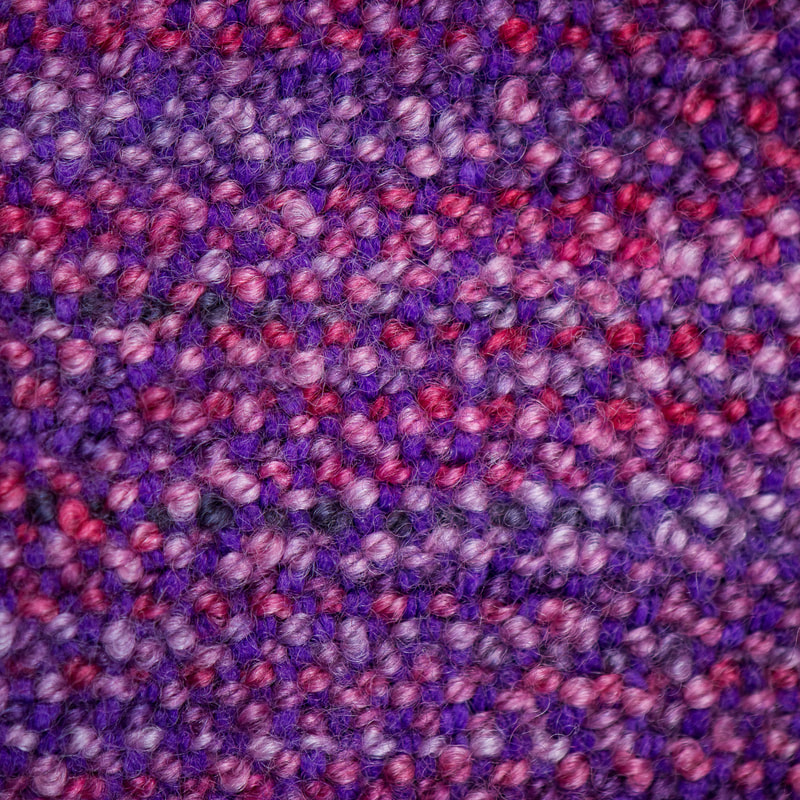
I ran out of weft yarn before I ran out of warp, so I decided to experiment with another color. I had just a little bit of purple sock yarn left over from a previous project (Tough Love Sock in "Grape Jelly"), so decided to use that up. I wove this one in a 1/3 twill. The results:
I loved the very pink/purple combination most of all, but unfortunately, there wasn't enough fabric to make anything out of it. Of course, the whole point of sampling new ideas at the end of your warp is to get an idea for next time, and I definitely have a few new ideas percolating around in my mind! I wet-finished the fabric once it came off the loom. The wool felted a bit, as expected, and the silk didn't shrink, creating an interesting boucle effect. The superwash sock yarn weft in the purple sample didn't shrink at all, but the warp did, and I ended up liking this fabric best of all. I ended up using the different orange fabrics to make a trio of project/notions bags, one of which made its way to someone else's Christmas tree before I could photograph it. The contrasting fabric is felted wool fabric (store bought). 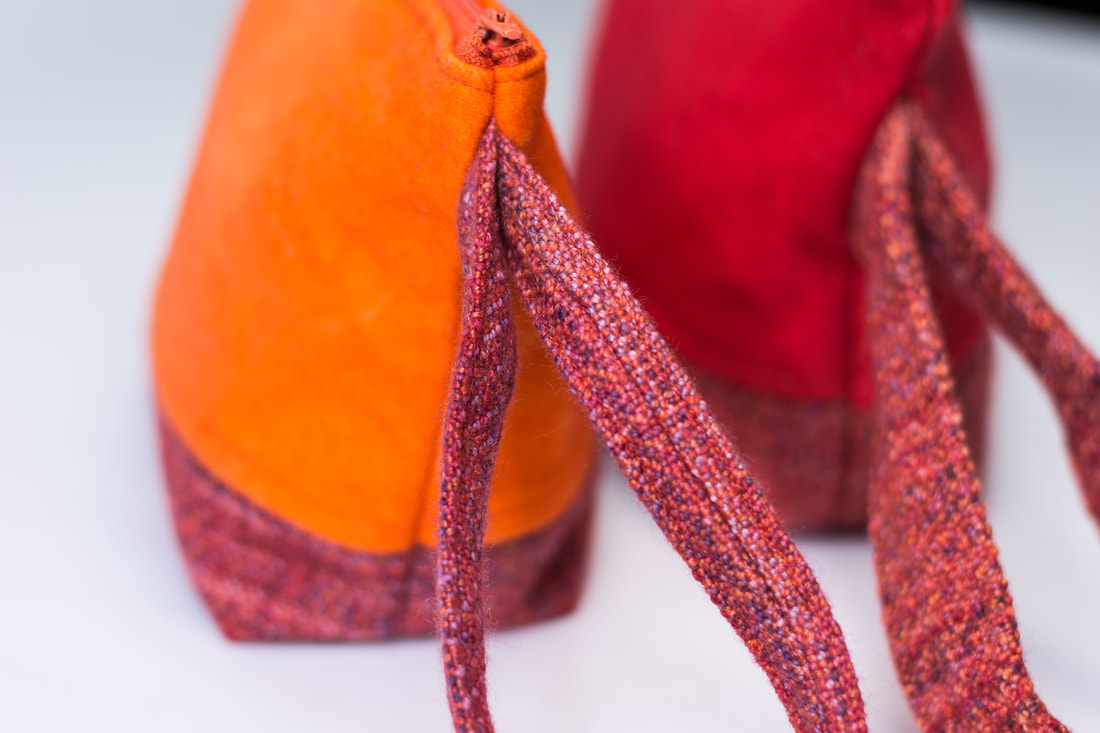 Even though I loved the 1/3 twills the most, they were the hardest to sew with. Like stockinette stitch in knitting, 1/3 twills tend to curl, and this was difficult to work with in the sewing up. And the fabric itself was thicker, making turned loops harder to make. It was really fun to see all the different possibilities I could create with different colors and textures in just one warp. I can definitely see more color experiments in my future! xx, Pamela *Not the same yarn base as the link, but the same color. And yes, that's my Etsy shop!
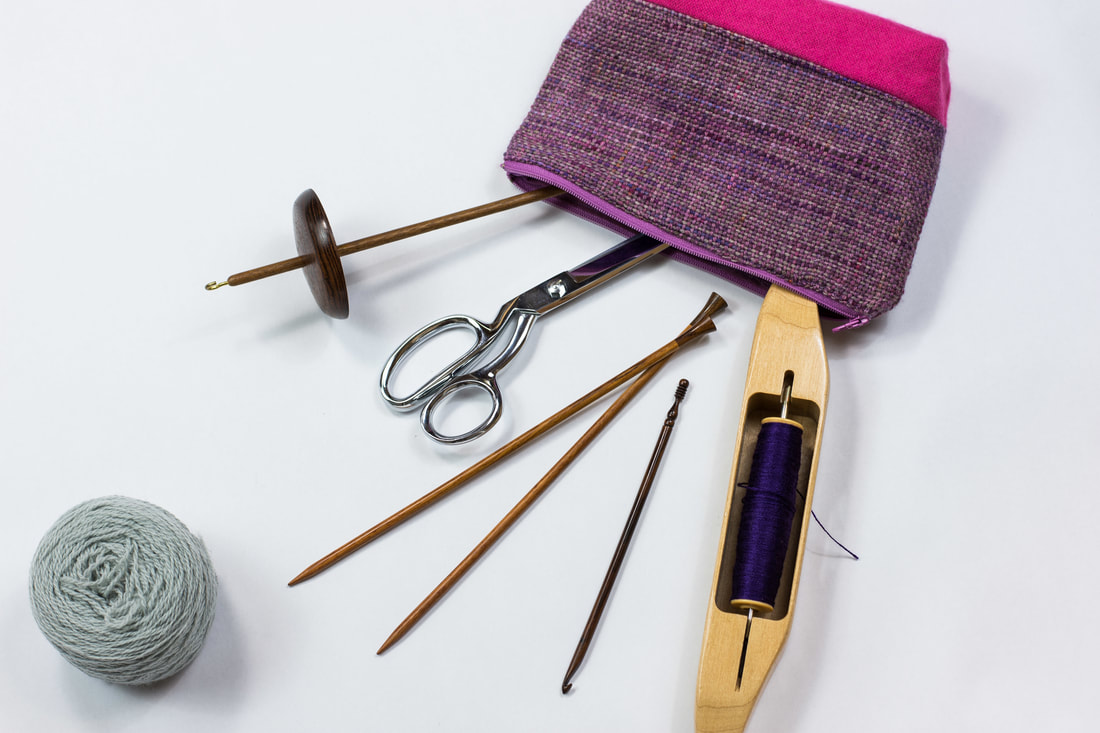
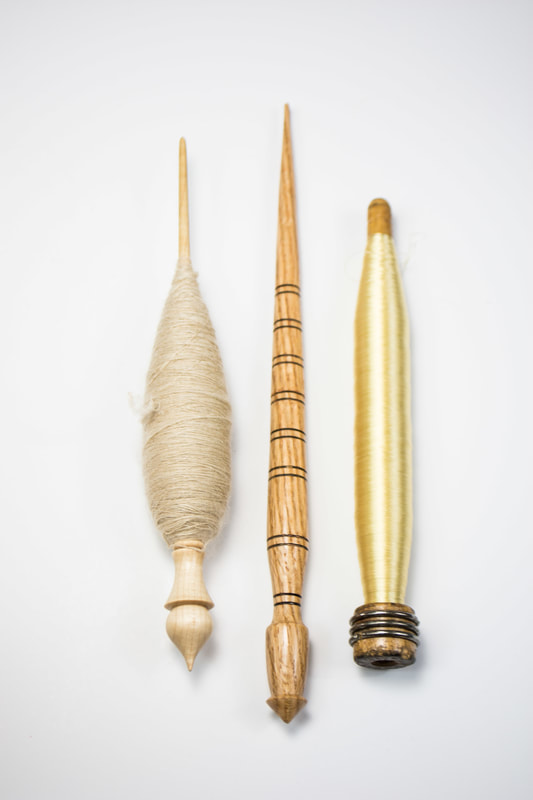
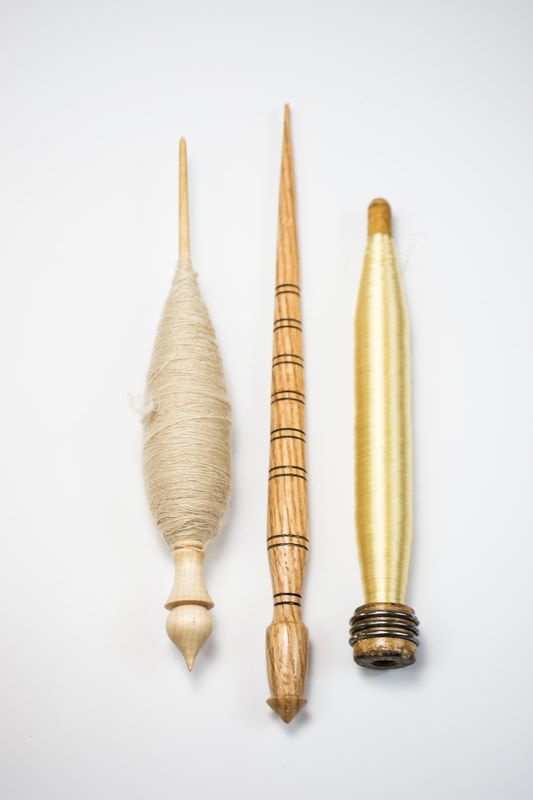 Somewhere, somehow, the thought occurred to me to spin and knit lace shawls in the traditional ways of different places around the world. First it was the Icelandic shawl. Now it's cashmere. When I first started spinning, I did not love spindles. My first spindle was a drop spindle, and I always say it's called a "drop" spindle for a reason. But when I learned how to spin on a wheel, suddenly spindles made sense, and I somehow began collecting them. And years before that, I'd checked out Galina Khmeleva's book Gossamer Webs: The History and Techniques of Orenburg Lace Shawls. At the time, I'd just finished knitting my second lace shawl and was intrigued to find out more about lace knitting, but felt the intricate Orenburg shawls a bit out of my reach, both in terms of skills and budget. But last spring, when I saw Galina's company, Skaska Designs, at a fiber festival, it made sense that I should pick up a Russian spindle of my own. 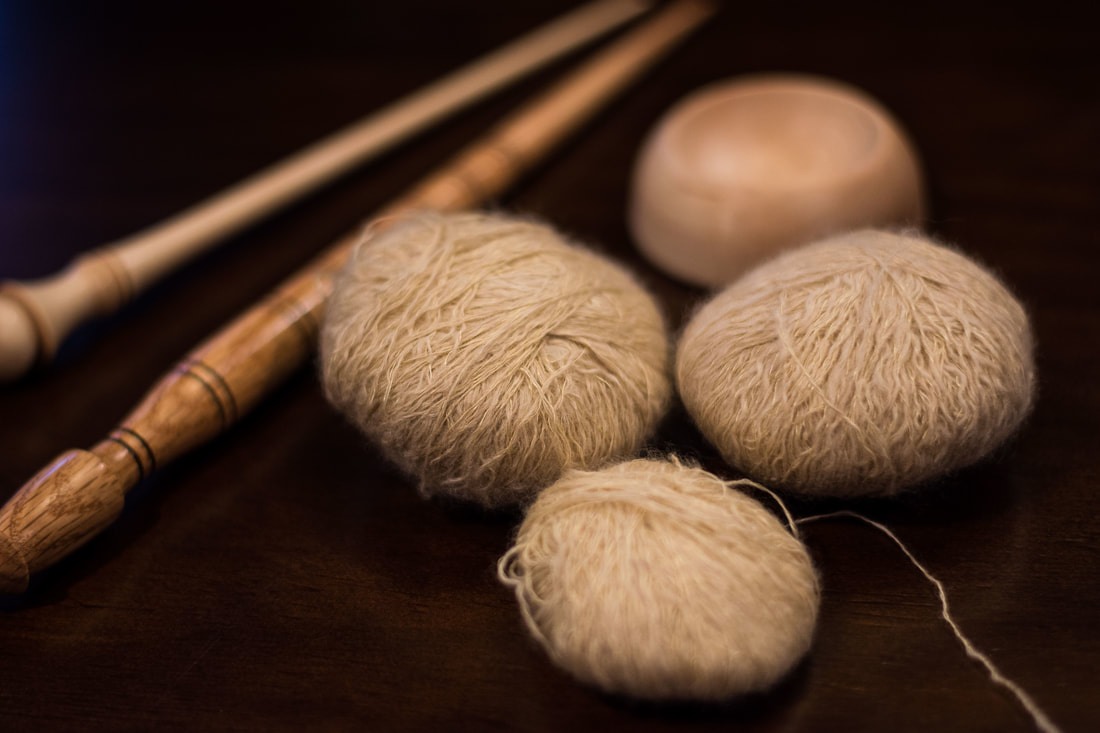 Russian spindles are typically support spindles - meaning they don't hang suspended while you're spinning like with a drop spindle. Instead, you use a bowl and spin the spindle like a top. It took me a bit of practice - and watching some videos - to get the hang of it, but once I did, it was pretty easy. Of course, since I was spinning laceweight yarn, it took me quite a while to spin the singles. I had about two ounces of cashmere, and from what I can tell, I started spinning it in early June. By November, I'd spun it all onto two spindles, and had purchased plying silk and a plying spindle for the next stage of the project. Orenburg spinners ply their goat down singles with commercial silk, so that is what I used (top photo, far right). Since the cashmere I used was a creamy off-white, I decided to skip white silk and try something different. The gold color adds depth to the yarn. Plying was completely different than anything I'd done before too. You wind the two yarns to be plied (one ply cashmere, one ply silk) onto a plying spindle (top photo, center). Only after all the yarn has been wound on the plying spindle do you add twist. And as twist is added, you wind the yarn around a paper disc to make a little ball. Watching Galina Khmeleva do it makes me feel painfully slow, but it's certainly an interesting technique. The twist is set by steaming the balls. 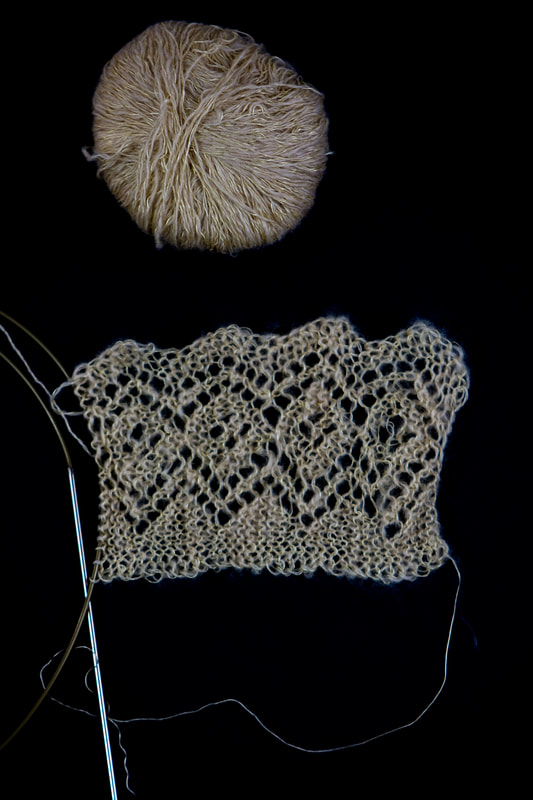 Now it's time to knit, and I have my eye on this pattern. I really have no idea how much yarn I have, and whether it will be enough, but it's a fun experiment! xx,
Pamela 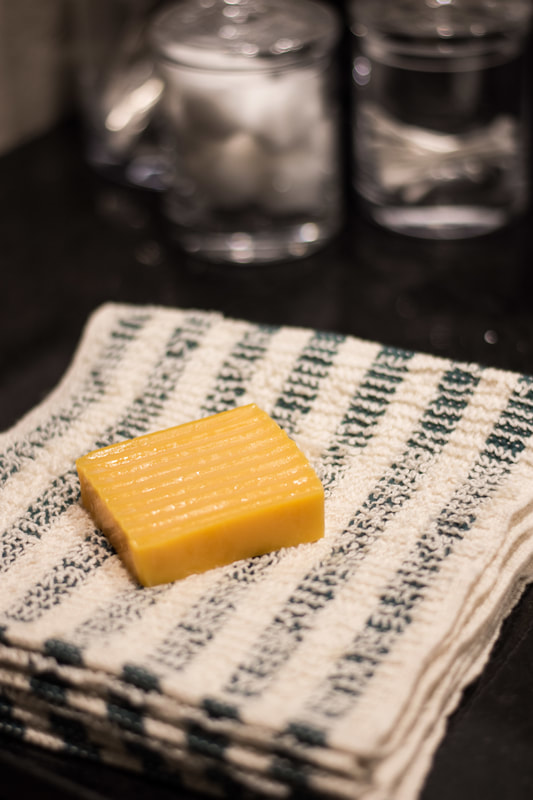 The first official FO of December, and these were a long time in the making. Made on my rigid heddle, after instructions from Inventive Weaving on a Little Loom. I'd made similar washcloths before with the same warp yarn, which I'd also used as the weft. While I love them, for these I used a thinner weft for a more “traditional” washcloth feel. Of course, using thinner weft meant the weaving took much longer, especially because it meant there was more looped pile to do. The looped pile technique is done by picking the warp up and looping it over a knitting needle, and it’s pretty time consuming. 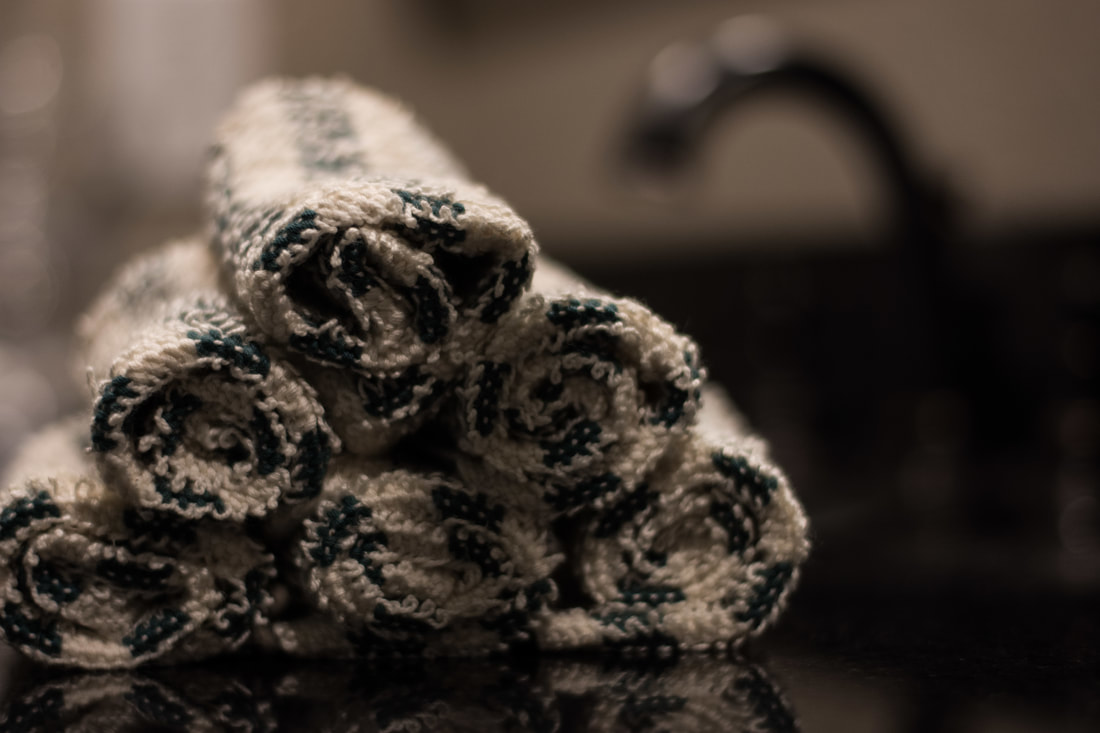 I'm not sure exactly when I started these, but I know it's been several months, because I took it with me to my Guild's rigid heddle group in September, and not in October because I felt a little bit guilty for not having something new to share. Now that it's December, I was determined to have them finished. Plus, after listing out my works in progress the other day, I realized just how much stuff is on my to-do list. (And of course, after I hit "post" I thought of about a dozen more. Which led to this: 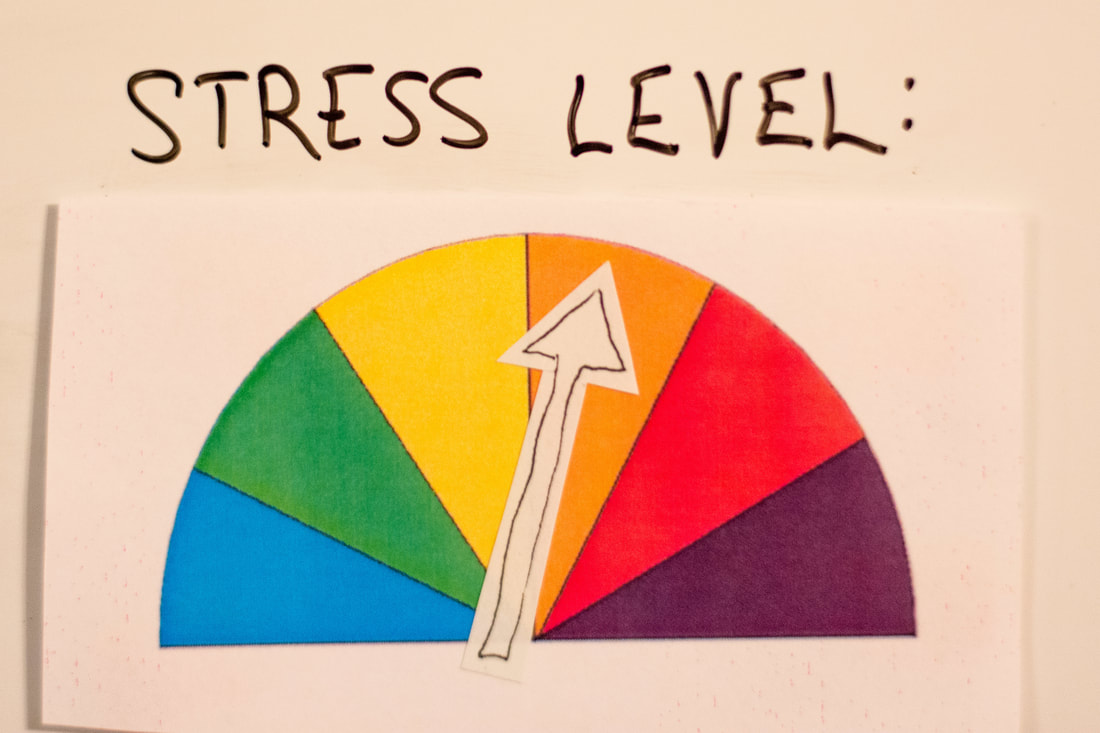 In truth, my stress level usually hovers in the yellow-orange range, and only hits blue-green when I'm asleep or just had a massage. Thankfully, red-purple stress levels are fewer these days and usually pretty short lived. Anyways, knowing my stress level helped me identify what would help lower it. The solution: cross some things off that to-do list! Really, there were only 1 1/2 washcloths left to weave. Once I set my mind to finishing them, they went quickly enough. Off the loom, they went for a run in the washing machine, then got rolled hems. And now I have new washcloths! I'd planned on weaving another set with the colors inverted, but I think I'll hold off on them for now. Weaving each washcloth takes about 90 minutes once I really get in the zone. Pretty slow moving for non-weft-faced plain weave. My 90” warp made 6 washcloths. I wove each to 10”, then did about 20 shots of plain weave between each washcloth for the hems. If there is a next time, I’d weave even more for the hems - it was a little tight sewing them up. More technical details are up on the Ravelry project page here. xx,
Pamela 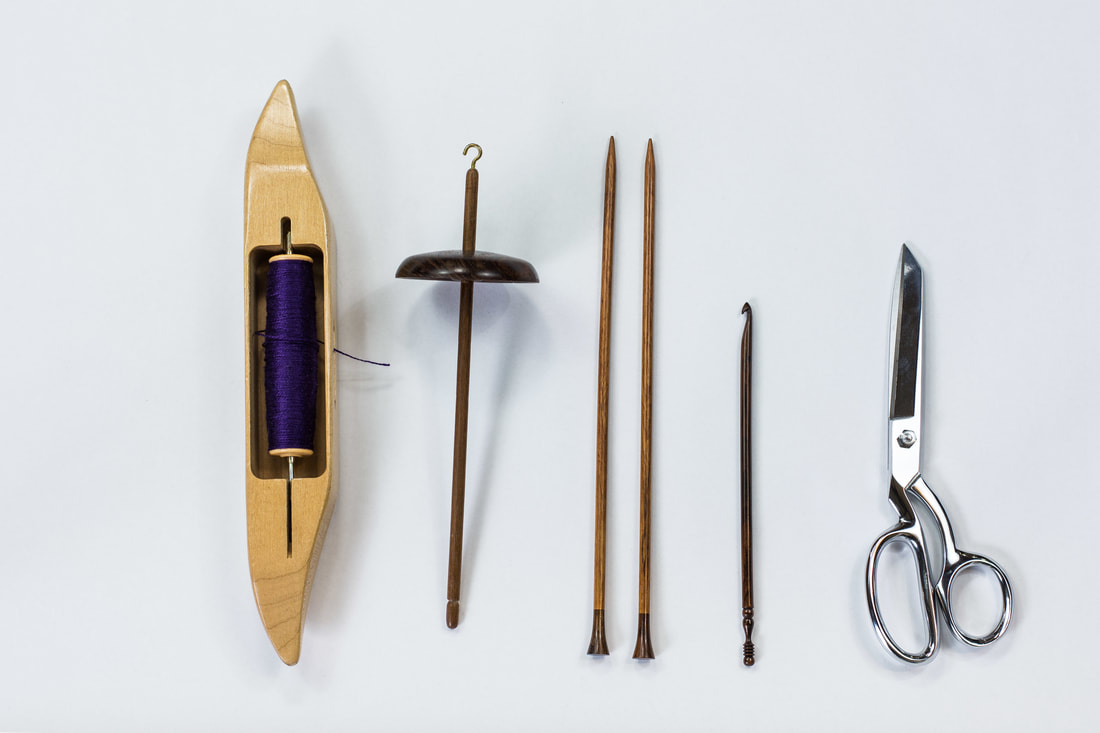 In an effort to get a handle on what it is I'm doing, I thought it'd be useful for me to review my WIPs/fiber pipeline here. Of course, once I took a look at all the WIPs I had going, I thought that maybe I had a little too much going on. But here goes: 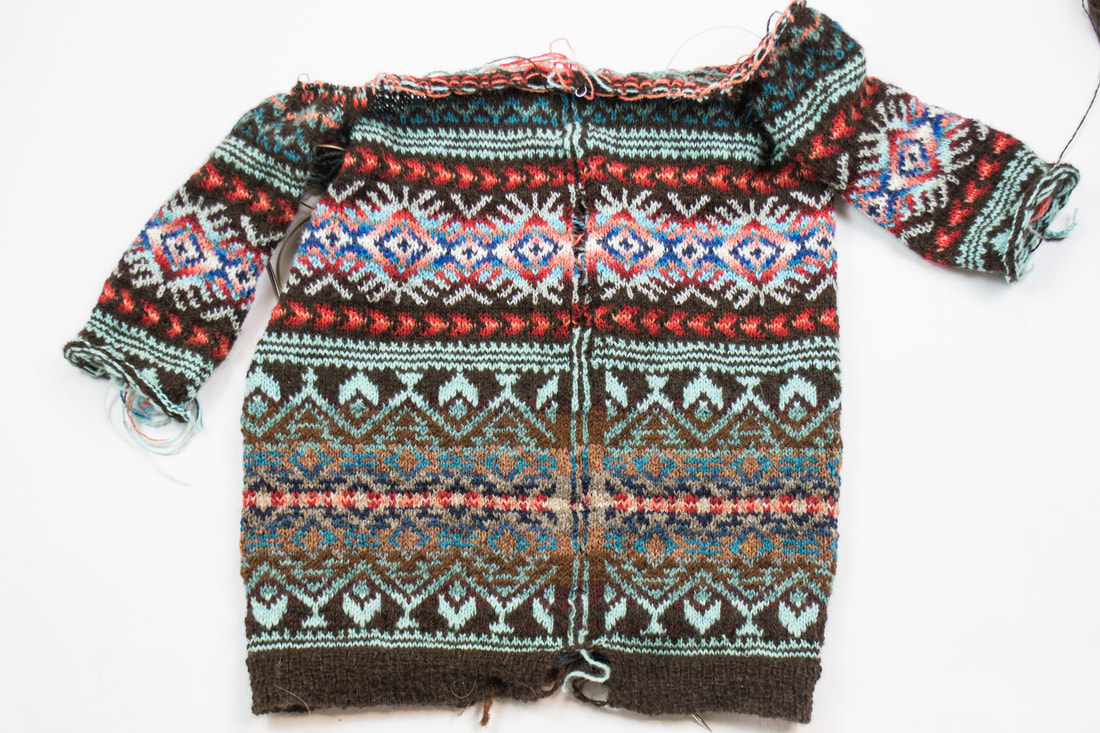 Knitting
Spinning
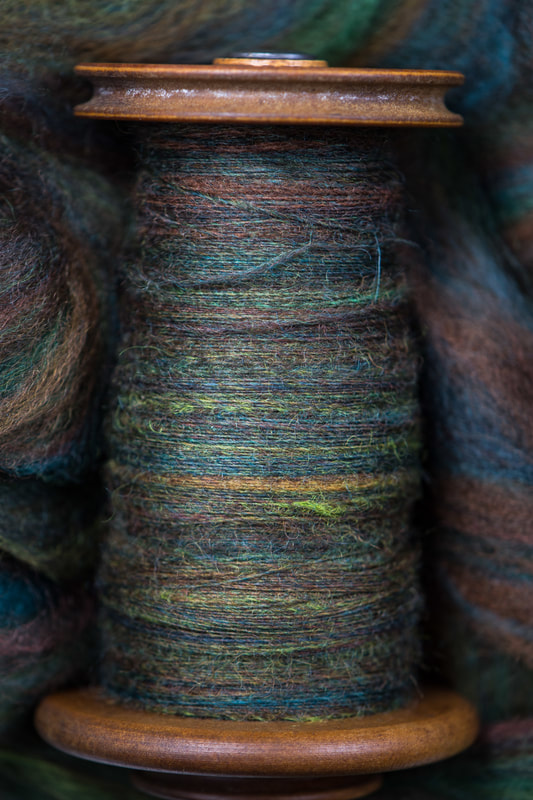
 Weaving
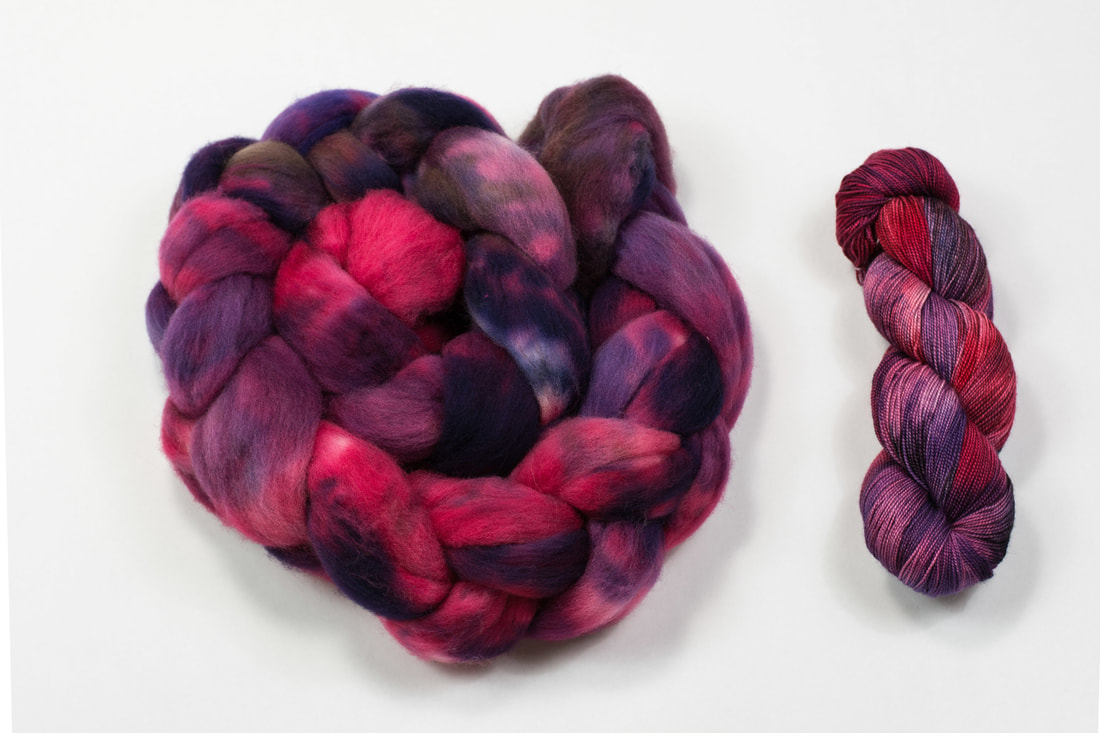 Hand-dyed spinning fiber and yarn in the same colorway. From thefibersprite Dyeing
 Sewing
Whew! That's quite a list, but I can promise you I'm not bored! What has been keeping your hands busy these days? xx,
Pamela |
Archives
January 2024
Categories
All
|
 RSS Feed