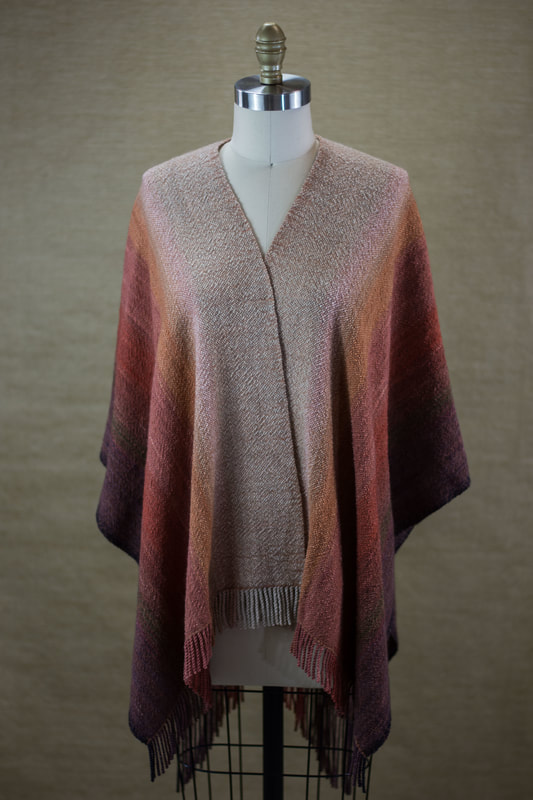
 I want to say that it's amazing when a project goes from idea to finished object with little to no effort. I mean, I guess it is amazing, and I'd love for it to happen all the time, but part of the process is all that effort. And we have to be open to changes to our ideas. This ruana started with a photograph last fall: 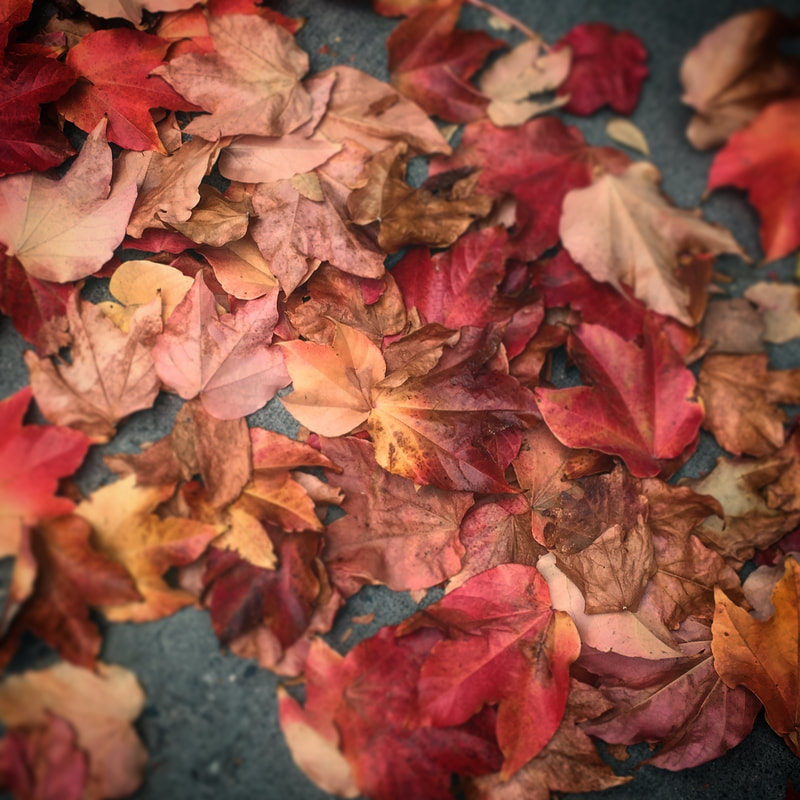 I'd been walking along, loving the fall colors, and looked down to see all these leaves at my feet. Originally, I'd thought these colors and shapes would make an excellent colorwork sweater. Then I started my stash sweater, with a very different concept, and this photograph has been sitting on my phone ever since. Sometime in mid-January, I had a lightbulb moment and realized I could dye all the colors I needed. You know, cause I sell my own hand-dyed yarn and all that. In retrospect, it seems obvious, but it was a lightbulb moment at the time. Anyways, I was a bit daunted by the sheer number of colors in this photograph - they're more or less analagous, but there are so many different shades. Which ones to choose? I launched a couple of different free online color palette generators, and picked my favorite set of colors. I like the generators that give you a bunch of colors, not just three to five. With a swatch printout of 15 colors, I circled my favorite 6. At this point, I was still thinking I was making a sweater, and I tried to get a range of values so there would be enough light/dark contrast to make the colorwork visible. I started guessing at dye recipes, aiming for a gold, a brown, and a red. For each recipe I used, I dyed at DOS (Depth of Shade) 2, 1, and .1. Then I evaluated the colors I wound up with - some were surprising to me in a wonderful way, and others made me wonder "what was I thinking?"* 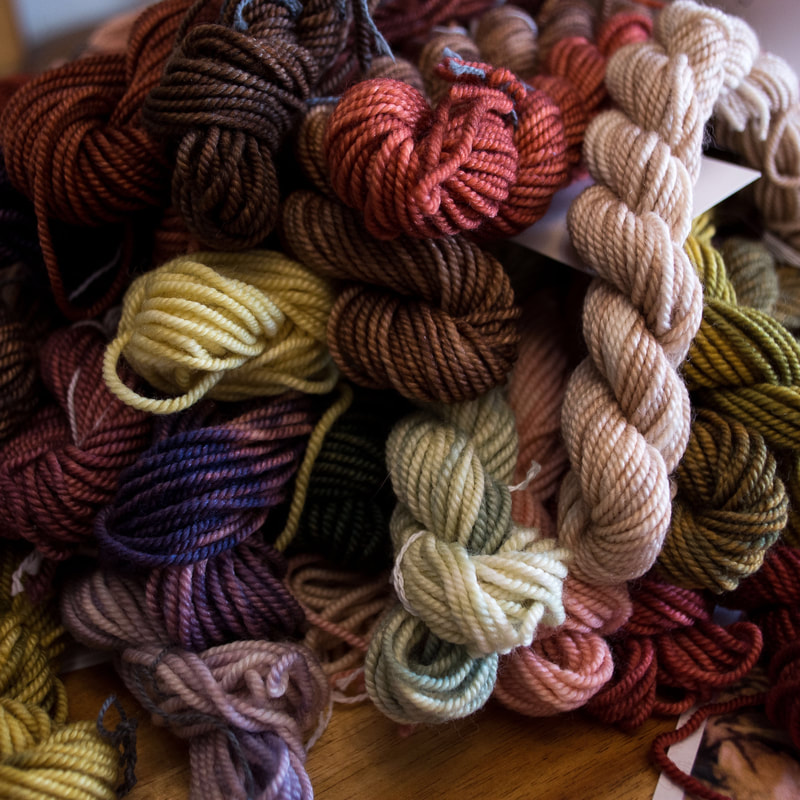 All of my samples were 10 grams - enough to get a good picture of the color, and a usable amount of yarn, but not a waste if I hated it. All were dyed with combinations of Greener Shades Blue, Flame Red, and Yellow. Each color has at least a little bit of each. My decision to do this was based on a natural dyer who told me that no plant dyes are one pure color - they all contain a little bit of all colors, which is why most natural dyes are harmonious with each other. Since my original inspiration was plants, I figured I might as well see what happened. Many dyers are obsessed with pure, bright colors these days, but I was trying to get a deep and nuanced color. As you can see above, my first round of dyeing didn't yield all reds, golds, and browns. Looking back at the dye recipes I used, it now seems obvious that green or purple would have been the result, but I had plenty of surprises coming out of the dyepot. 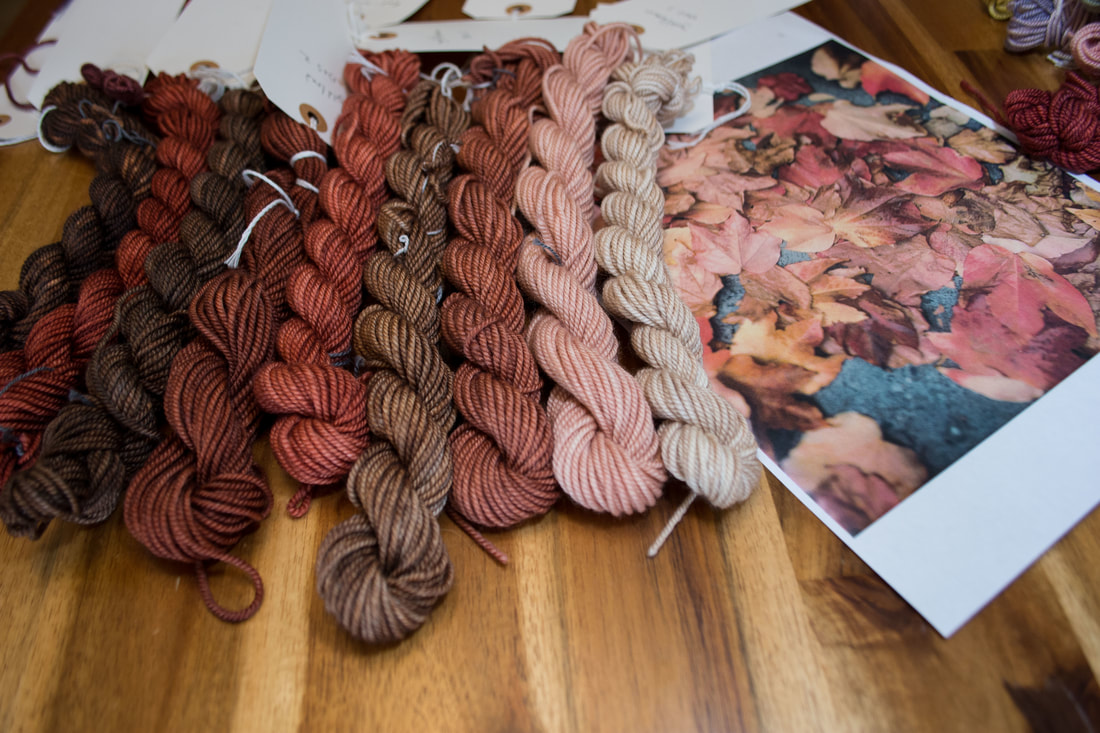 I pulled together the colors that were what I was aiming for, with a printout of the original photograph for reference, and decided that a gradient was the way to go. It was somewhere around here that I got the idea to weave a ruana, with the lightest colors at the center, and the darkest colors at the outside. With the shift from colorwork sweater to gradient weave, though, I felt there were some gaps in my color gradient, and set about to dye some more colors. In the end, I used 14 different colors for the warp. 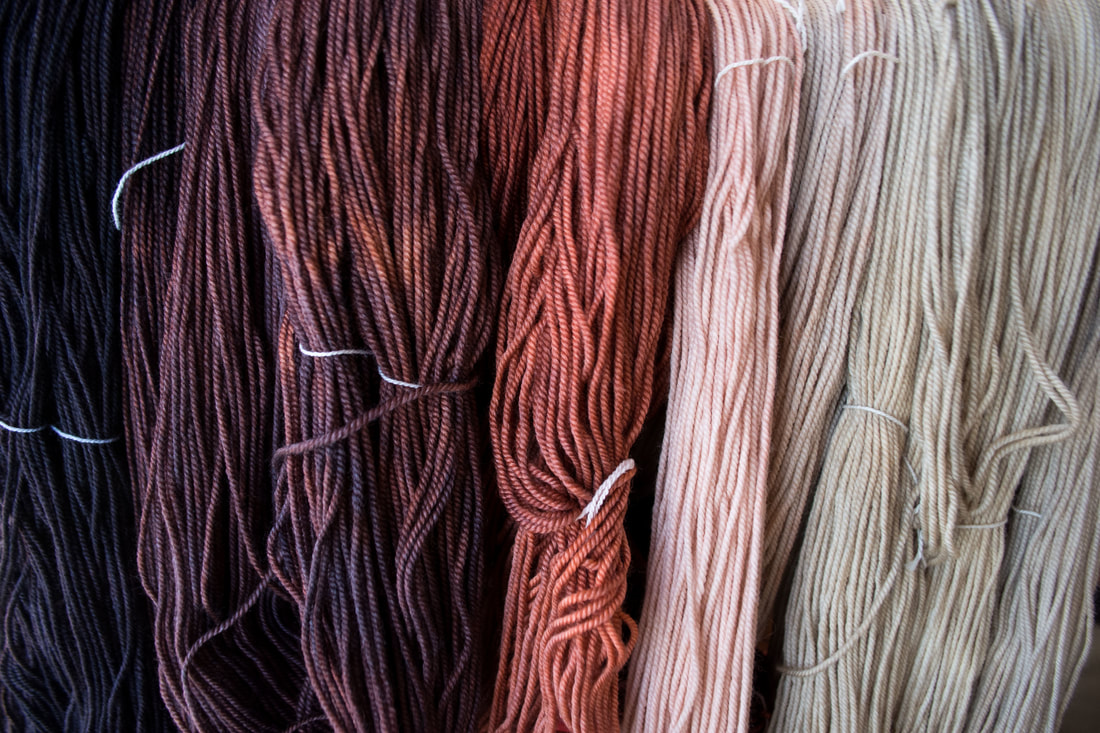 I also decided that there would be main colors and intermediate colors - not every stripe is the same width, and even among the dominant/supporting stripes, very few of them are the same width. I felt like this would bring an organic quality to the progression. I made a loose plan for how many warp ends each color would be, mostly so I wouldn't waste yarn during the dyeing process. Then I set about to warping my loom, and only loosely followed my warping plan. My original warp was 23.5" wide in my 24" wide table loom. I dyed my weft yarn (which is slightly thinner than the warp). The warp was sett at 12 ends per inch, and I wove the weft at 12 ends per inch as well. I wove off a sample piece of fabric and wet finished it to make sure everything was perfect. It wasn't. 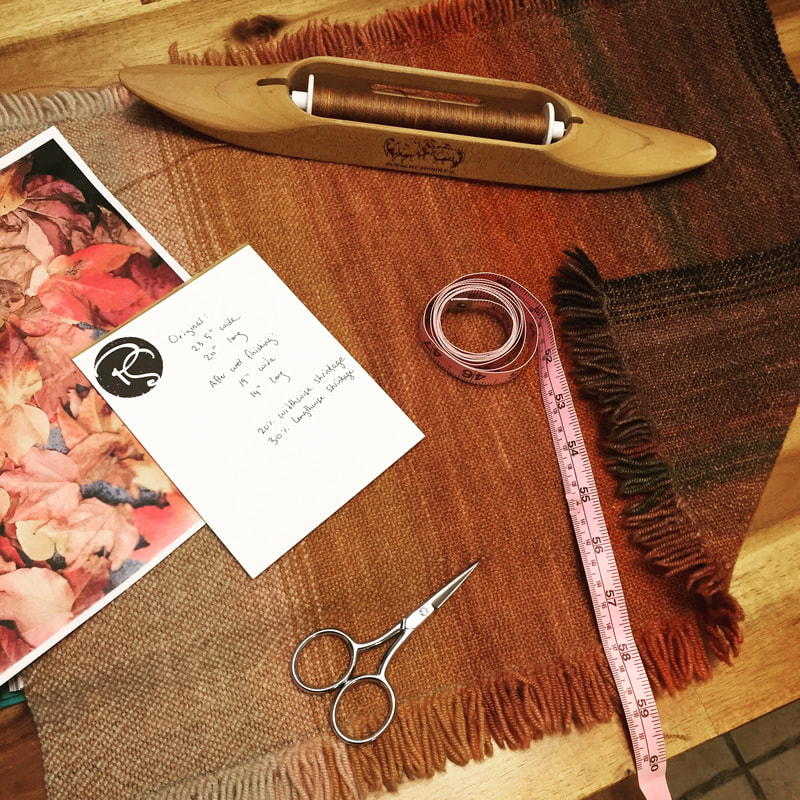 I mean, I loved the fabric. It did almost exactly what I thought it was going to do. But the colors...Can you see where the yellow/orange meets the beige? There's a pretty distinct stripe there. And at the far right, where the dark brown meets what looks like black. Everywhere else, the gradient fades in and out of itself. On the loom, it was harder to see. Off the loom, I felt like it stuck out like a sore thumb. I sat with this piece for a couple of weeks, knowing that I'd need to dye a few more colors to even out those spots. Plus, I was a little bit worried that the weft was too orange/yellow for my face. I asked at a guild meeting and got split responses, so I decided to ask my mother, who was conveniently in town. You know, for such a major design choice! Anyways, I dyed the in-between colors, and inserted them into the warp, which involved a little bit of surgery - my final warp ended up using the whole 24" reed, instead of just 23.5", and I had to move a bunch of the taupe warp ends over. But, it was definitely worth it to get an even color gradation. 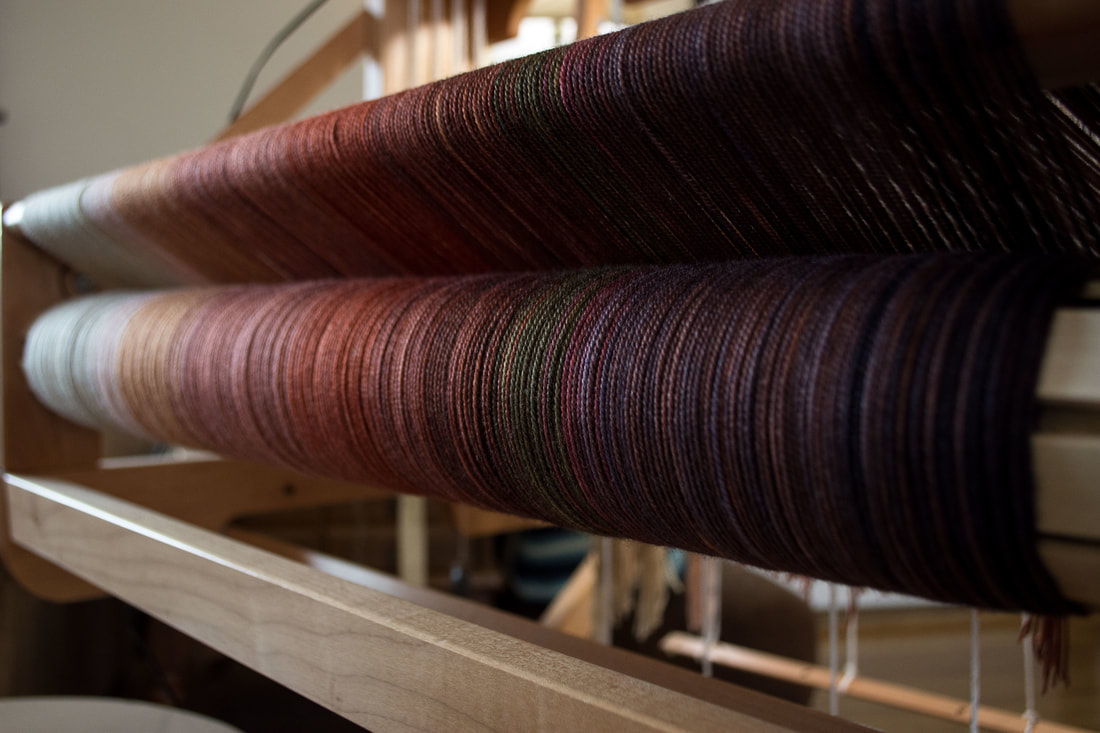 Then it was time to weave. Based on how long my original warp was (6 yards), the length of my sample, the shrinkage in wet finishing on my sample, and my estimate for waste, I was operating on a pretty tight margin. I played with the calculator (again and again and again) and decided that I would weave 70 inches, leave 10 inches unwoven for fringe, and then weave another 70 inches. Honestly, it was a bit of a nailbiter...As I finished weaving the first half, I thought I'd have plenty of yarn...and as I came to the end I worried I wouldn't have enough. As luck would have it, I had just enough. The last few inches were tricky, and I did end up switching to a damask shuttle to make my life easier, but there was enough left over that weaving the last few inches wasn't terrible, and not so much that I felt like I should have woven the piece longer. After hemstitching and cutting down from the loom, it was time to fix mistakes. There weren't that many, but there were a few, and I've learned that it's better to look for them early on in the game rather than after everything is wet-finished and the mistakes are harder to fix. 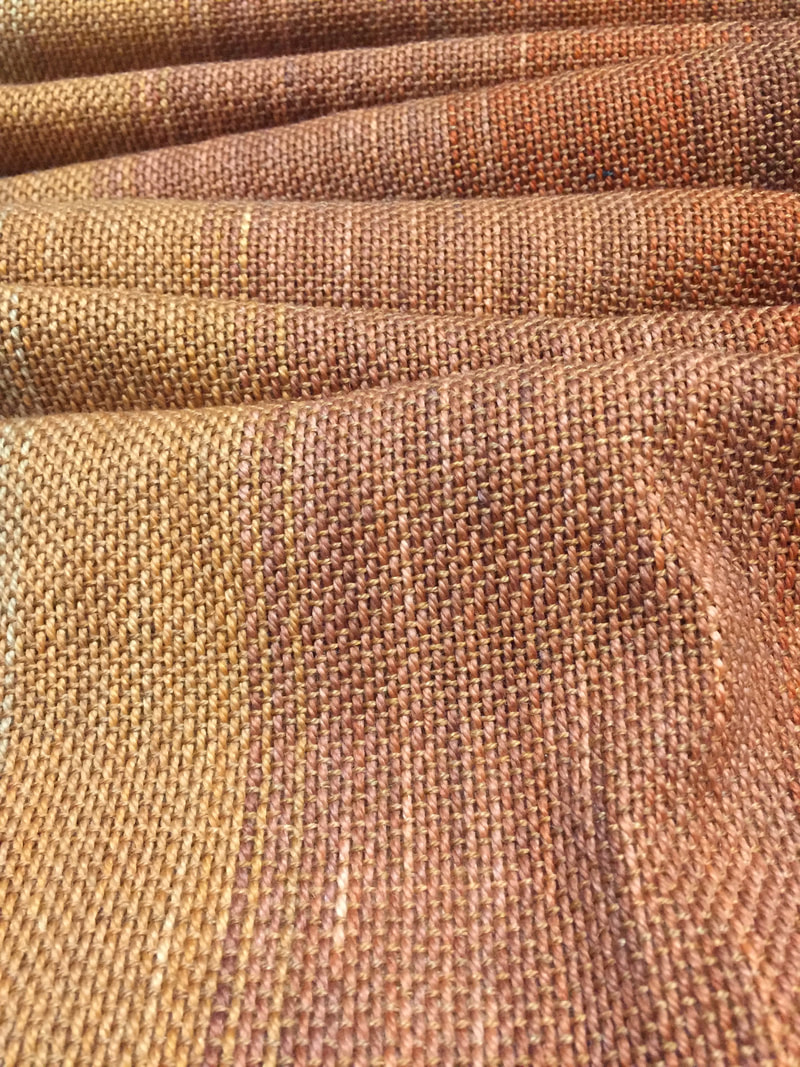 And after fixing the mistakes, it was time to seam down the back and twist fringe. I decided to make the fringe in the back longer than the fringe in the front. The fringe in the back was basically the waste yarn from tying on to the front and back apron rods, and the fringe in the front was the unwoven gap between each piece. Anyways, to decide where the seam should end, I folded the pieces in half, with the edges of the fringe matching up to each other, instead of the edges of the cloth. Then, I started the seam about an inch below where it would end, seamed up to the end, and then worked my way back down. That way, the part at the neck opening had a reinforcement that will hopefully protect it from wear and tear. Twisting fringe was an epic odyssey that felt like it was going to last forever. (In reality, about 5-6 hours.) But once that was done, it was time for wet finishing. I put the ruana in a tub of warm water with a color catcher while I went off to my Tai Chi class. When I came back home, I toyed with the idea of wet-finishing entirely by hand, but the weight of the thing was intimidating to me. I swished it through some hot water again with some woolwash, then threw it in the dryer for about 20 minutes with a dry towel. After 20 minutes, it needed about 5 more minutes until it was the size and texture I was expecting. Once I took it out of the dryer, I gave it a bit of a press with my iron, set to wool/silk with no steam, to get some of the extra moisture out. I let it sit overnight to dry fully, and then trimmed the edges of the fringe. 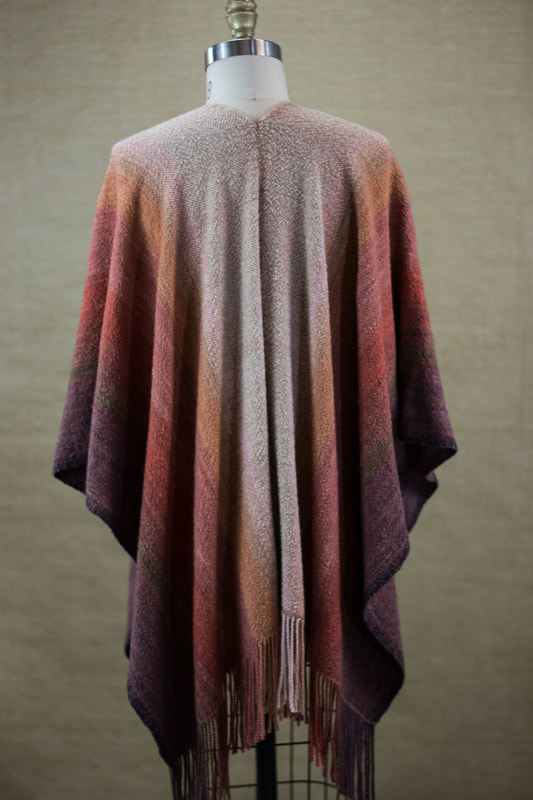 I'm super pleased with the result...and I think there might be a few more ruanas in my future. It would be easy to say that this piece practically made itself, but that wouldn't be true. There were lots of design choices and little hiccups along the way. What matters is that the whole process was enjoyable and that I have a finished product that I know I'll enjoy. Happy making. xx, Pamela *I've since found a much better way to figure out a starting point for dye recipes. Alanna Wilcox describes it all here.
Comments are closed.
|
Archives
January 2024
Categories
All
|
 RSS Feed