|
Last fall, we moved across the country and into a new house. This was a huge shakeup! One of the things I needed was a new laundry basket to fit a dark and awkward corner in our bathroom. The Starting Point - A "Sad Greige" Laundry BasketI ended up buying this laundry basket at Target. The size was just right, but the gray fabric just made me sad. Right now gray walls are everywhere, but we decided to paint the house in more cheerful colors - peach, turquoise, and a very pale pink. So gray just wouldn't do. Luckily, I'm a weaver! I set out to weave a fabric that would go with our new color scheme, and brighten up that dark corner in the bathroom. 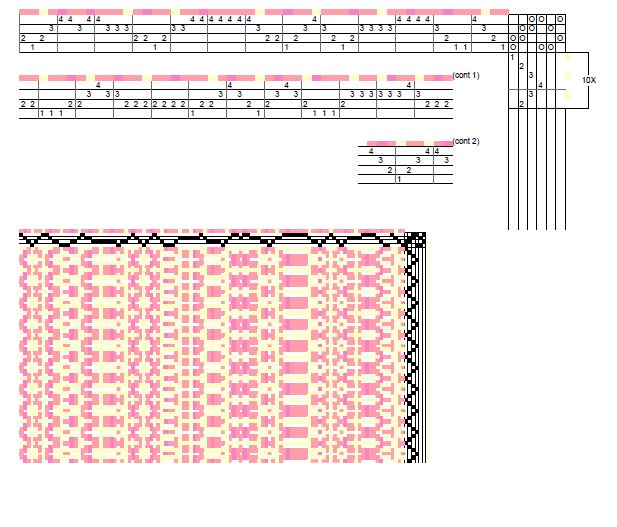 Designing a WarpAround 2020, I started including secret messages in some of my warps. It's a fun way to create texture & randomness without having to think too hard about what I'm doing. Usually I do this in a plain weave, but this time I decided to put the weave into a sort of point twill structure to see what happens. Let me know if you figure out the code! ;)  Planning the Warp ColorsFor this warp, I chose to use mostly 8/2 cotton and cottolin. While I knew I wanted the fabric to read as a peachy color, none of the 8/2 yarns I use have that color. And, since I don't have a dye space set up anymore, dyeing wasn't a great option. By warping a combination of pinks, oranges, and yellows, I got a warp that was close. I knew I wanted texture, so I added in a cotton blend knitting yarn that was my target color. This helped tie everything together. When designing warps like this, I start with the yarn that I have the least of. In this case, it was the knitting yarn. I'll wind as much of that yarn on the warping board as I can, note the number of ends, then go on to the next color. When I have equal amounts of multiple colors, then I sometimes hold those together. (Peggy Osterkamp has some great instructions for winding multiple ends here!) Then I have lots of warp chains to work with. Approximating what this will look like in my weaving software is a challenge. I go for "close enough" with this kind of random warp. 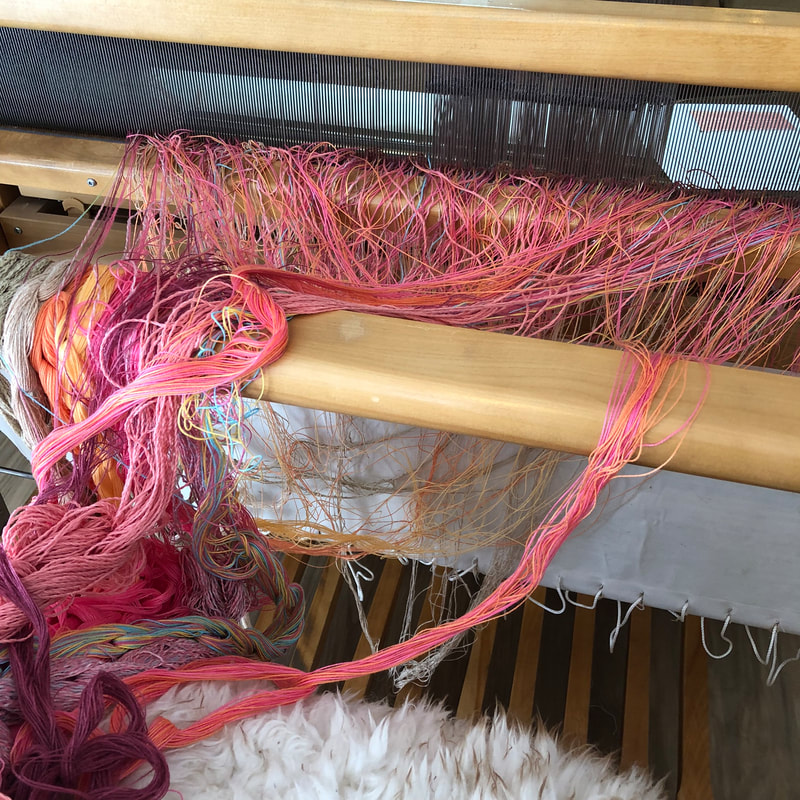 Designing in the Reed & WarpingThe next step is warping. With a mixed warp like this, I like to spread the colors evenly across the warp. The process for this is called designing in the reed. While it looks like a tangled mess, it's actually pretty easy to manage. Each warp chain exists in its own layer, and these all get straightened out as I wind the warp on. There's a lot of debate among weavers about whether to warp a loom from front to back (like I'm doing here) or from back to front. I do both! On this loom, I find warping front-to-back a lot easier. When I'm working with limited quantities of a certain color, like in a mixed warp, front-to-back also just makes a lot of sense to me. Once all the yarns are in the reed, I can fold up the back beam and sit on a short stool to thread the heddles. This is one of the reasons I like to warp front-to-back on this loom - it's easier on my posture! Usually when I'm threading the heddles, I start on one side of the warp and work my way to the other side. But this time, I started in the middle and worked my way out. I'm not really sure why! It gets pretty dark under my loom, so I use this adjustable lamp to shine light where I need it. 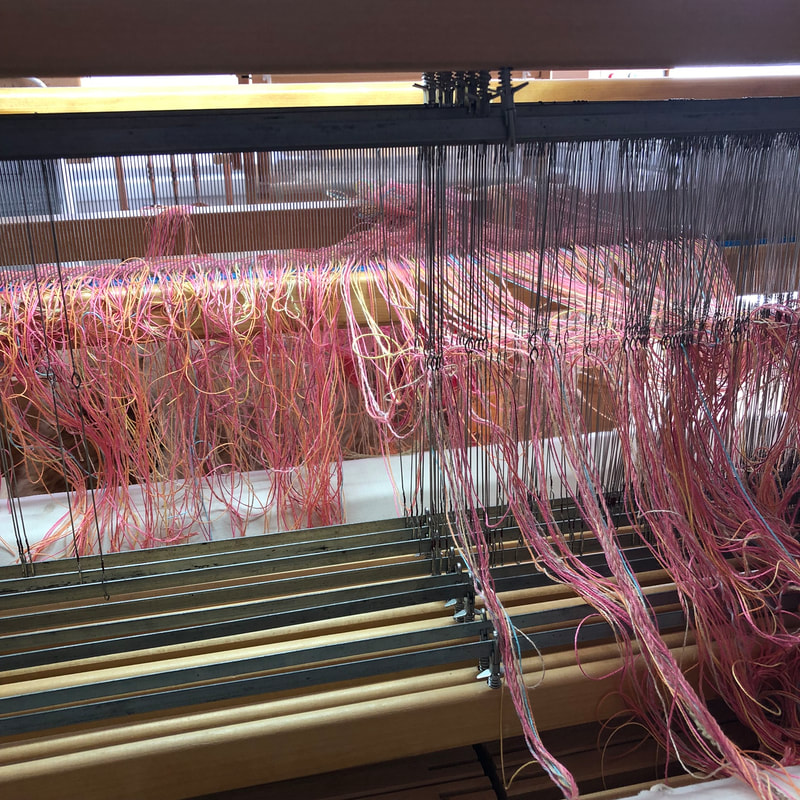 Weft SelectionI spent a lot of time in WeaveIt playing with possible weft colors. Then I went to the loom, where I often find I'm surprised by other factors that are harder to predict in the software, such as yarn texture, thickness, and sett. In the end, I chose to alternate a buttery yellow linen and a slubby white cotton. The goal with the white was to add texture, and the goal with the yellow was to keep the white from completely washing out the warp. 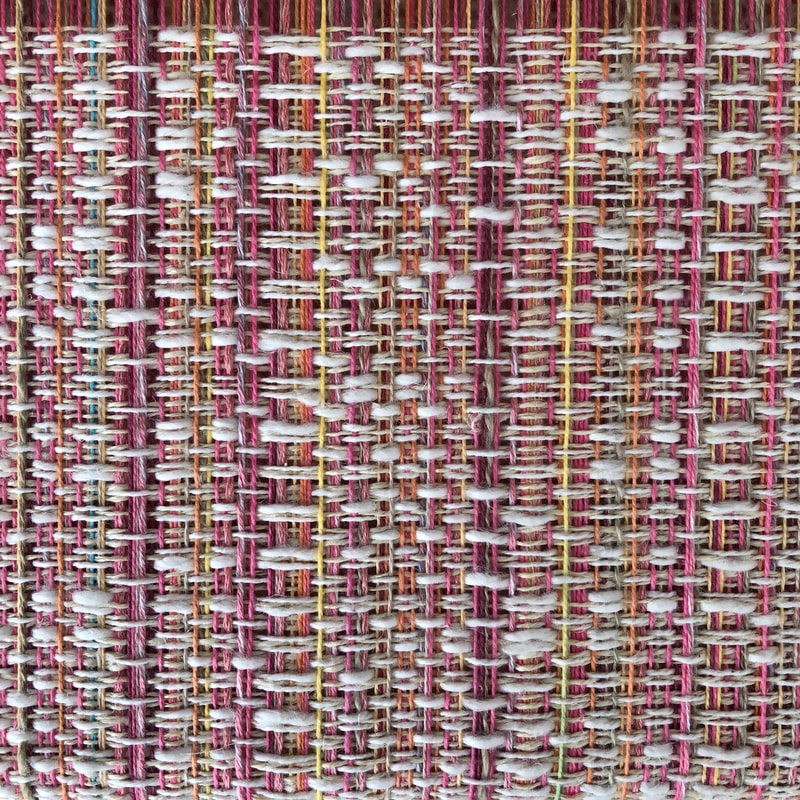 Spot the Error!I chose to treadle in a point-twill fashion. Only, the design didn't emerge as a point twill. Can you see why? The answer is that one of my tie-ups is wrong. Instead of being in a twill, one of the treadles was set up to do plain weave. I noticed the error about a half a yard in. I didn't have much play in the yardage, and didn't want to cut out that much weft, so I decided to stick with it until the end. I do think that the mistake helped prevent some draw-in on the loom, and also contributed to the final texture of the cloth due to the differential shrinkage of plain weave and twill during washing. In all honesty, I didn't love the fabric on the loom. But I was confident that it would work with my plan for the laundry basket, so I pressed on. Change Your Tie-Up, Change Your LifeAt the very end of the warp, I did play with other colors. I settled on a dark burgundy cashmere/wool weft. The yarn was laceweight, so I held 4 strands of it to get the right thickness. And I fixed the tie-up error to see what the cloth would really look like. Just looking at the fabrics, I do like this fabric better than the main fabric that I wove for the laundry basket. But the laundry basket fabric works better in the space! 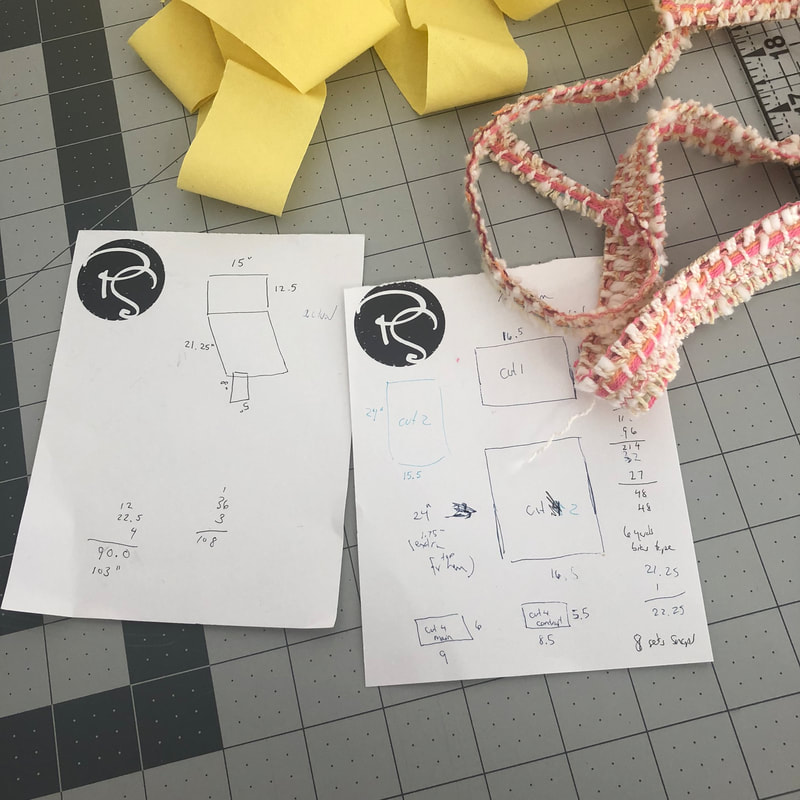 Sewing the Laundry Hamper BagUsing the measurements of the original bag, I made a new one. No pattern, just hacking together rectangles and keeping seam allowances in mind. Initially, I made all the sides the same size, forgetting I was working with a rectangle instead of a square. Luckily, I'd used the long edge of the rectangle for all my pieces, so just needed to cut down two of the large panels to be a little narrower. I used a yellow broadcloth as a contrasting fabric for the base and interior trim. As I often do with handwoven fabric, I ran zig-zag stitching inside the seam allowance on all raw edges. This was especially important for the laundry bag, since it has to hold the weight of our clothes! If you have a serger or overlocker, this would be a great place to use it. I did notice some gapping at the top edge of the bag when I put it back on the frame. This is probably due to the placement of the straps that hold it back on the frame. I solved this with a simple pleat on the sides. And with that, the laundry basket is done! I'm pleased with the result! Despite my doubts about the fabric, it fits well in the little corner between the sink and shower. I think the bath mat might be up next for a makeover ;)  |
Archives
January 2024
Categories
All
|
 RSS Feed