 My handspun sweater is at that stage of doneness where it is wearable as a garment, but still needs a few finishing touches – sewing up those faux seams, adding some handwoven ribbon to keep the steeked edges covered, and there might still be a couple of ends that need weaving in. But we managed to get out to the park for a walk in the sunshine, and it was the perfect layer for a spring-like day (in January!). Last week I filmed myself cutting the steek down the center front. Traditionally, steeks are cut in colorwork – a way to speed up the knitting, since colorwork is easier done in the round than worked flat. Really though, you can use a steek just about anywhere – as long as you’re using a yarn that’s not too slippery. Knitting the sweater in the round and then steeking it let me accomplish a couple of things. First, I was using handspun, which has more variety in thickness and color from skein to skein than commercial yarn. Knitting the sweater in the round meant that it would be visually even – no need to try to juggle matching left front to right front. Second, it meant I could knit a stockinette sweater with very little purling. Actually I did purl – the center front has one purl stitch, and each side has a purl stitch where the seam will be. The purl in the center front made for an easy visual for where to steek, and the side purls are there for a faux seam and to add a little bit of structure. But that’s it! Steeking intimidates a lot of people because it seems so dangerous! Won’t the knitting unravel? Interestingly, knit stitches don’t really want to unravel in the direction a steek is normally cut, which helps soothe most people’s fears. When you cut a steek, there are a couple of different ways to reinforce it to keep all your hard work from unraveling. The two main techniques I’ve seen are using a sewing machine and crocheted reinforcement. Using a Sewing Machine to Reinforce a Steek The idea is simple: sew a couple of rows of stitches just outside the cut. The machine-sewn stitches are strong and disappear into the fabric. You do have to be careful not to stretch the knitting as it goes through the sewing machine, or else risk a “ruffly” edge, but this technique is great for yarns that might not traditionally be steeked, like cotton or acrylic. You can find a bunch of great tips about machine sewn steeks here. Reinforcing a Steek With Crochet Stitches This technique uses two columns of crocheted stitches just outside the column of stitches to be cut. The crocheted stitches pull away from each other, leaving you a clear cutting path. Once cut, they roll under whatever edging you add, giving you a nice edge. This is my go-to tutorial for the crocheted method. This second technique is the one I used for my sweater, partially because I like it, and partially because I didn’t want to haul out the sewing machine. Then it was just snip, snip, snip, and I had a cardigan instead of a pullover. I’ve heard a lot over on Instagram about how daunting steeks can seem, but they’re really useful in a lot of situations. Maybe I’m a little obsessed, but I think every knitter should try steeking at least once! Do you have any experience with steeking? I’d love to hear about it – or any questions you might have about the process. I’m all ears! xx,
Pamela 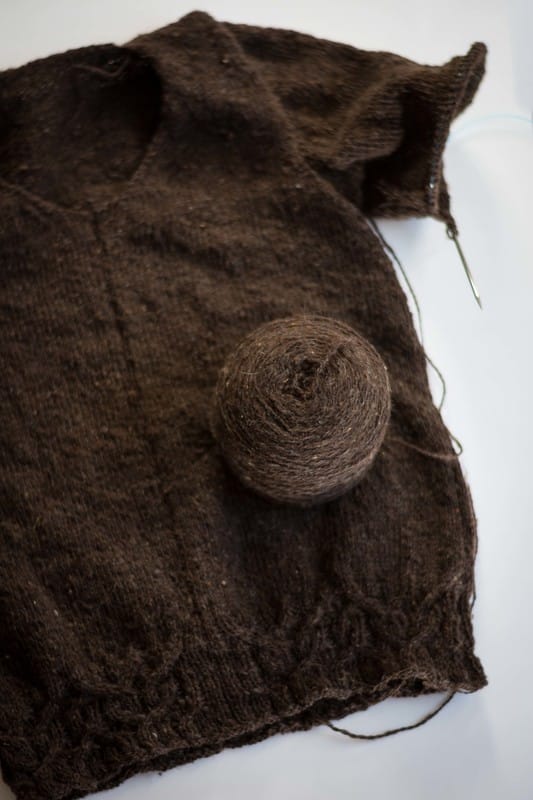 Ever since I saw it, I wanted a cardigan like Velvet Morning. It checks all the boxes for me - gorgeous, cozy-looking, simple but with lovely colorwork details, and of course, it's a cardigan, which is my favorite kind of sweater. I'd make a few changes though. I'd knit it in a lighter weight yarn, since I don't live in Canada like the pattern designer. I'd give it some V-neck shaping, because that's my neckline of choice, and I'd knit it in the round and steek it instead of knitting it flat and seaming it. Oh, and I'd make my own colorwork patterns inspired by my travels. Basically, I'd design a whole new sweater with Velvet Morning as the inspiration. This is not that sweater. I meant for it to be, and then all of a sudden I had sailed right past the place where the colorwork needed to start. And being the type of person who would rather plow ahead instead of rip back, plow ahead is what I did. 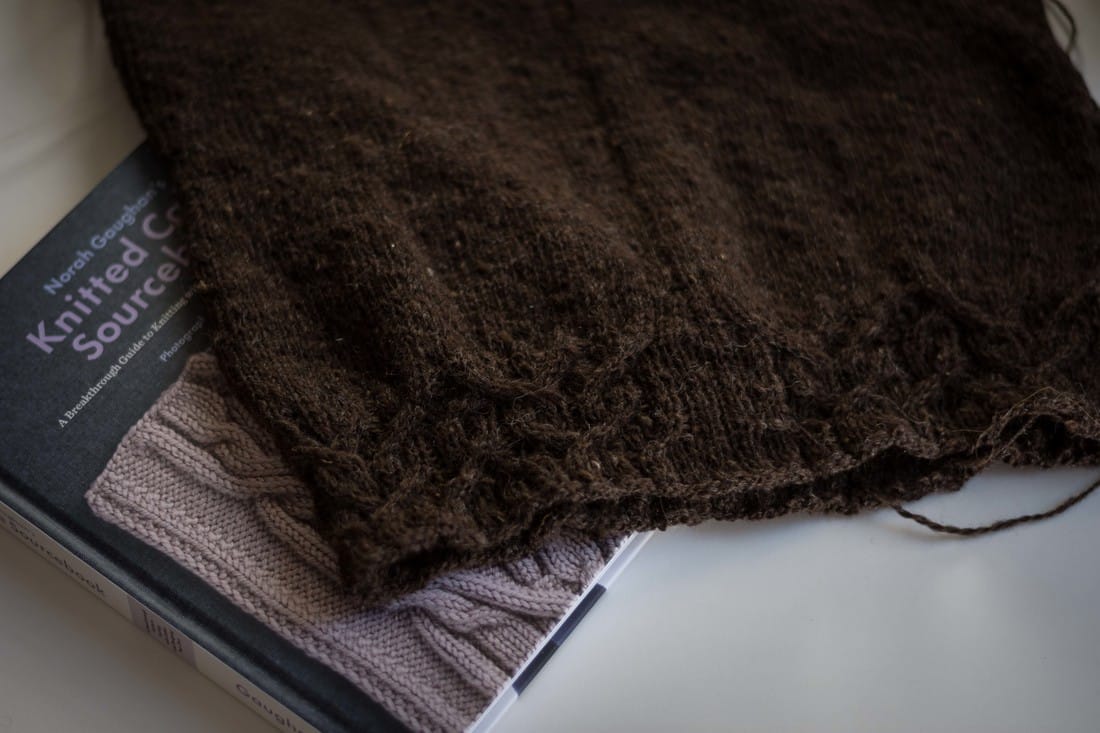 As I knit the body, I was a little sad that I was making "another boring sweater" and wondered how I could spice it up. When I got to the ribbing, I had the bright idea to try cables. The classic cables were still too boring for my taste, so I pulled out the new Knitted Cable Sourcebook by Norah Gaughan. I ended up with cable pattern #112 "Fusion," which fit neatly into my stitch count and is based on a 2/2 rib. I'm hoping those ripples between the body and the ribbing block out - I do think they will, since the swatch stretched pretty considerably after I washed it. Knitting the cables in dark brown wasn't quite as difficult as I thought it might be, and I'm happy that I'll have a subtle bit of texture on this sweater after all. xx, Pamela p.s. -- My Velvet Morning-inspired sweater is totally still in the queue!
Since it's Halloween, I thought I'd share something lots of knitters find scary - cutting a hole in your knitting. On purpose. It doesn't have to be scary, though, and that's why I created a video to walk you through the whole process. Enjoy! xx,
Pamela 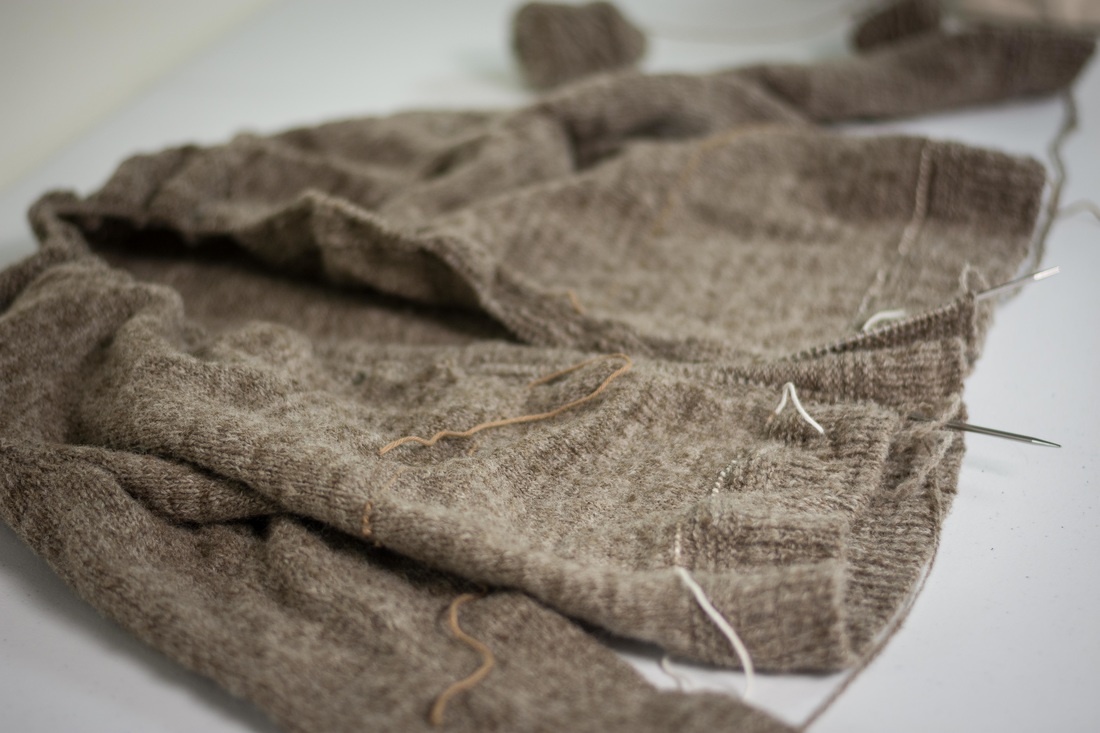 So I know I said No New Clothes for this Slow Fashion October, but I wrote into my own personal manifesto an exception for this sweater, which I started around this time last year. I worked on it steadily throughout the winter until last January, when it went into hibernation. The problem was the sleeves. They made the weirdest shape on my shoulders, and were just a little bit too long. And I didn't quite have the heart to take them out. I made a couple of attempts, but always got distracted by something else. I even took the project along on my RV trip this summer, hoping the road would be the perfect place to re-motivate myself. But it wasn't until now that I've really started to work on it again in earnest. Re-knitting the sleeves wasn't so bad once I got going, and while I was at it, I shortened the sleeves just a bit. They still make a pucker at the top of the shoulder, but it's not as bad as it was. I'm thinking there might be just a tad too much fabric in the armhole itself, and I've decided it's a flaw I can live with. (It's the kind of thing only I will ever notice, anyways.) Next, I picked up stitches for the neck/buttonband. The plan is to make a shawl collar. Since the sweater has v-neck shaping, the buttons will only go down the bottom 2/3 of the sweater. 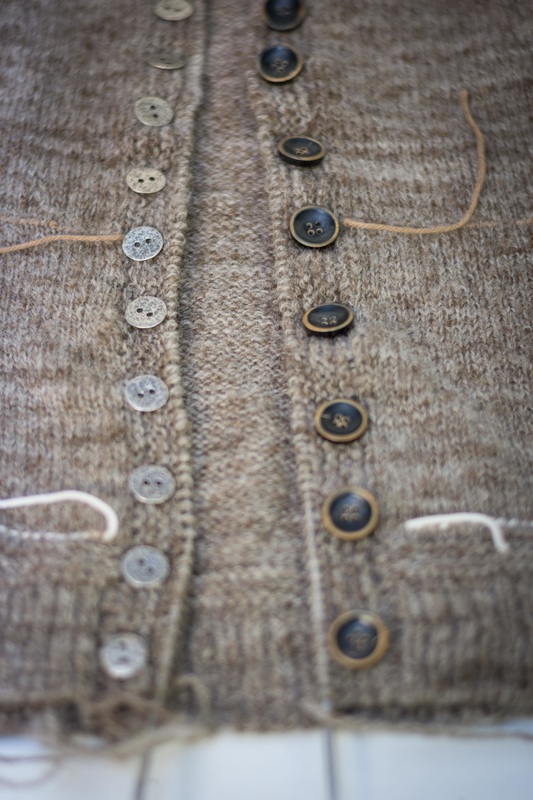 I love both these sets of buttons, but ultimately I decided to go with the darker ones. Unfortunately, I'd knit a little too far on the band when I picked out the buttons, and had to rip back. Which is okay, because I also realized that I'd picked up too many stitches for the band and it was looking ruffly. What can I say? One of the drawbacks of seat-of-your-pants sweater design is that things don't always work perfectly the first time around. A note on the yarn: The yarn is corriedale, handspun by me in to a woolen-type yarn. I spun about a pound of wool for this sweater, and it looks like I'll use most of it. More details on the yarn here. A note on the sweater pattern: I designed the pattern using a combination of Elizabeth Zimmerman's percentage system (aka EPS), measurements from other garments I liked, and Knitting Pattern Essentials. The original inspiration was a grandpa sweater worn by one of my old coworkers. xx,
Pamela 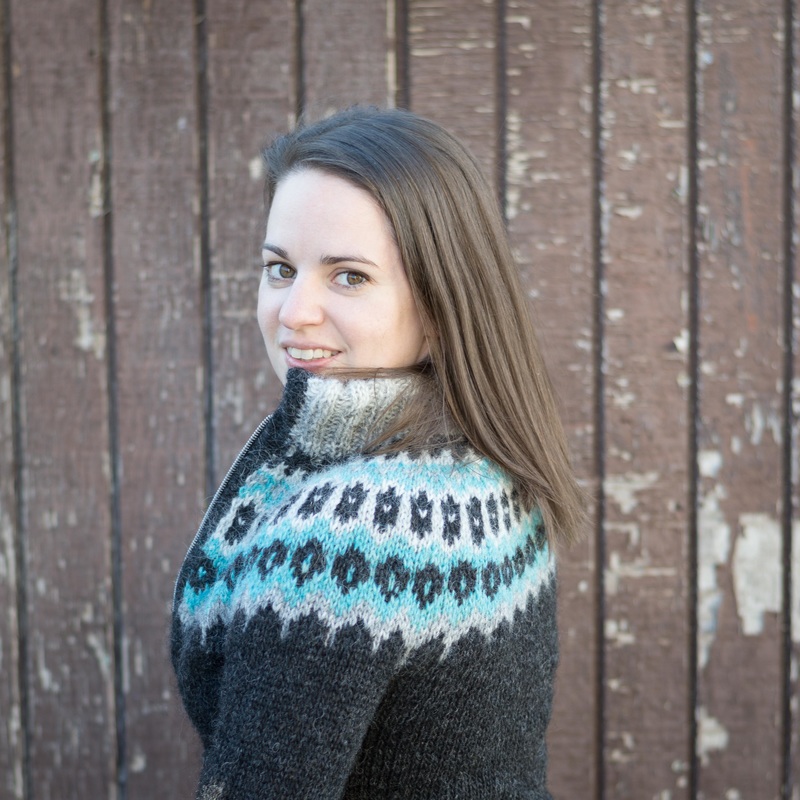 After weeks of stubbornly refusing to do the finishing touches on my #bangoutasweater, I’m proud to say that it’s finished! The problem for me was how to deal with the steeks. I knitted on a band and was trying to sew down live stitches to the wrong side of the fabric, like a steek taco instead of a steek sandwich. But that meant I had to sew the live stitch down to exactly the right corresponding stitch – on black yarn. It was tedious work –difficult to see and difficult to get right because … black yarn. Once I finally got my act together, I knew what I had to do – unpick what I’d already sewn down, knit another row or two, and bind off. Now I had flaps, and just pinned them down so they encased the steek edges. The beauty of knitting is that it’s pretty forgiving, so this time I didn’t have to go stitch by stitch to get it perfectly right – I could just whipstitch the bands into place, and this time it looked much more even. 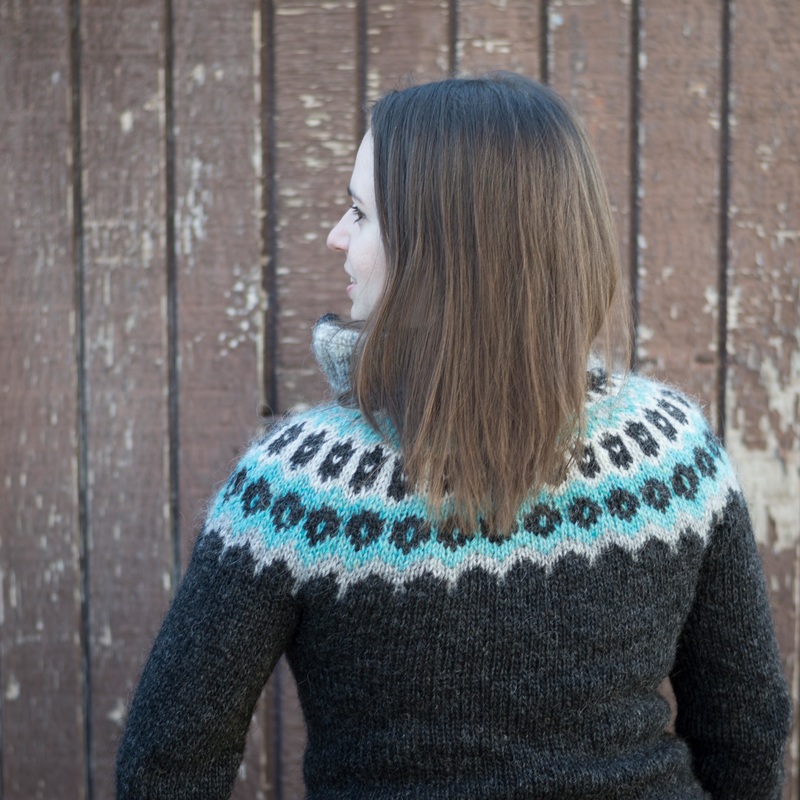 Then it went for a wash and just needed a zipper. Last time I used this tutorial, but this time I found Purl Soho’s gave me exactly what I wanted with a minimum of fuss. I find that the simpler something a technique is, the more likely I am to actually do it. Purl Soho's tutorial fit the bill. And then I got to wear it. I love, love, love the zipper, and the neckline behaves just the way I wanted to – pulling away from my neck without flopping against it in the way that drives me crazy. One of the things that has kept me from knitting a sweater at this gauge is a concern about it being too warm – but it’s not. This yarn is so lightweight that the sweater weighs practically nothing and is as light and airy and just as warm as I want it to be without being too hot. Much has been made about whether or not Lopi yarn is itchy. This wool isn’t soft like Merino, but it’s not really itchy either. Most of the itch in the unwashed yarn seemed to come from vegetable matter that was easy to pick out while I was knitting it. After I washed it, it softened up quite a bit. Some people like to use hair conditioner to soften it even more, but I just used Eucalan. I found that there was a bit of a prickle when I first but the sweater on, but that soon disappeared into a light cloud of warmth. Now I’m drooling over all the different colors of lopi yarn and planning half a dozen sweaters from this yarn. Don’t worry, I’m doing everything I can to hold myself back. Besides, I’ve still got the Anna vest to knit. xx,
Pamela |
Archives
January 2024
Categories
All
|
 RSS Feed